Course navigation
Input Components
Step 1
Take the sketch of the user interface (UI) you designed and turn it into a real app!
It says “Screen 1” at the top of your screen. Go to the Properties pane and change the Title to the name of your quiz.
Step 2
Go to the Media pane (underneath Components) and upload your digital media:
- App background image
- Three question images
Step 3
Drag and drop the following Components onto the Viewer:
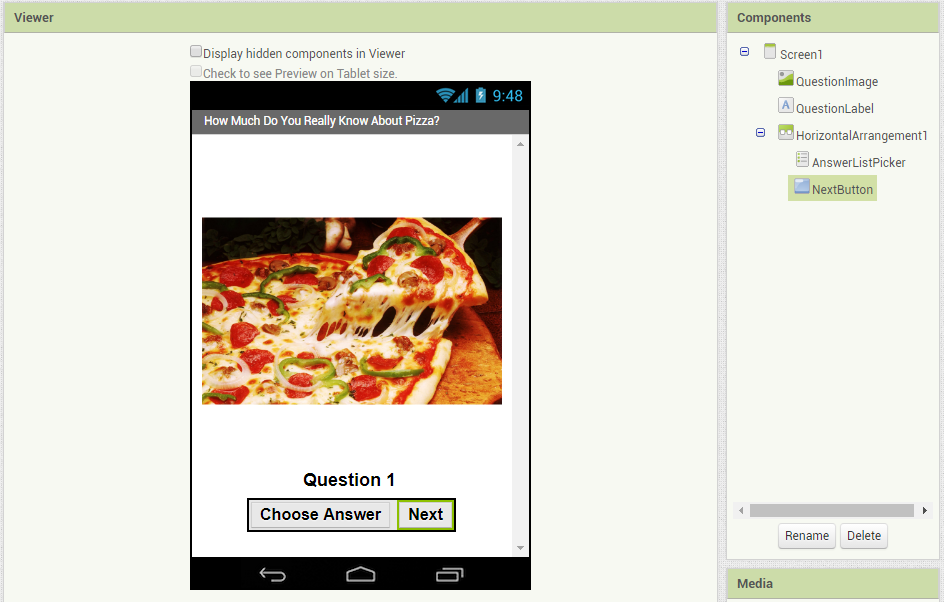
- Image component renamed as “QuestionImage”, set Height and Width to 300 x 300 pixels, set Picture to image1 (picture for Question1)
- Label component renamed as “QuestionLabel”, set Text to “Question 1”
These can be renamed in the Components pane. Renaming components makes programming them easier later.
Step 4
Drag and drop a HorizontalArrangement into the Viewer and place the following Components inside:
- ListPicker component renamed as “AnswerListPicker”, set Text to “Choose Answer” and uncheck the Enabled box
- Button component renamed as “NextButton”, set Text to “Next”
As you add these components, change the Properties according to your design. The Viewer and Components pane will look like this:

Step 5
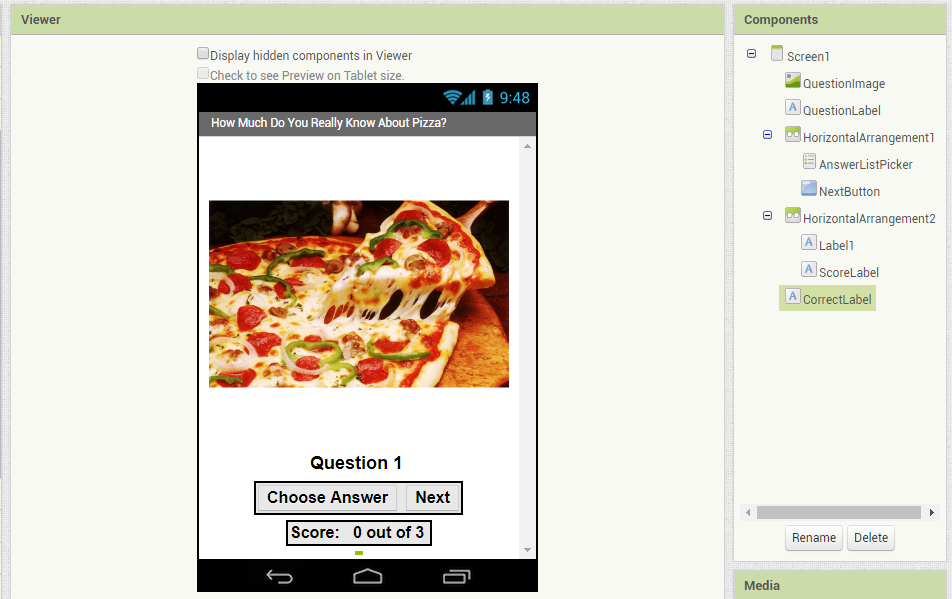
Drag and drop a second HorizontalArrangement into the Viewer and place the following Components inside:
- Label component named as “Label1”, set Text to “Score:”
- Label component renamed as “ScoreLabel”, set Text to “0 out of 3”
Step 6
Drag and drop this final Component onto the Viewer:
- Label component placed at the bottom of the screen, renamed “CorrectLabel”, set Text to blank (This label will remain hidden for now)
As you add these components, change the Properties according to your design. The Viewer and Components pane will look like this:
