Course navigation
Build Up the User Interface
Step 1
Add some basic functions to your Doodle app.
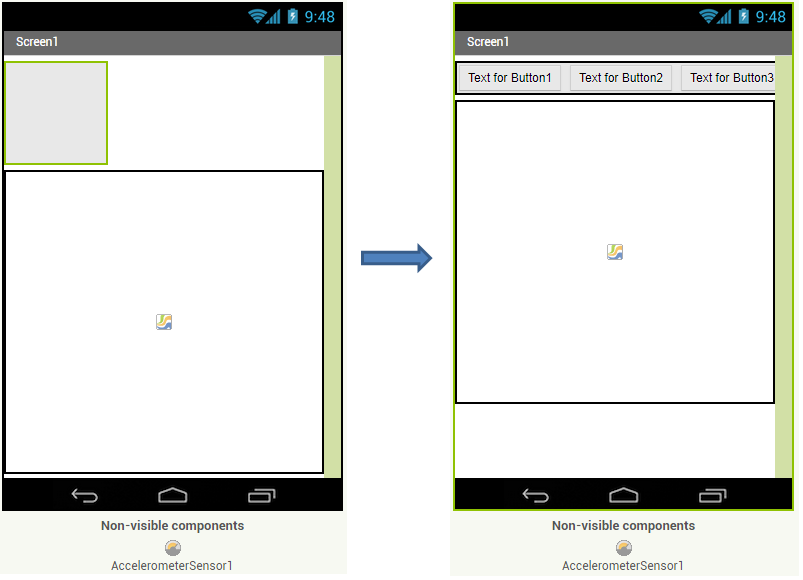
Create a row of colour buttons in the user interface (UI). To do this, go to the Layout palette and drag out a HorizontalArrangement component. Place it above the canvas.
Drag three Button components onto the Viewer and place them inside the HorizontalArrangement1 component. A blue highlight will appear as you hover the Button component over the Viewer to guide you. The buttons will go side-by-side across the screen.

Step 3
As your UI becomes more complex, you need to rename the components, rather than using the default names. This will help you program them later.
- Go to the Components pane
- Click on Button1
- Click on Rename
- Change the name to “RedButton”
Change Button2 to “BlueButton” and Button3 to “GreenButton”.
Step 4
Design how the buttons look.
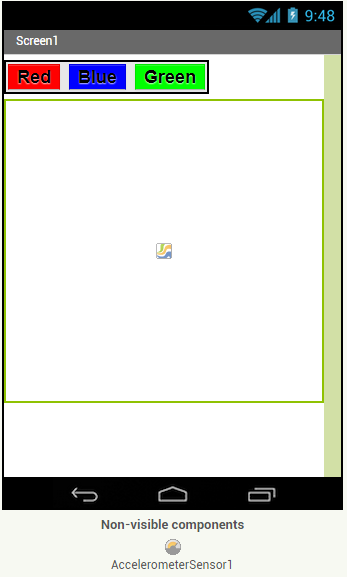
Select a button by clicking on it in the Viewer and create a design for each one. Go to the Properties pane and change the BackgroundColor and Text for all three buttons. You can also change other properties, like FontBold, FontSize and Shape. Check how the design looks on the phone screen.

Step 5
Create a second row of buttons in the UI. These will change the brush thickness.
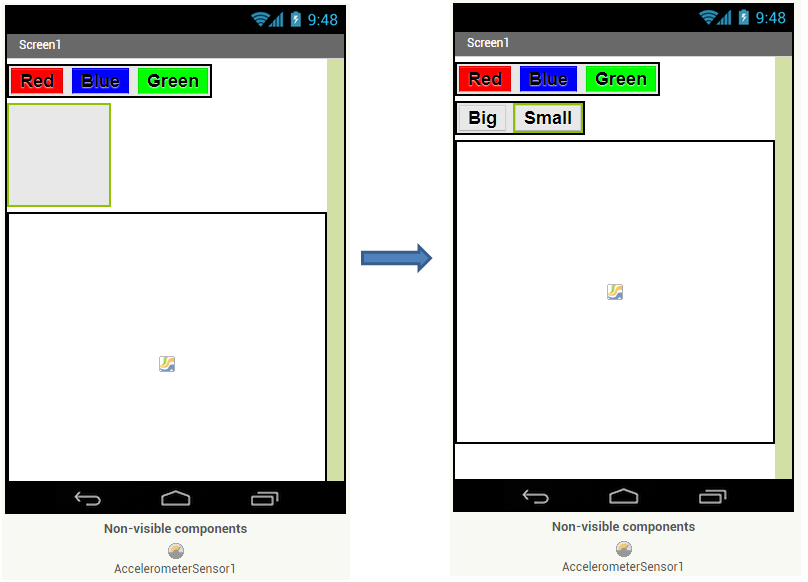
Go to the Layout palette and drag out a HorizontalArrangement component. Place it between the first row of buttons and the canvas.
Step 6
Put two Button components inside HorizontalArrangement2.
Rename Button1 to “BigButton” and Button2 to “SmallButton”.
Step 7
Design how these buttons look using Properties.
Here’s an example of a simple design:

Step 8
To finish the look and feel of your app, you may wish to move the buttons to the centre of the screen. Click on Screen1 in the Components pane, then go to the Properties pane and change AlignHorizontal to Centre.
Check out how your app looks on the phone screen and make sure you’re happy with the design. Make any small changes you need in the Properties pane and then move on to the next section.