Course navigation
Connecting the Camera to the Raspberry Pi
Learn how to attach the camera to the Raspberry Pi and make sure it's working.
Step 1
Make sure the Raspberry Pi is switched off.
In the next step you will connect the camera module to the Raspberry Pi's camera port then ensure the software is enabled.
Step 2
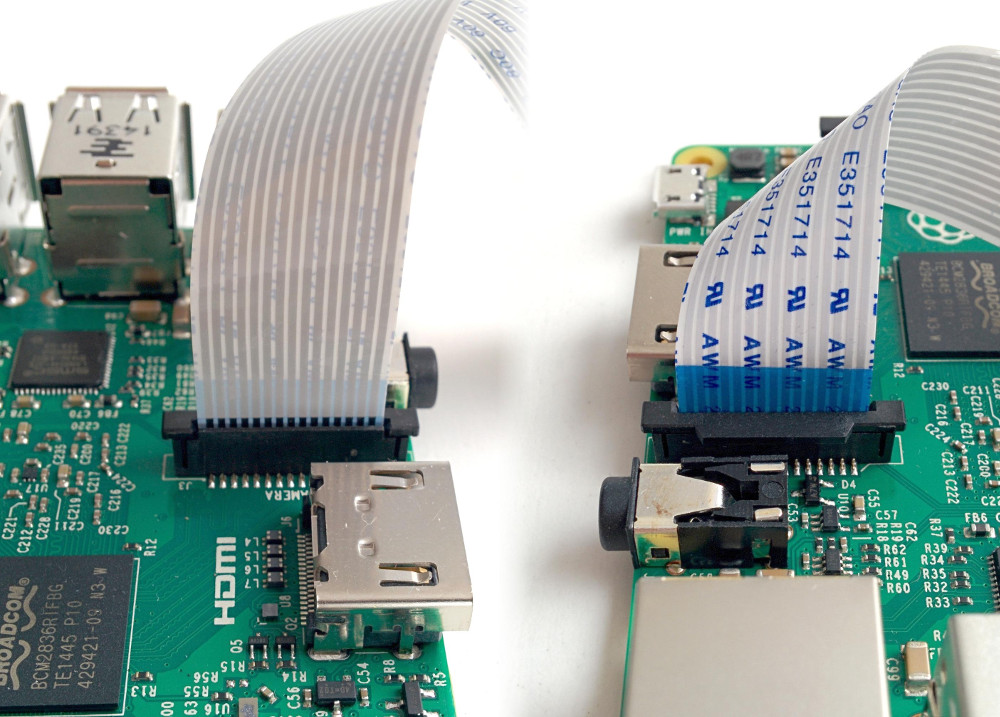
Locate the camera port and connect the camera:

Do this slowly and carefully. Lift the latch and feed in the ribbon cable. Make sure the ribbon is facing the same way as in the image.
Step 3
Carefully place your camera to the side of the Raspberry Pi. You might want to attach it to something using sticky tack.
Turn on the Raspberry Pi and log in.
Step 4
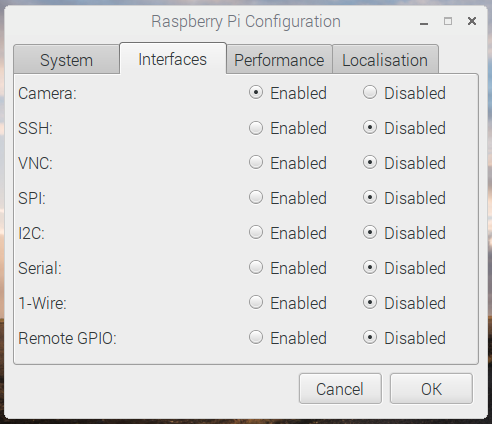
Open the Raspberry Pi Configuration Tool from the main menu. Make sure that the camera software is enabled.

If it's not enabled, enable it and reboot your Raspberry Pi.