Course navigation
Create Your Own Digital Postcard
Step 1
Now that you know how to use HTML and CSS to change how a web page looks, you can make something a little more complicated.
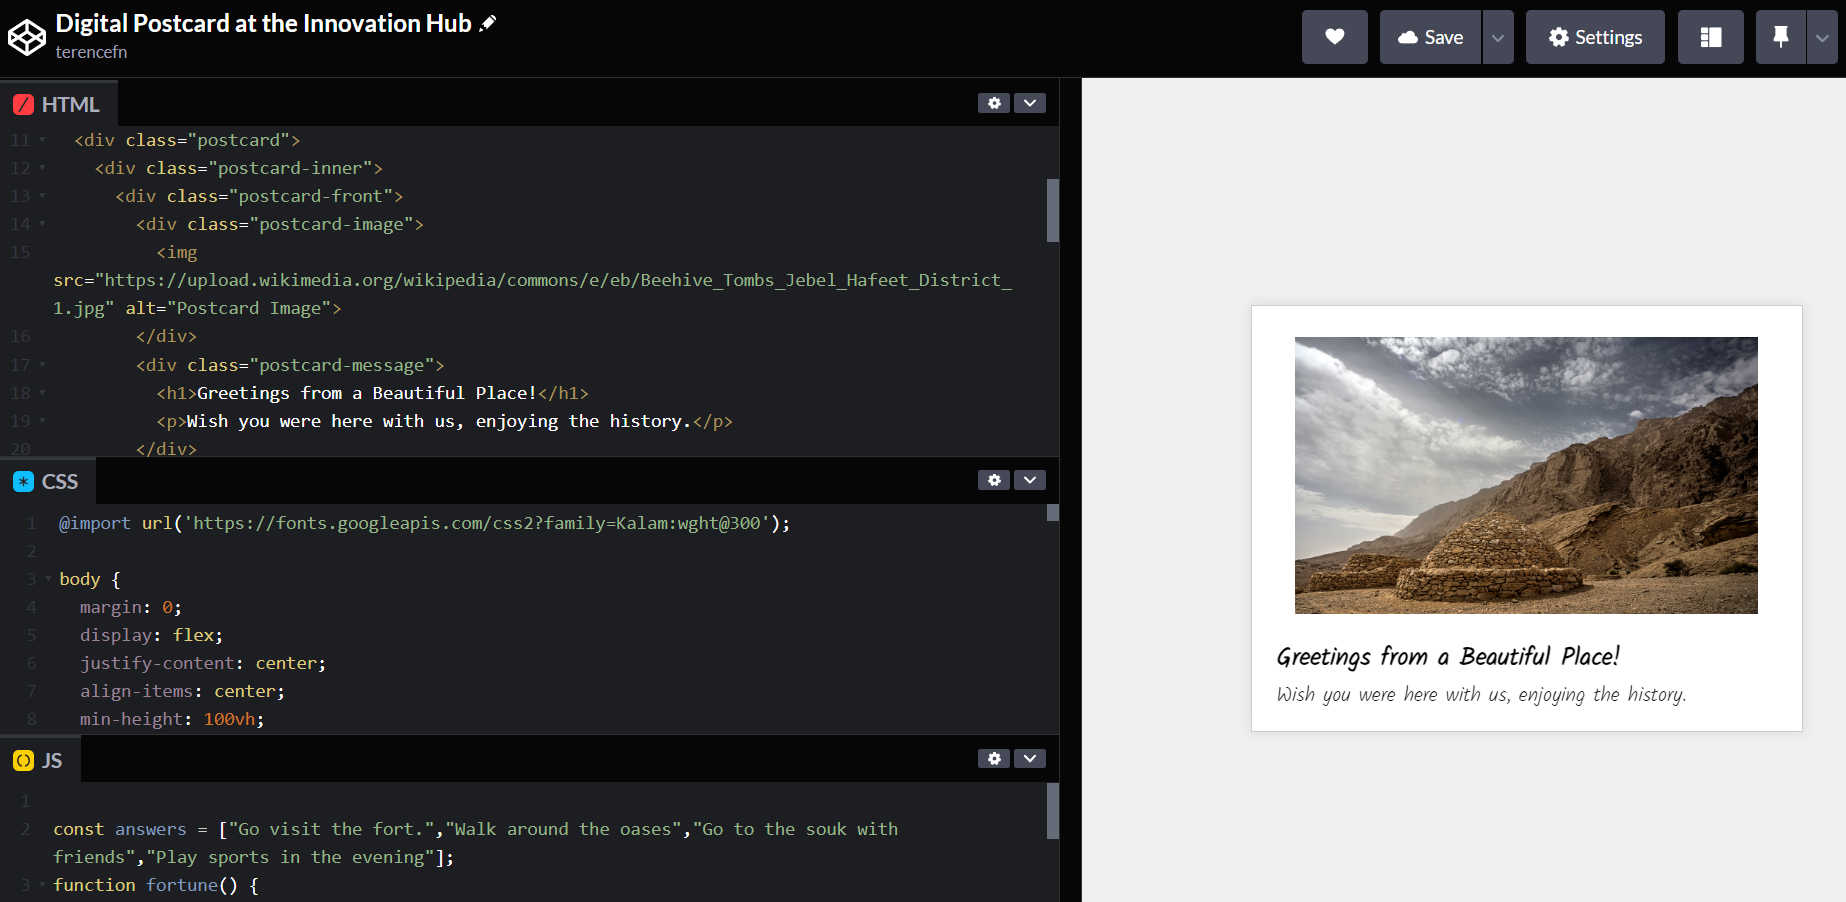
Open the digital postcard Code Pen at: https://codepen.io/terencefn/pen/oNQVPyE

Step 2
The Code Pen editor shows you 3 files that we will work on - html, css and js. It also shows you a live preview of how your page looks as you edit. You can click the layout button in the top bar to arrange these files on your screen.

The JS file is for JavaScript. Javascript is a type of code that lets you create interactive parts of a webpage. Here, it will control a button.
Step 3
With your knowledge from previous lessons, you can edit the postcard any way you like to create your own version. It could be a postcard with a message for a friend or family member, or a card from a fictional character. It can say anything you want.
Replace any text you like, and add more if needed.
You can replace the image with your own. Remember, you need to put the image address in the <img> tag.

Step 4
You will notice that the postcard flips around to show the back when hover the mouse over it. This is all controlled in the CSS file. You should be able to find "transform: rotateY(180deg);" - this controls how the postcard rotates. CSS is a powerful way to create animations like this with certain keywords.

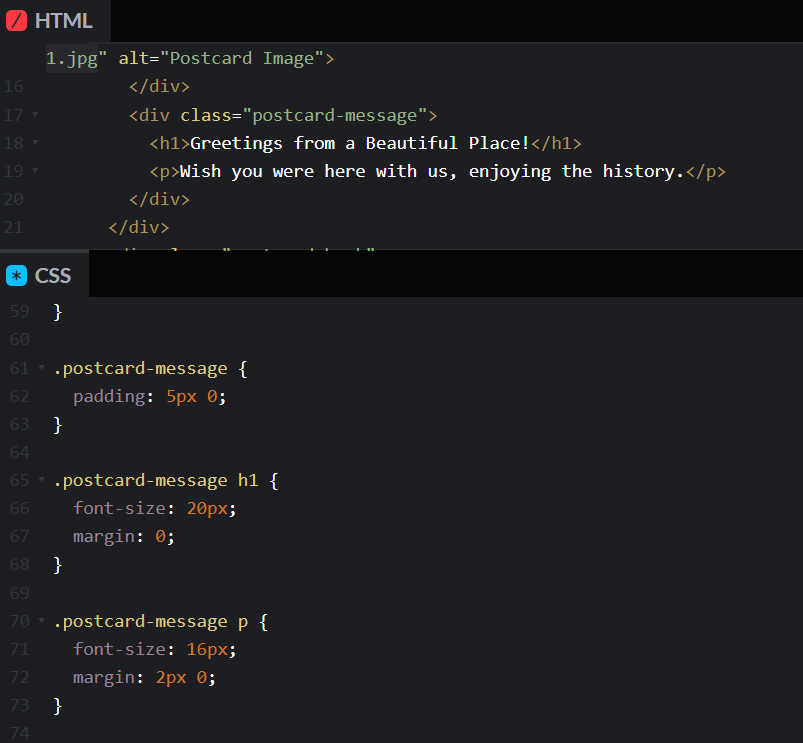
See if you can change the color of the greeting message. Find the right definition for the class in the CSS file. Remember that you can define the font color by adding "color: #014589", for example.
You could also change the size of the font by changing “font-size:”. The size is measured in pixels.

Step 5
You can add more images to your postcard. As a reminder, you can search for images using Google, but only use photos that don’t have copyright.
To do this, you can search on images.google.com. Put in the word you want to search for (like “beach” or “mountains”) then press enter. To show only the pictures that are free for you to use, click Tools, Usage Rights, and then Labelled for Reuse.
Like the last lesson, you need the location of the image to put in the code. Once you have found an image you want, click on it once, then click on the button “view image”. Right-click the image and click on “copy image address”.
Go back to your html code file and find the <img> tag. Paste the location of the image you have found in the brackets, instead of the one that is there. Your image should now show on the postcard.
Step 6
Hover your mouse over the postcard and you will see that it spins to show the back side.
The back of the postcard has a button that is a link to a wikipedia page. The style of the button is defined in the CSS file, in the ".button" section. Change some of thes values until you're happy with the way the button looks.
The writing on the button and the link is in the HTML file. Change these to something to which you want your postcard to link.
Step 7
Test the button that says 'Click Here' – it should change the text underneath to a different phrase every time you click it.
This button uses JavaScript code to select a word from a list of different words every time the button is clicked.
Find the part of the code in the JS file that has that list of words. Change the words to your own words to create your own messages. Make sure to keep the commas and quotation marks in the right place.
See if you can change the text above the button, and the text on the button too.
The JavaScript uses a variable and a function. A variable is something that can change, and a function is code that makes something work.
Here, the function is called "fortune". See if you can work out where the "fortune" function is used in the HTML. Hint: Find the part that controls the button – look for the “OnClick” keyword.
Step 8
Try changing the fonts used on your postcard. Each font is listed at the start of the HTML file – you can see the ones used in this file by looking at the start of the file.

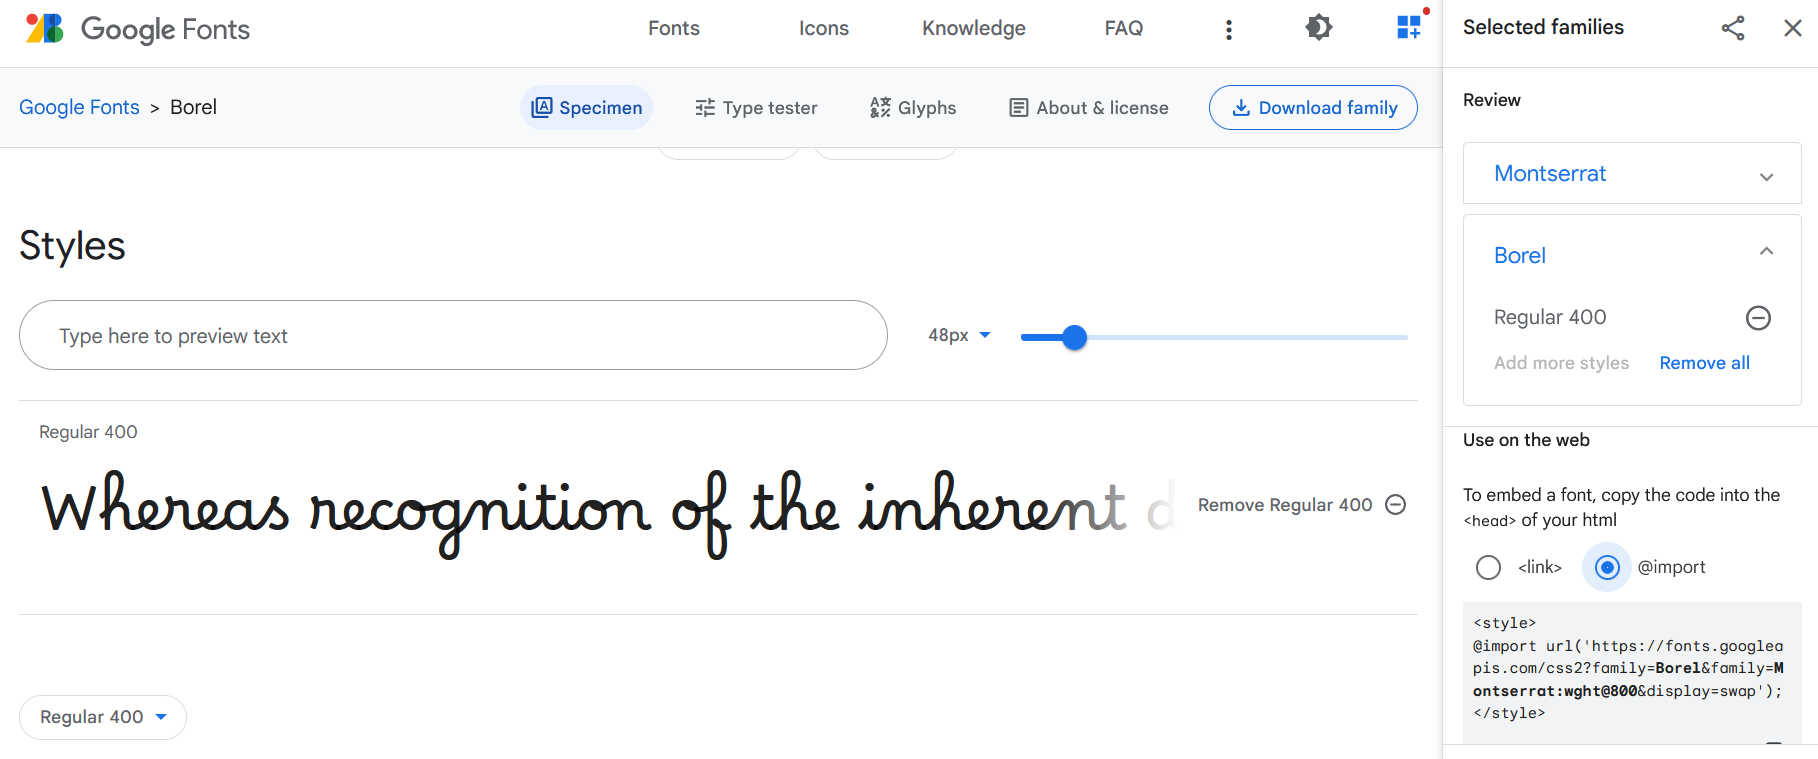
You can add any font you want to the top of the HTML file, then you can use it anywhere on the page. There are lots of fonts shown on this page: fonts.google.com
Copy a link for the font into your HTML file.
To do this, find a font you want to use and click the + symbol, then look at the black box that pops up at the bottom of the page. The link is shown in a grey box, and starts with @import. Copy the whole thing, and paste it into your Css file, next to the other font.

To use that font on your page, use the name of the font in the CSS code. For example, if you want to use your new font in the heading:
- Find the CSS code that starts with “h1 {“
- After “font-family: “ put the family name of the font
- You can find the family name in the link at the top of the page. Make sure you type it exactly.
You can do this for any part of the code where you want to use that font.
Step 10
If you have time, you can add more images to the back of the postcard. To add smaller images in a row, we can use similar code to the bricks example in a previous lesson.
Create a new definition at the end of the CSS file by pasting this code at the end:
.postcard-image-small {

position: relative

margin: 1px;

border-radius: 4px;

display: flex;

}

.postcard-image-small img {

max-width: 30%;

padding: 2px;

}
This allows you to add 2 or 3 photos on the back of the postcard. To insert the photos, add <div class="postcard-image-small">testing</div> in the right place in the HTML file so that "testing" appears on the back of your postcard. Now you can replace "testing" with your image tags. Put up to 3 tags in, remembering to add the image address after src=.
Make sure you ask for help if you get stuck.

Step 11
Before you finish, get someone else to test your code.
Save your Code Pen page - you may have to log in to save it to your account.