Course navigation
Adjusting and Inspecting
Step 1
Select your model using the left mouse button. Once selected you’ll be able to see the coordinates the model has on the top left of the screen:
- X: 0mm
- Y: 0mm
- Z: 0mm
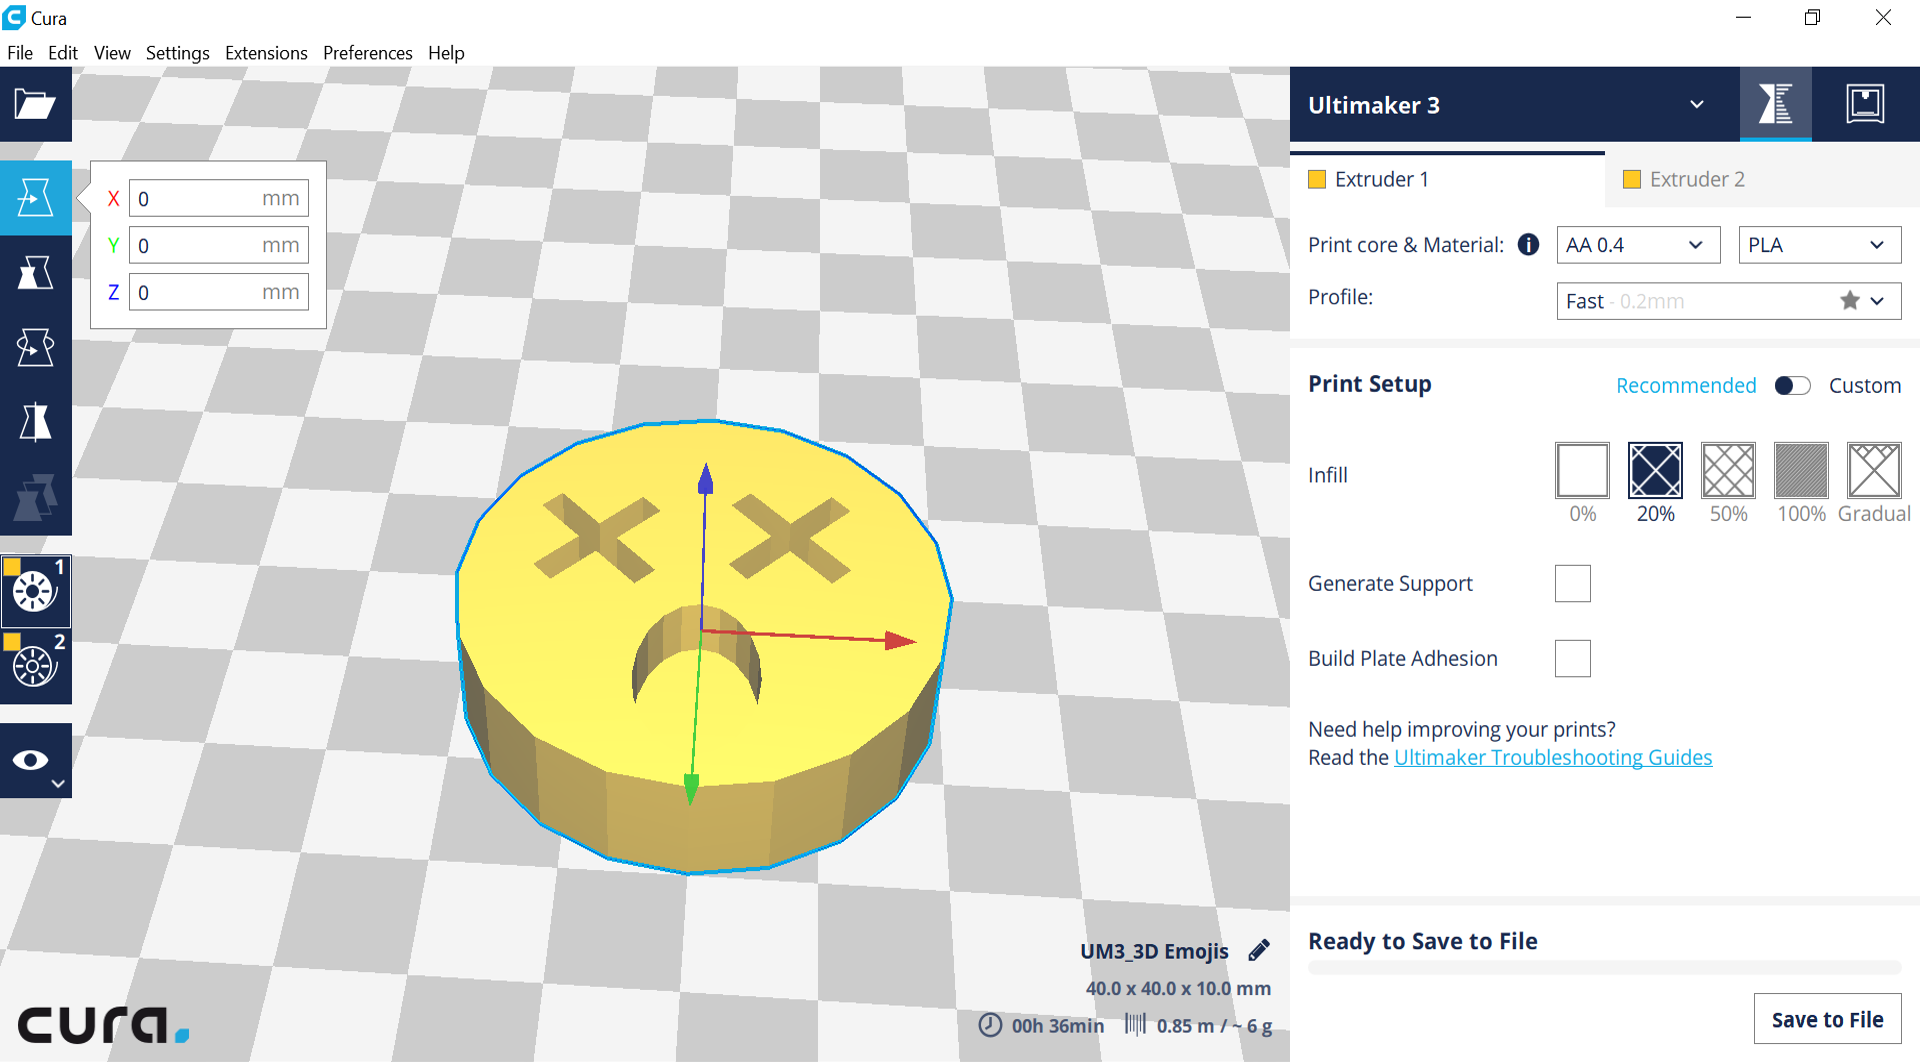
The ‘print bed’ is the surface your model will be printed on in the 3D printer. It is shown in Cura as the checked surface.
You can change the location of your model on the ‘print bed’ by changing the coordinates at the top left.
Click the "Slice" button, which will prepare the file for printing. When it's complete, you can see three vital pieces of information on the bottom of the screen:
1. Dimensions: 40.0 x 40.0 x 10.0mm
2. Time it will take to print: 00h 36min
3. The amount of material it will require to print: 0.85m/~6g
These will be important when you are printing.
Step 2
If your object has come in too large or too small, you can scale it. Select the second icon down on the left-hand side panel. Alter your dimensions to bring your printing time down to approx 10 minutes by typing directly in the Scale boxes.
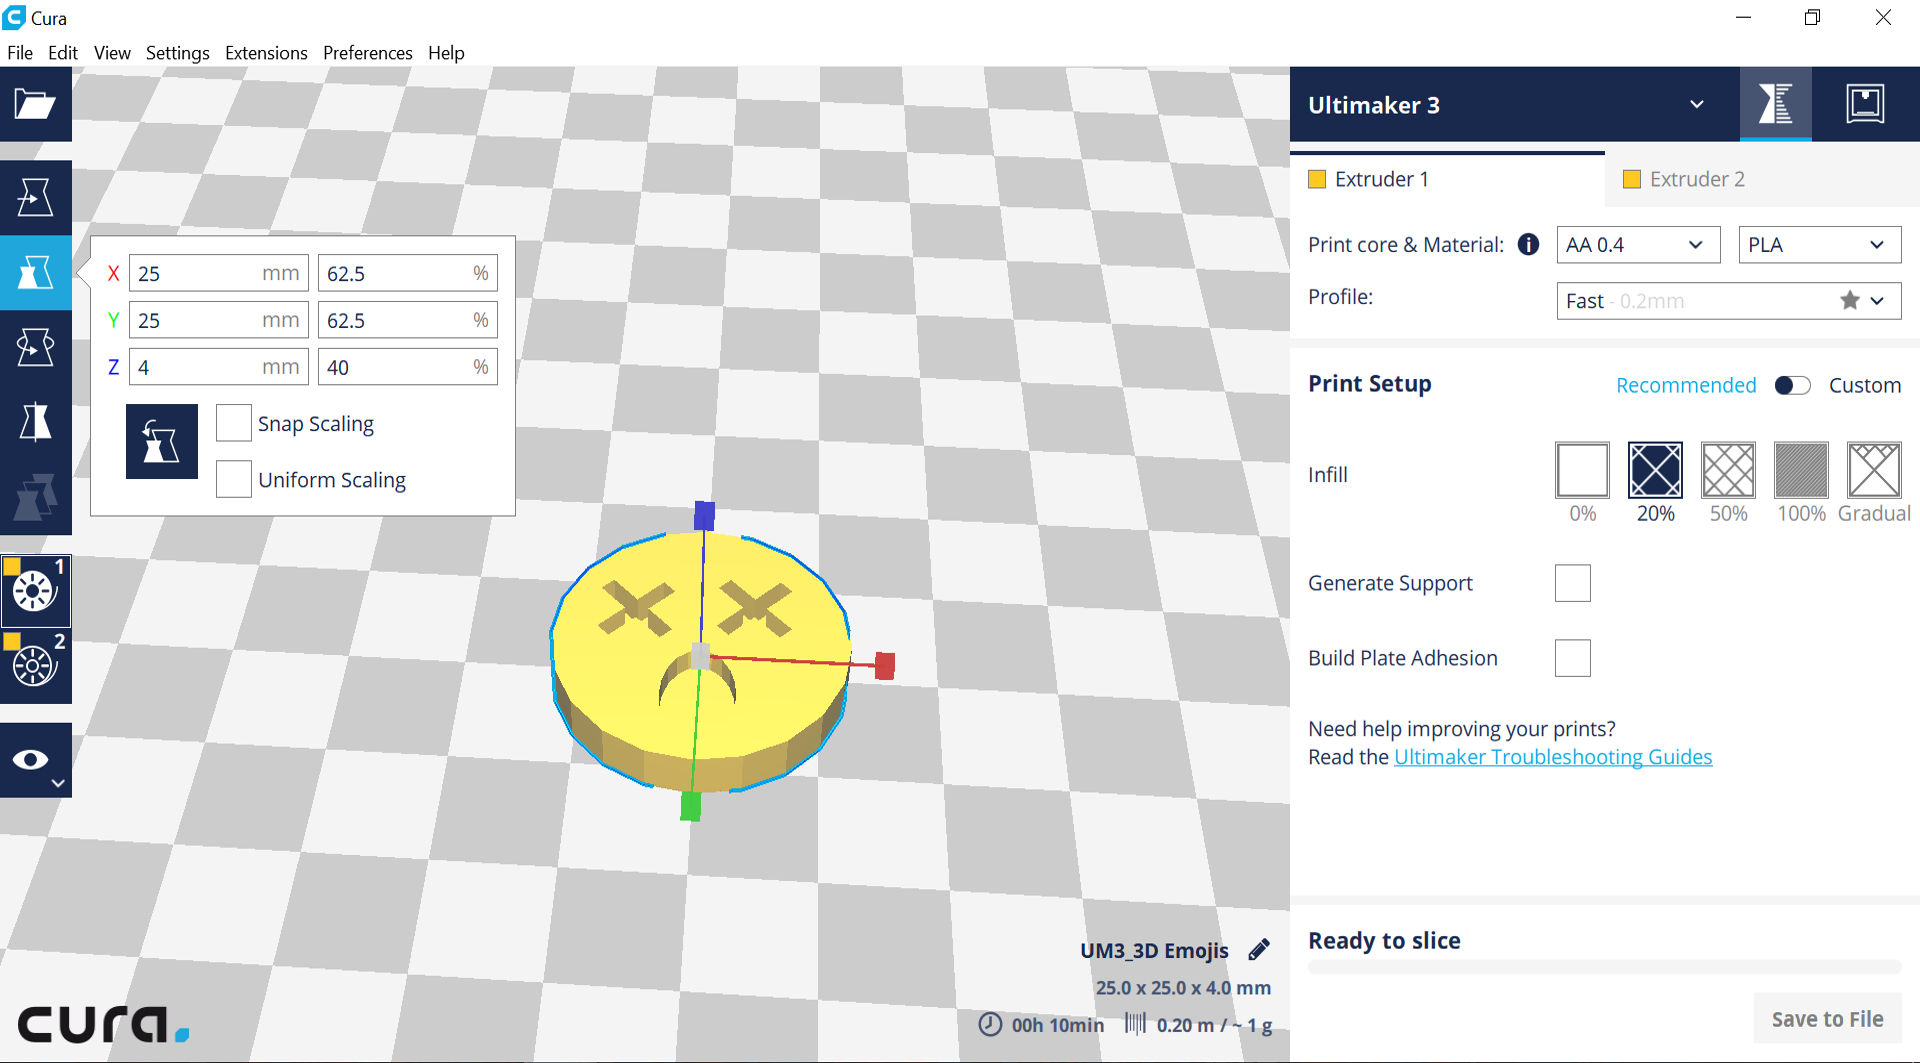
The object descriptor in the bottom right corner should now display something along these lines:
4. Dimensions: 25.0 x 25.0 x 4.0mm
5. Time it will take to print: 00h 10min
6. The amount of material it will require to print: 0.20m/~1g
Step 3
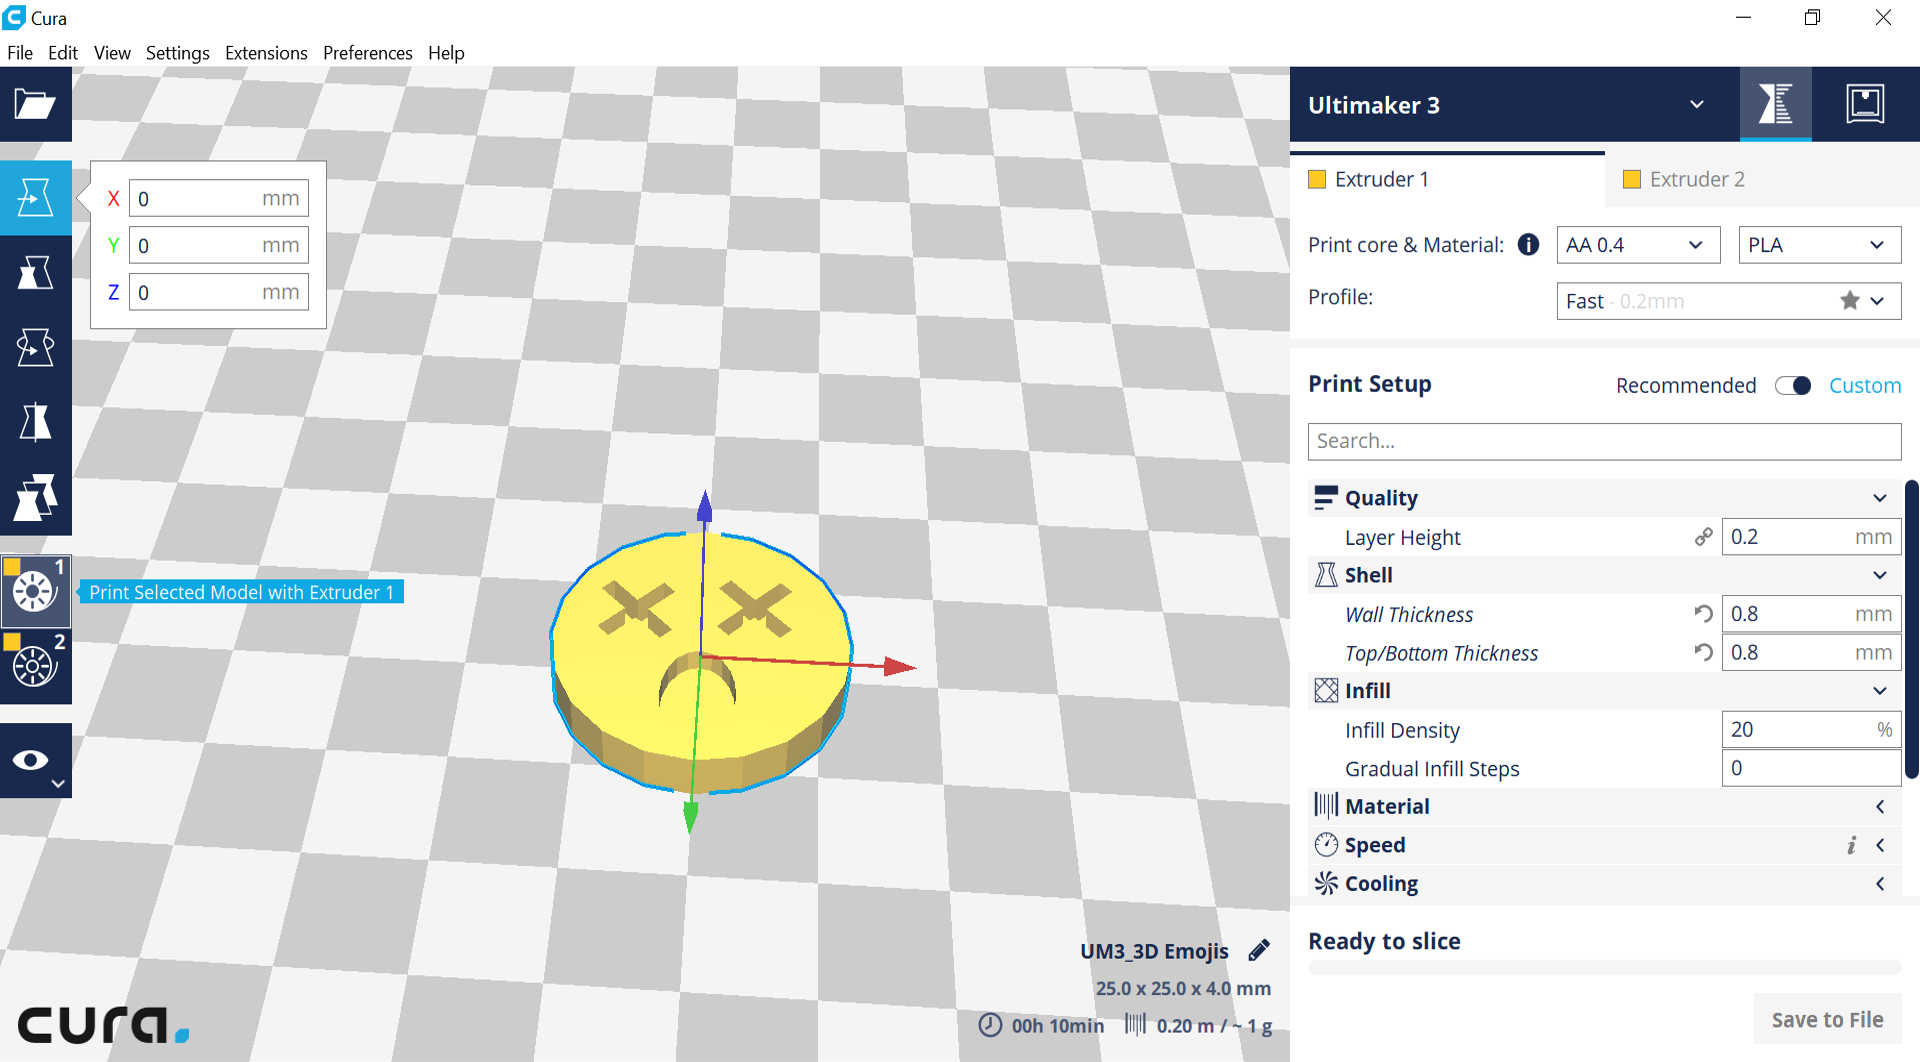
Once you’re satisfied with your position, dimensions and print time, check that you have the correct extruder selected for this print in the panel on the right hand side of the screen. The Ultimaker 3 is a dual extruder set to print PLA material with Extruder 1 and Dissolvable Support Material with its Extruder 2.
Select your model then select Print Selected Model with Extruder 1 on the left-hand side menu. The reel icon for Extruder 1 should display as white if selected.
Step 4
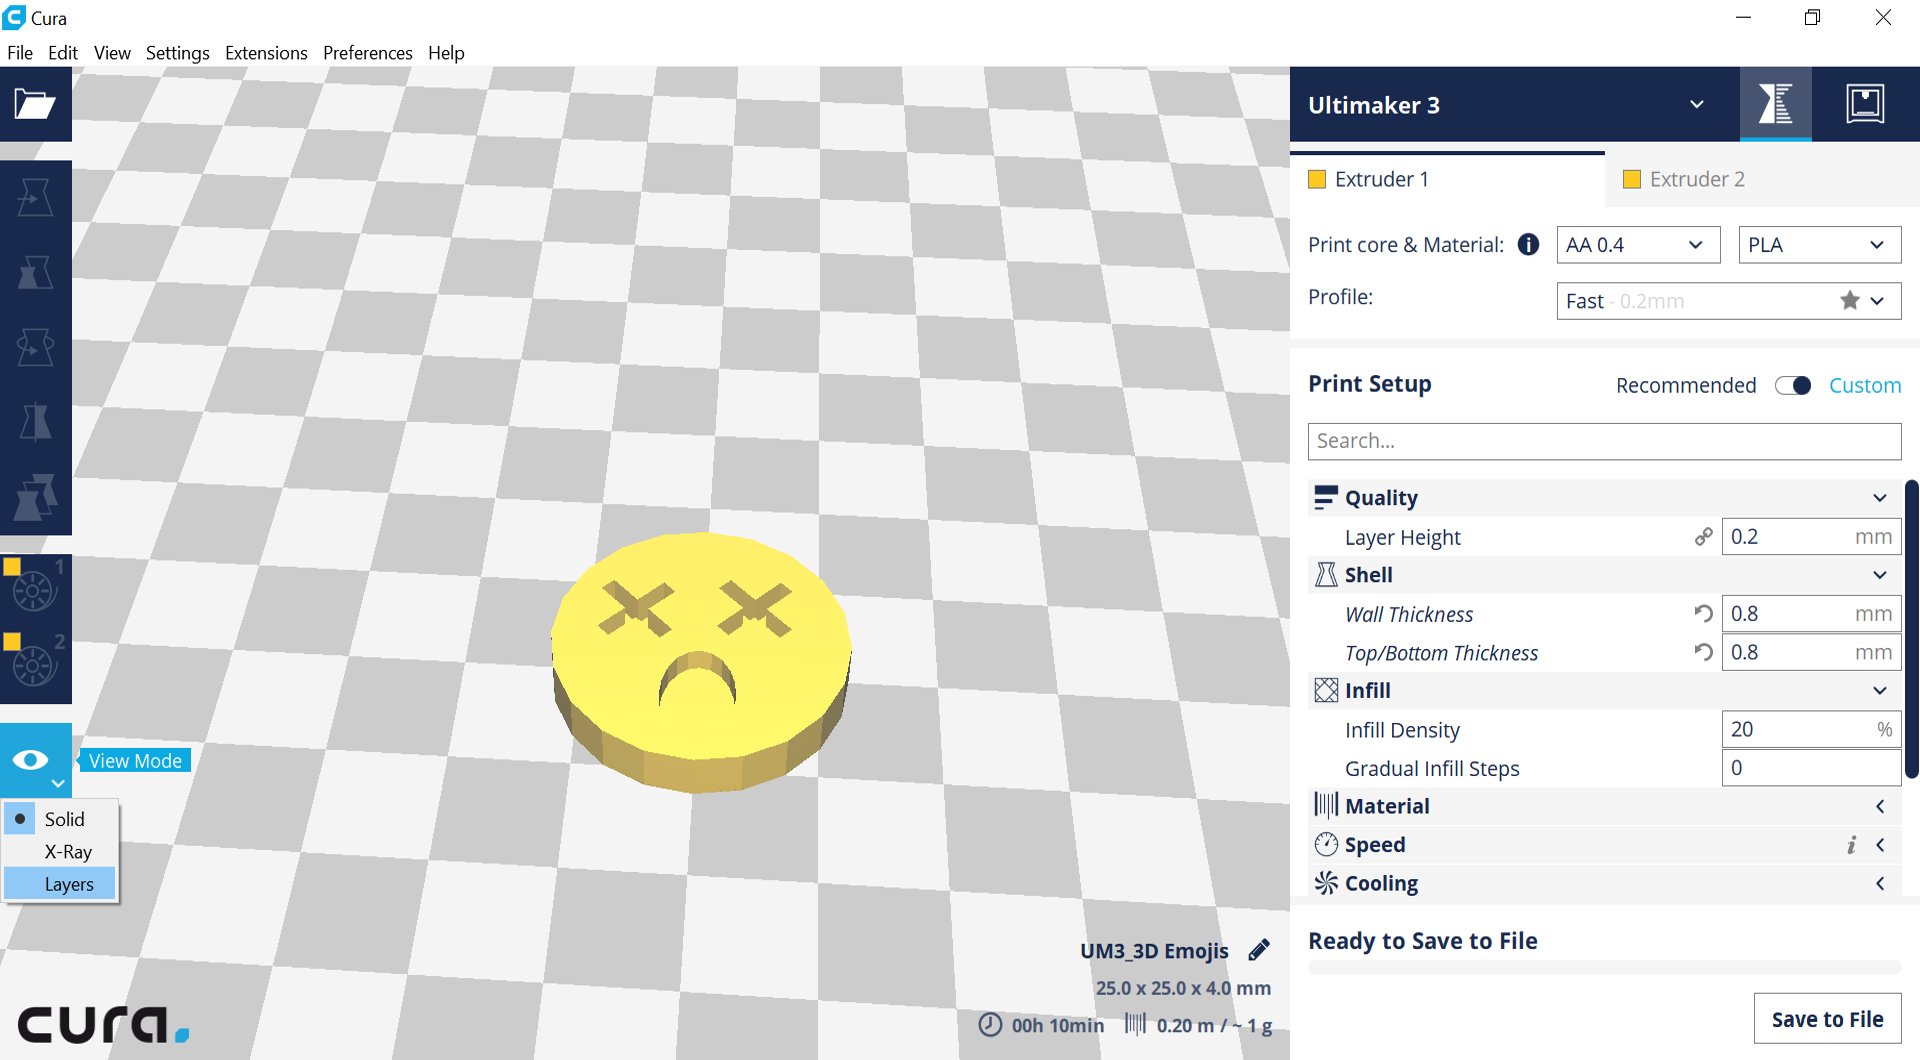
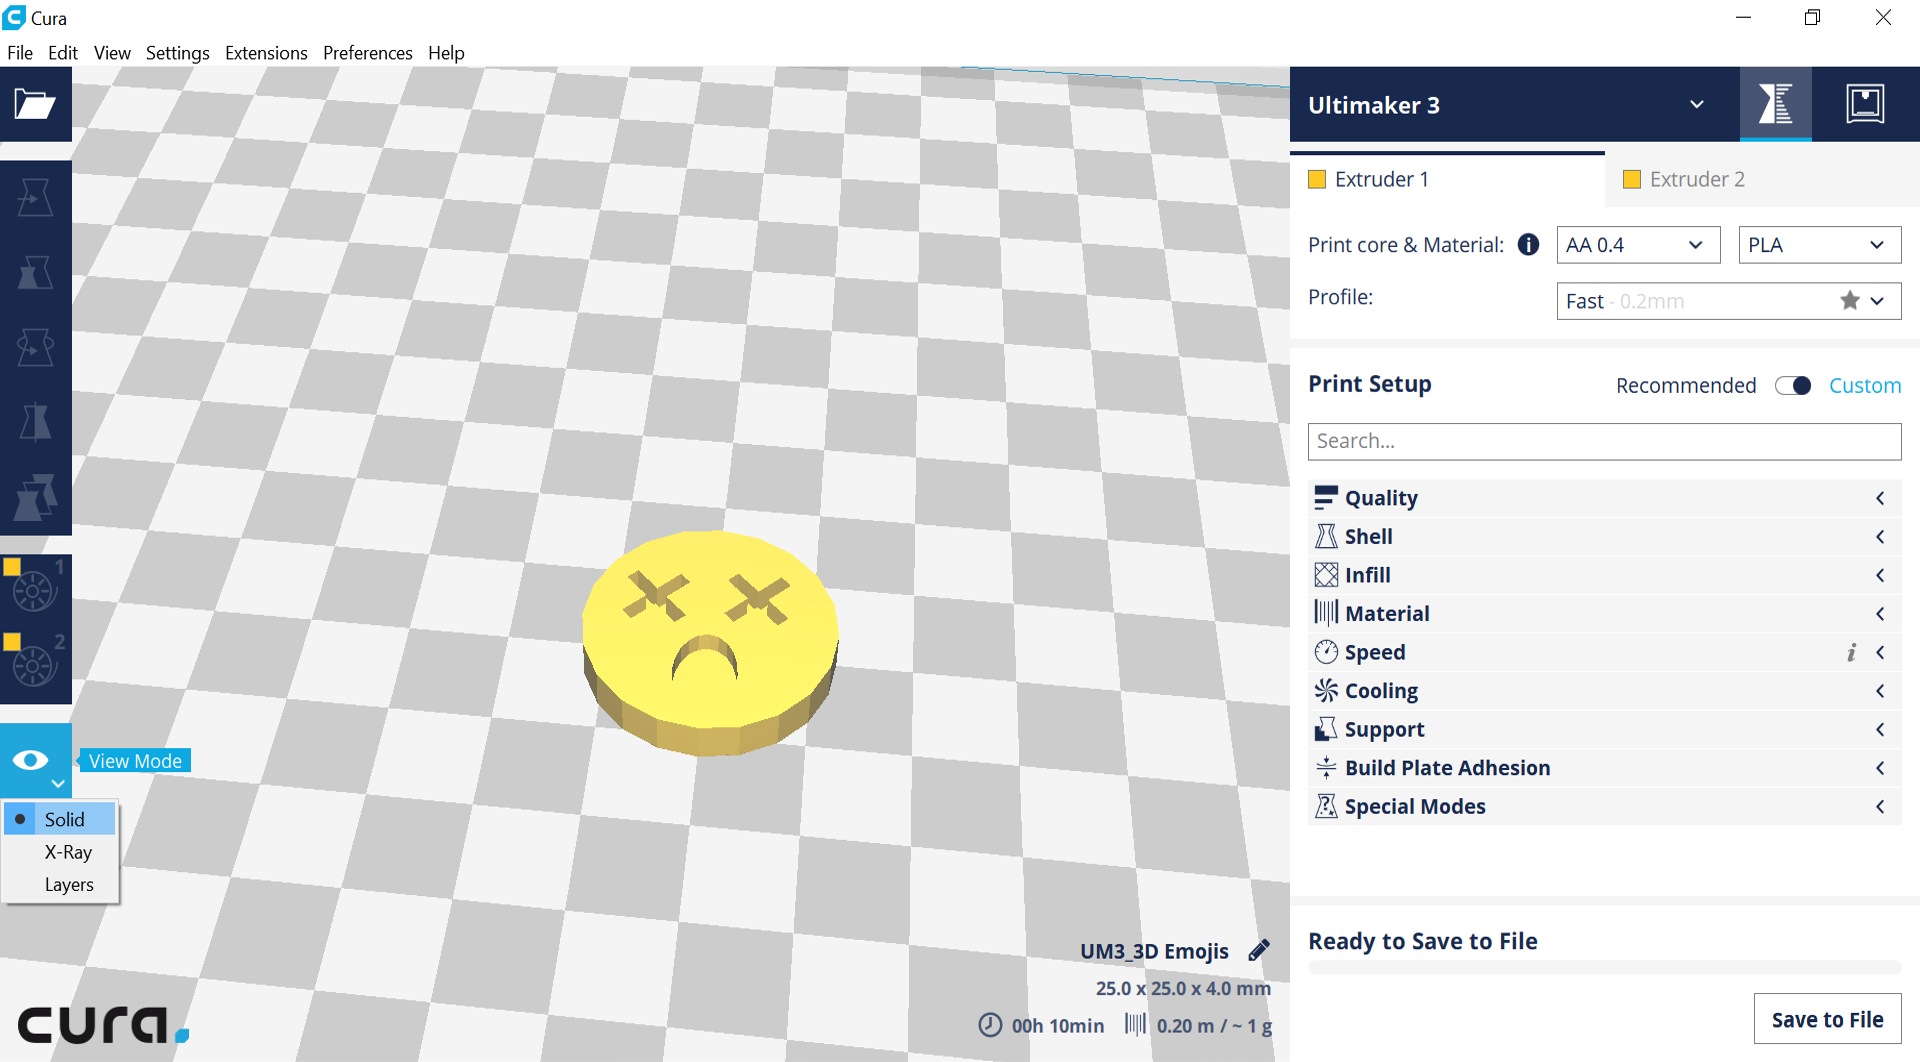
At the moment, what you see is what the model looks like on the 3D printer - it doesn't show how it will print. To see what it looks like on the inside you can look at a preview of the layers. Depending on the version of Cura, you should click on the eye button on the left-hand menu or the Preview button on the top menu.
Step 5
You will now see a representation of how the model will print!
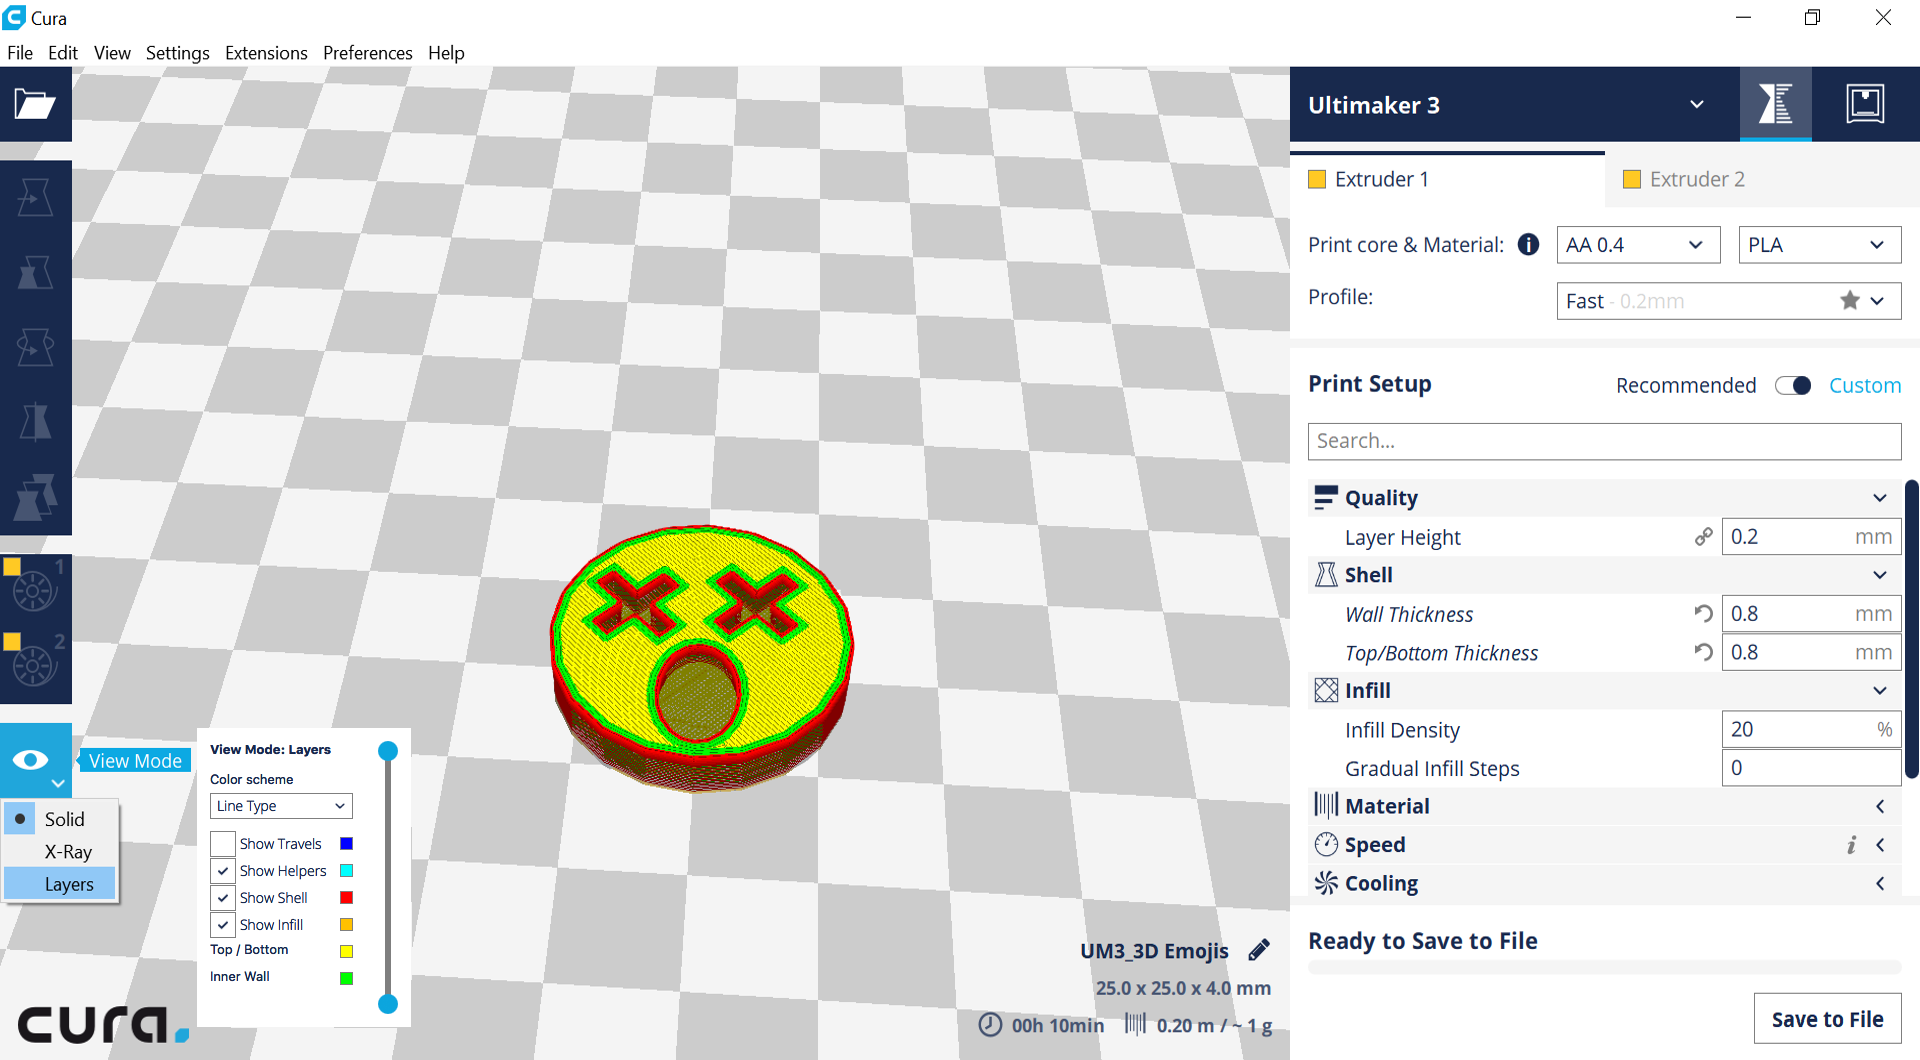
The model is much more colourful now.
Each of these colours describes different jobs that the 3D printer will do:.
- Light blue lines are ‘Helpers’. These are not required with this model,
but if we needed them they would also show us ‘Supports’ or a ‘Brim’ for
platform adhesion.
- Red is ‘Shell’. This is the outside of the 3D model.
- Yellow
is ‘Top/Bottom’. These lines will be completely filled in on the model.
- Green
is ‘Inner Wall’, which you can see very closely next to the red lines.
- Orange
is ‘Infill’. This is hard to see in this view, so let’s change take a closer
look.
Step 6
Find the vertical slider that shows the number of layers it will take to build your model. This is either on the left menu, or on the right hand side of the screen.
Click and drag the circle down.
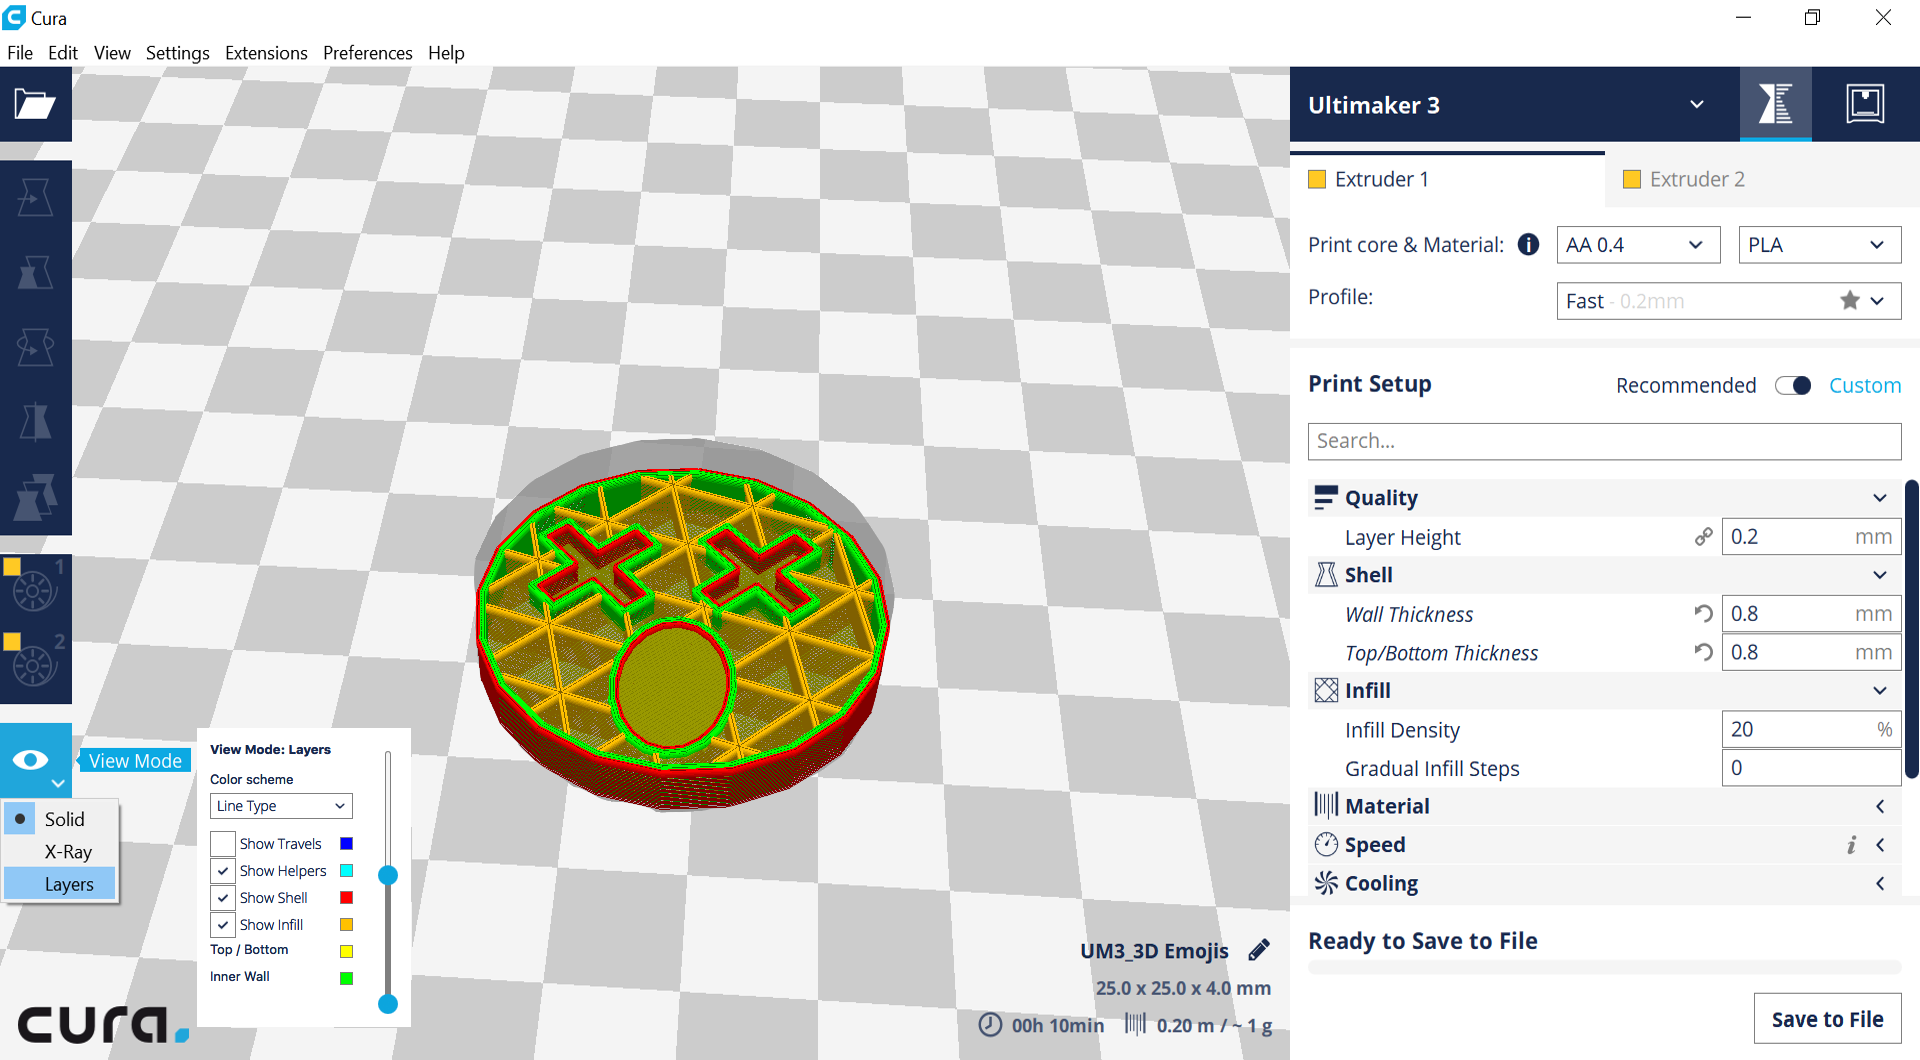
Now you can scroll through each layer of the model and see if anything is wrong.
We can now also see the Infill in orange.
3D prints aren’t usually solid all the way through, but will require some material in the middle to make sure they are strong and to stop the top layer from sagging. This Infill is usually designed as a grid or a honeycomb.
Step 7
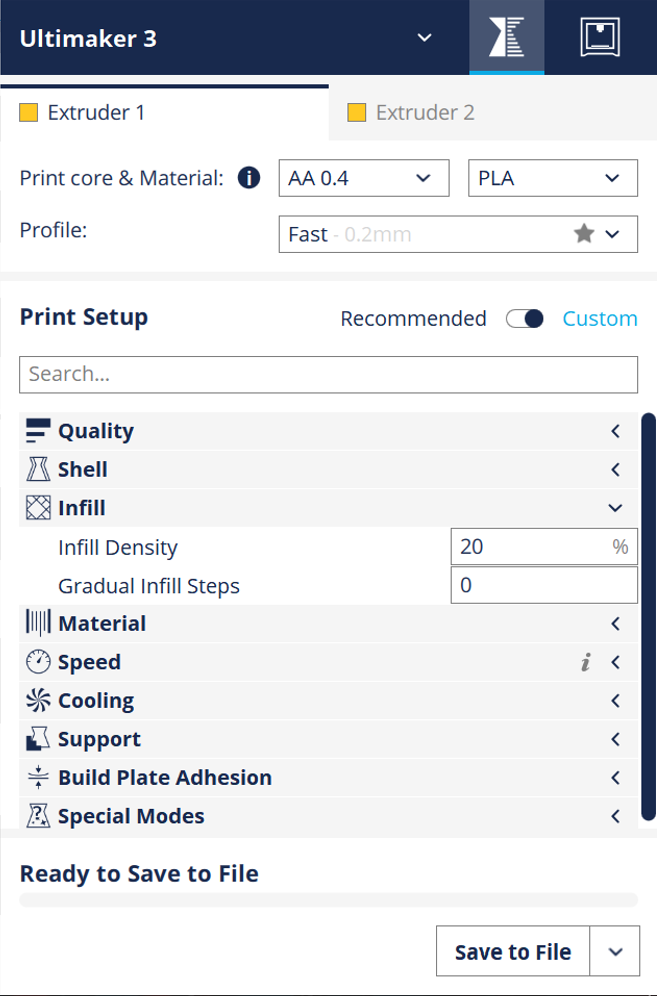
Set your 3D printing settings. To do so, return to Solid or Prepare view and find the settings in the right-hand menu.
Check that you are in the Extruder 1 menu and in Quality set your Layer Height to 0.2mm.

In Shell, set your Wall Thickness and your Top/Bottom Thickness to 0.8.
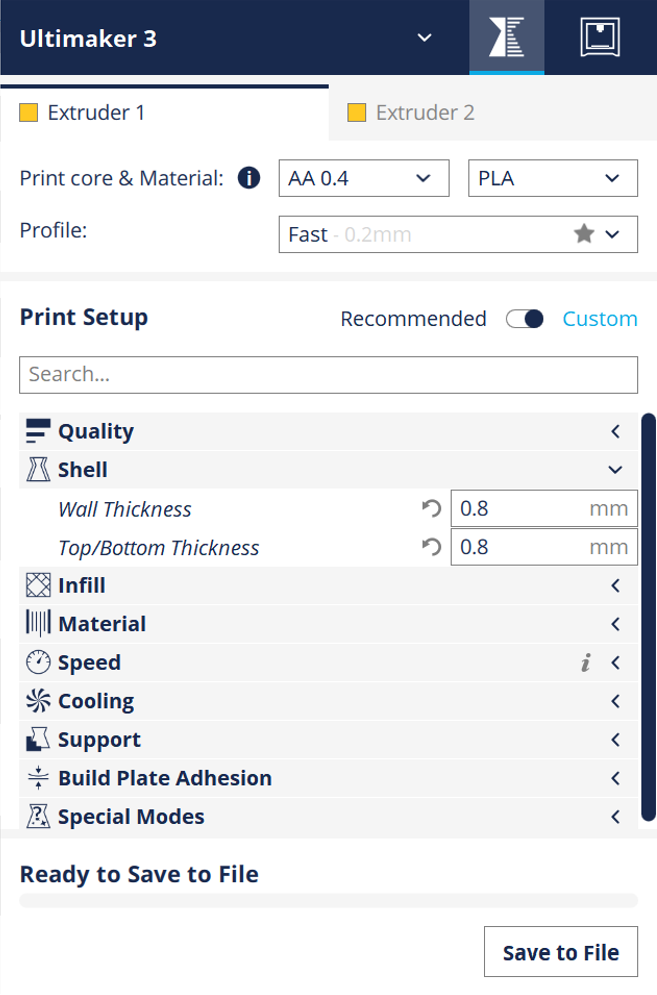
In Infill, set your Infill Density to 20%.
Go to Support and check that Generate Support is deselected and go to Buildplate Adhesion and select None in Buildplate Adhesion Type.
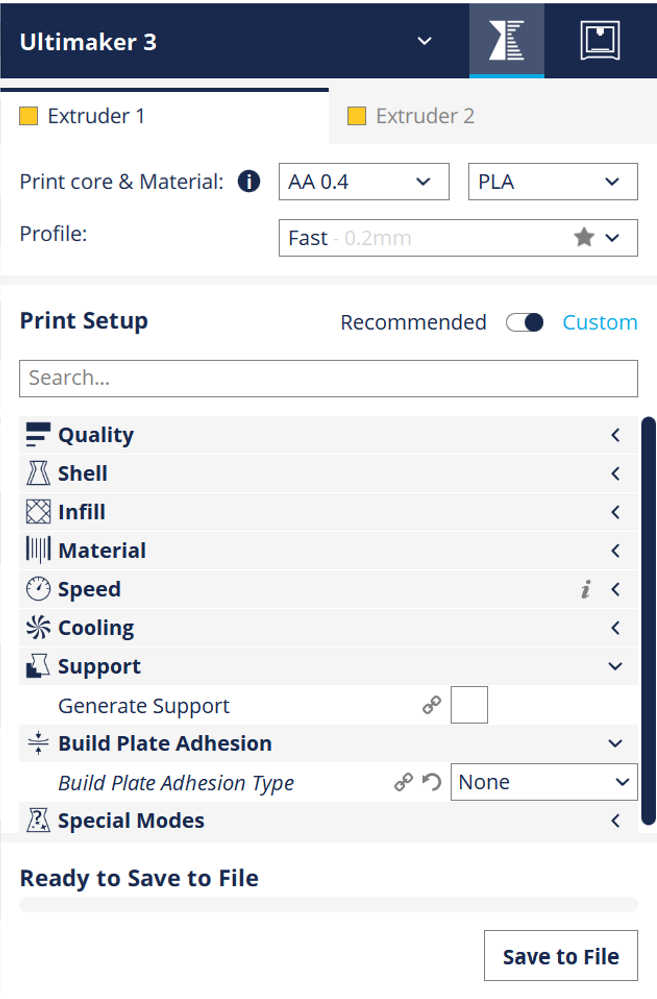
Your model is now fully setup for 3D printing.