Course navigation
Exporting Your Shape
Go to Steps 1-3 to learn to edit basic TinkerCAD shapes using advanced options or if time is short, skip to step 4 to create your 3D emoji.
Step 1
Go to the TinkerCAD website and click Create New Design.
Practice creating chamfers and fillets on basic shapes.
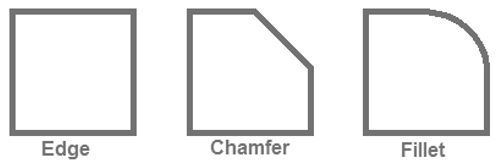
When creating 3D designs, it is usually good practice to reduce sharp edges so objects can be easier to handle once 3D printed. A chamfer is a 45 degree flat edge between two faces of an object. A fillet is a rounded edge between two faces of an object.
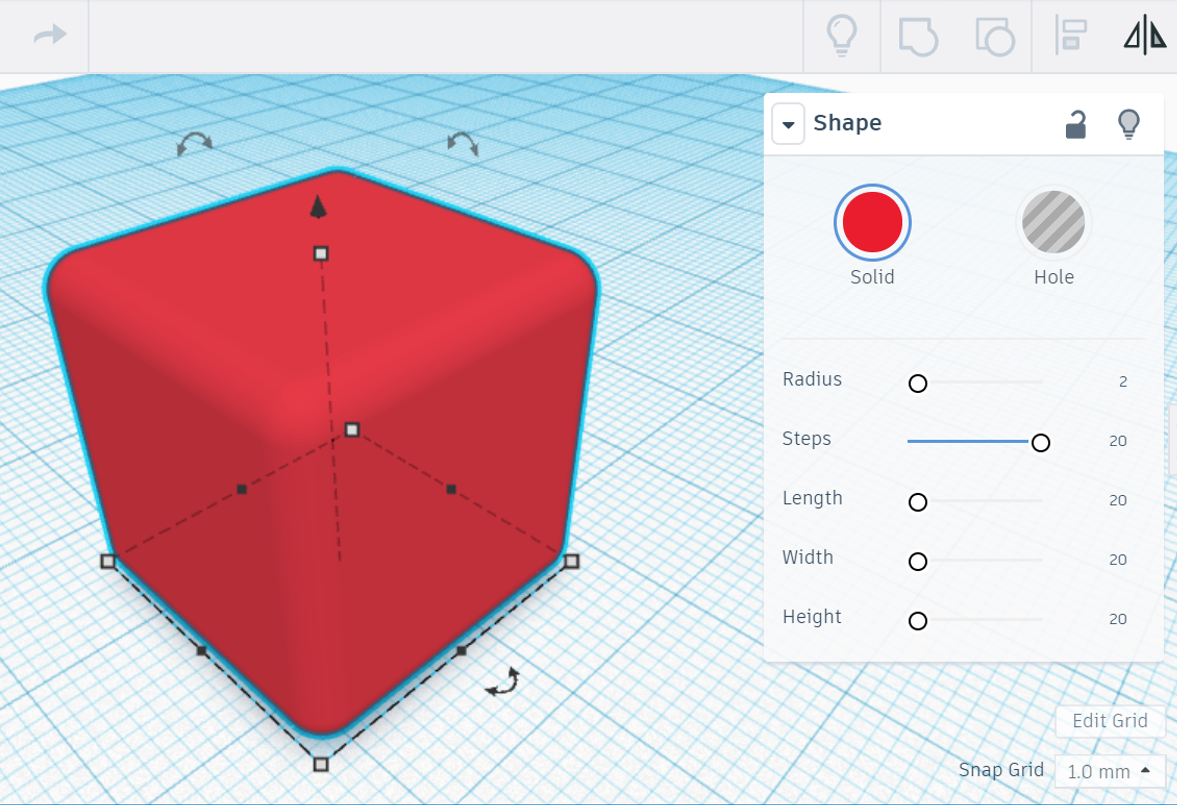
To create a chamfer on a cube, select the Cube shape and drop it on your workplane. Whilst you have it selected, go to the Shape dialogue box and set the Radius at 2 and the Steps at 1. You now have a chamfered cube.

To create a fillet on a cube, go to the Shape dialogue box and set the Radius at 2 and the Steps at 20. You now have a filleted cube.
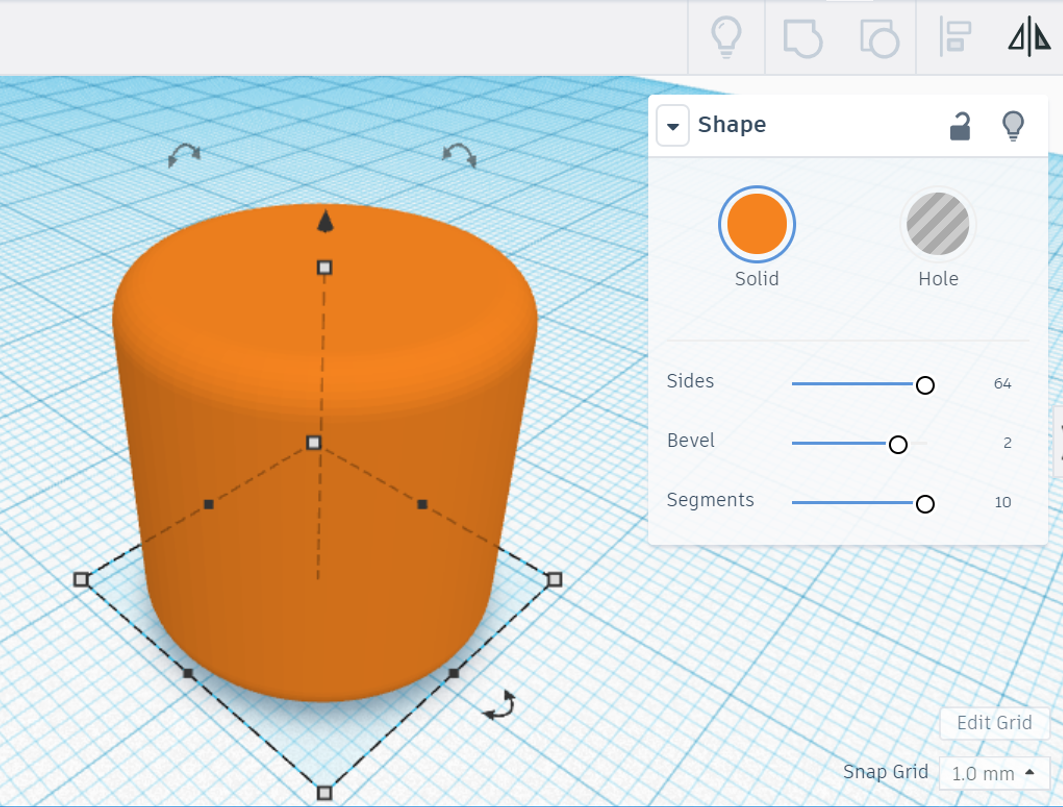
Select a Cylinder shape and drop it on your workplane. To give it a chamfered edge, select your cylinder and set the Bevel to 2 and keep the segments at 1.
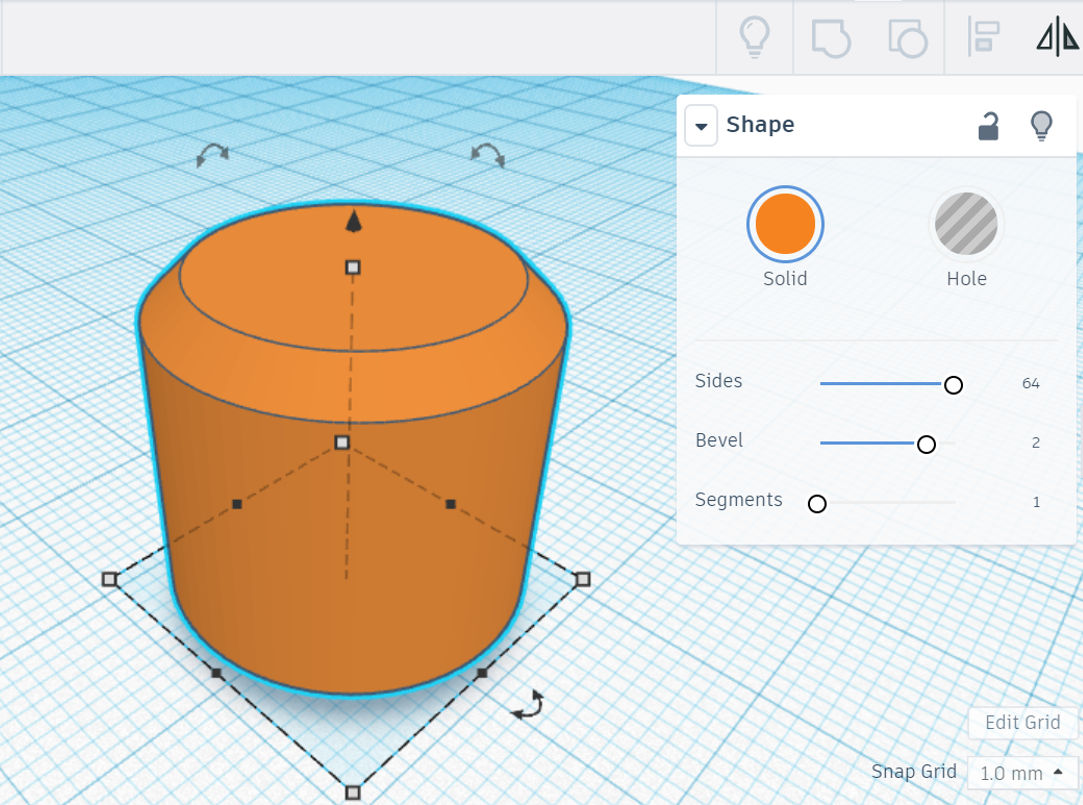
To create a fillet on a cylinder, go to the Shape dialogue box and set the Bevel to 2 and the Segments to 10. You now have a filleted cylinder.
Try repeating those modifications with the Polygon shape to see what you can do.
Step 2
Turn your basic shapes into more complex geometric solids using the Shapes control settings.
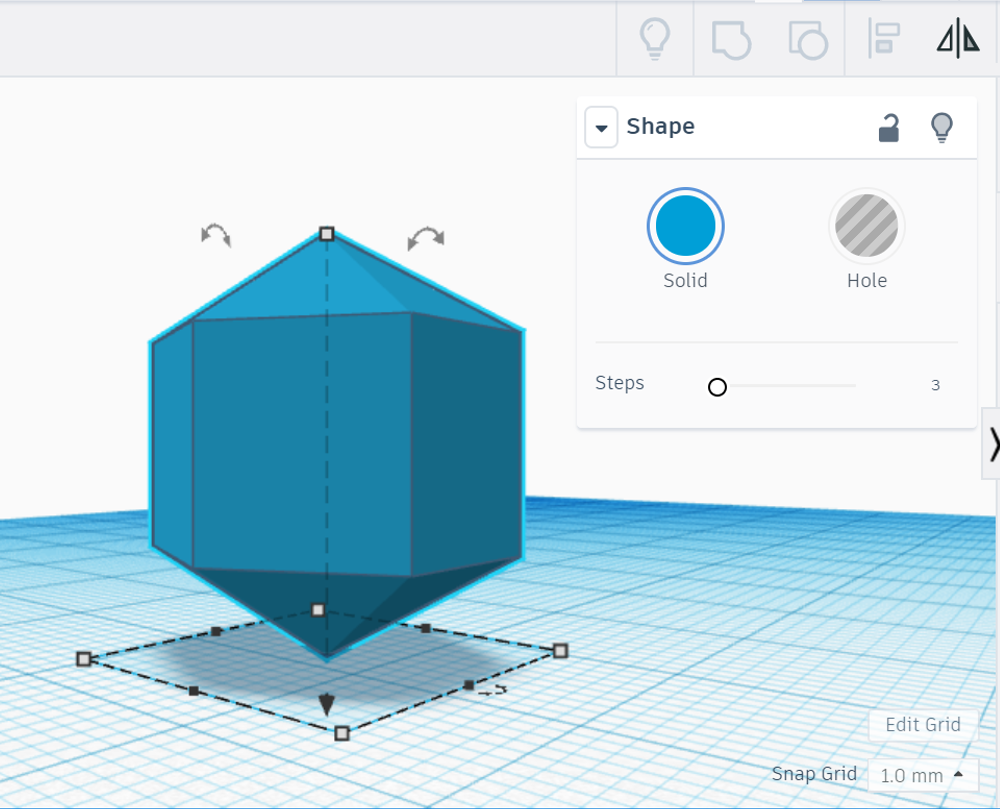
Turn a sphere into a polyhedron. Select a Sphere shape and drop it on your workplane. Go to the Shape dialogue box and reduce the number of steps down to 3. You now have a 6-sided polyhedron.
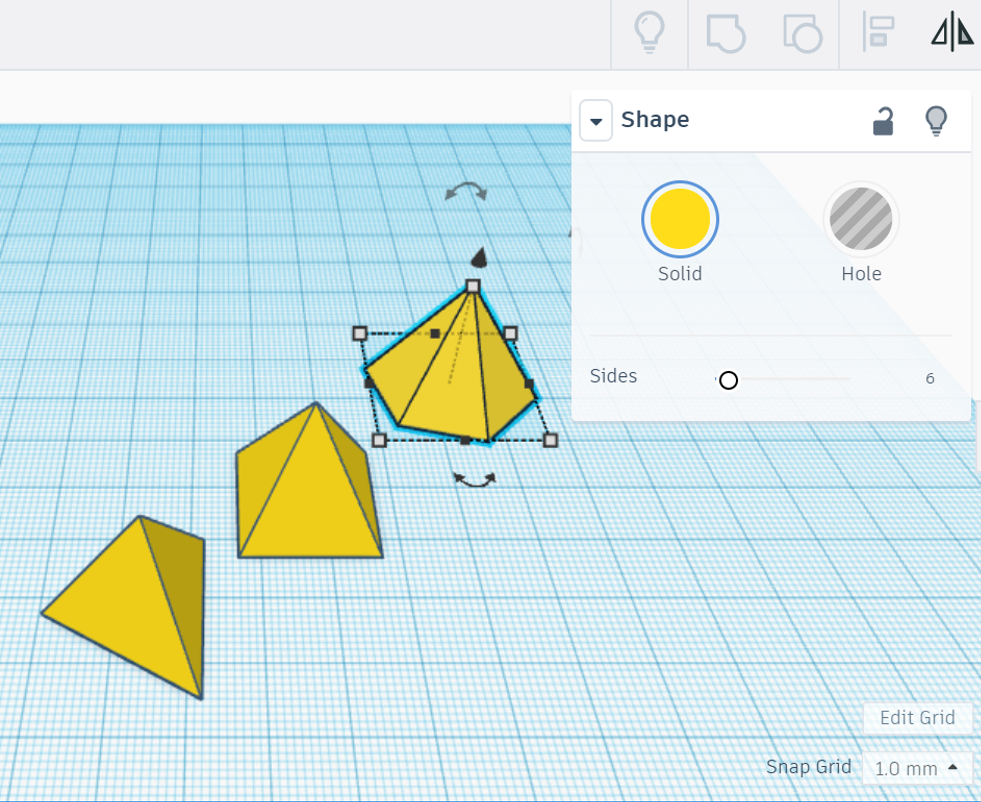
Select the Pyramid shape and drop it on your workplane. Select the number of sides to transform your pyramid into a 3-sided or 6-sided pyramid.
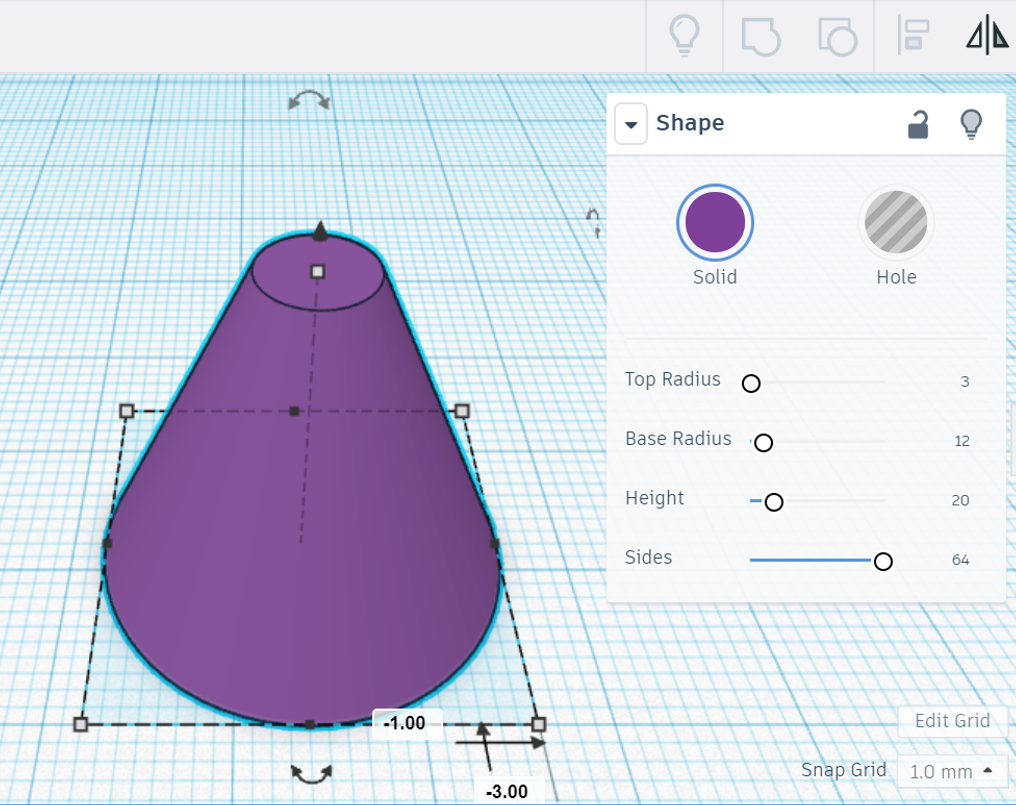
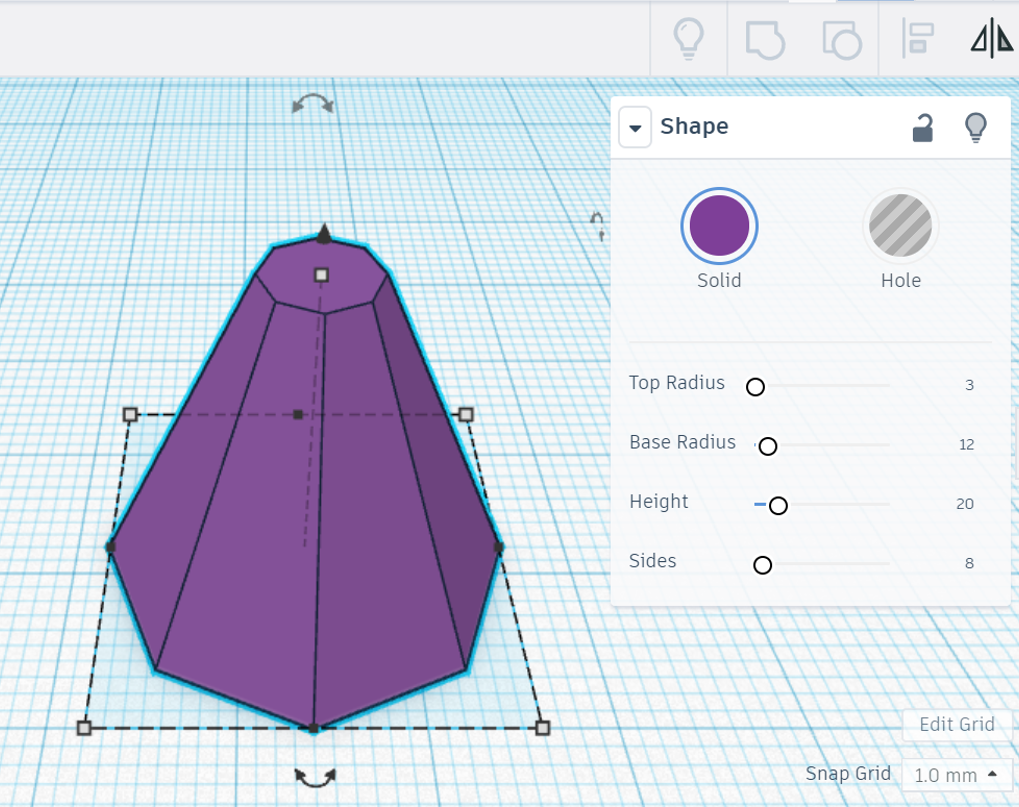
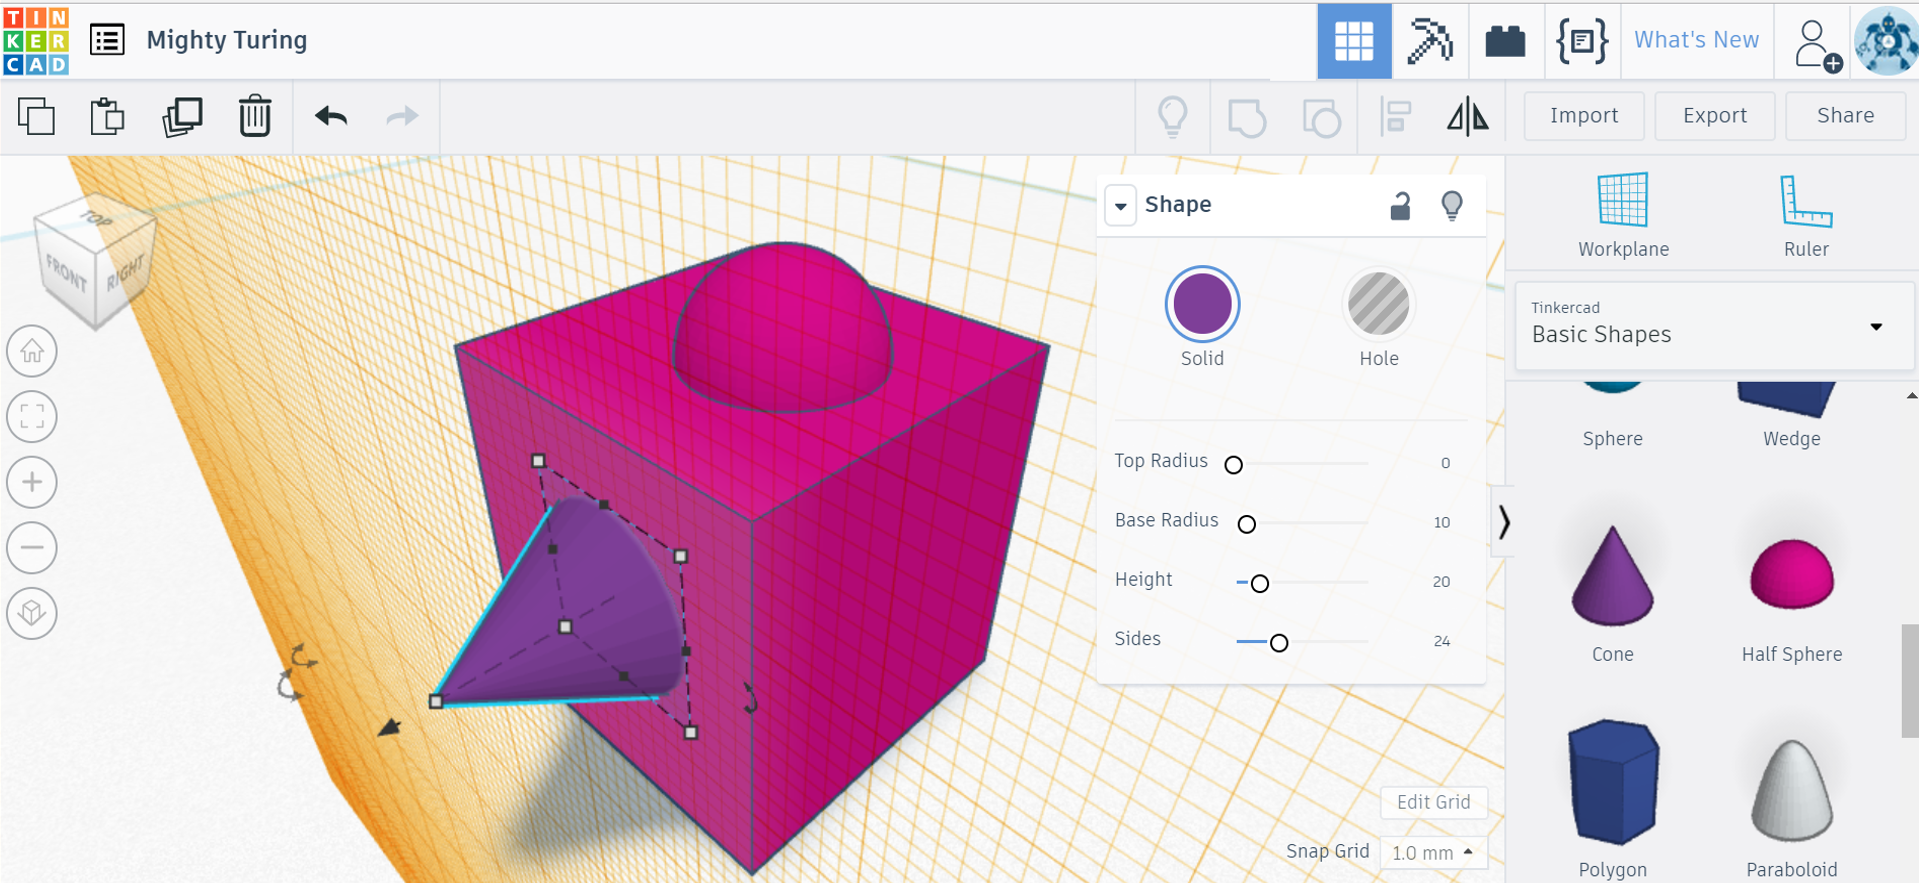
Select the Cone shape and go to the Shape dialogue box. Set your Top Radius to 3, Base Radius to 12 and your Sides to 64. You have created a truncated cone.
Select the Cone shape again and in the Shape dialogue box, set your Top Radius to 3, your Base Radius to 12 and your Sides to 8. You have now created a truncated pyramid.
Step 3
Practice building shapes in different workplanes.
So far, as you’ve been developing your shapes, you have been using the basic (x, y, z) Workplane to start your designs.
As your skills develop, you may wish to start building shapes on top of other shapes or on the side of other shapes. To do this, you will need to use the Workplane tool in the right-hand menu.
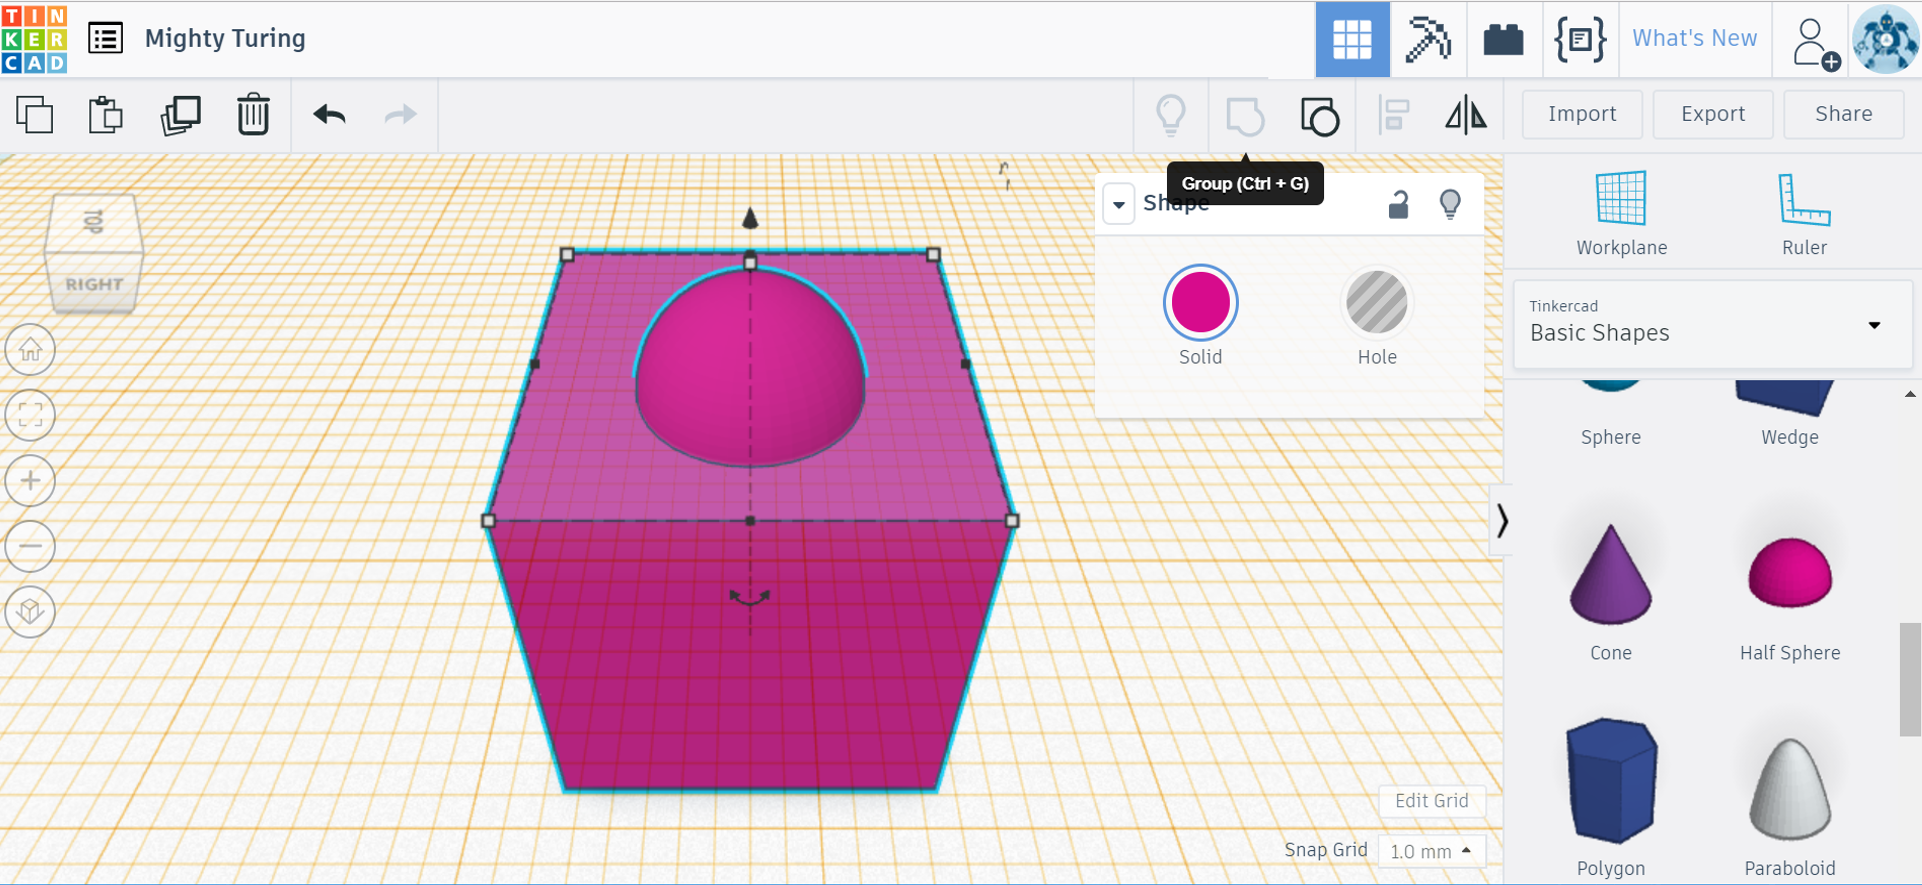
Select a cube and drop it on your basic workplane. Select the Workplane tool and hover over the top horizontal surface of the cube (you will see a white square with a white cone in its centre).
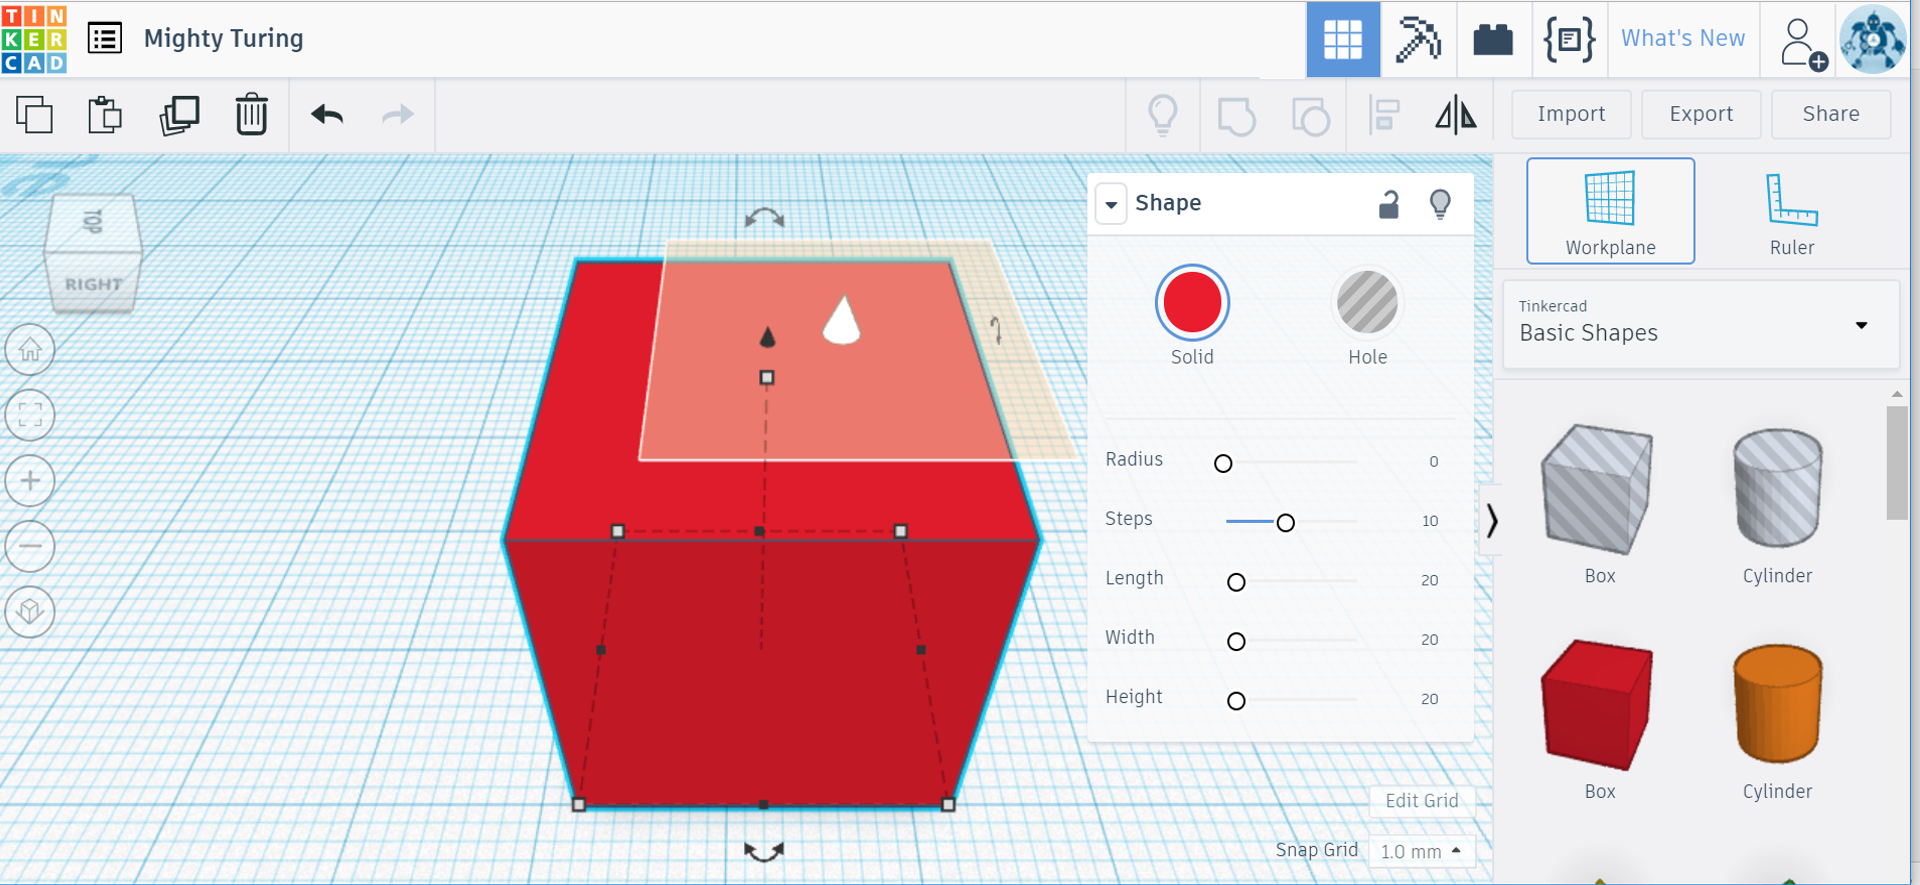
Select that face. You will see a new horizontal workplane grid in orange. Select a semi-sphere or another shape to build on that new workplane.
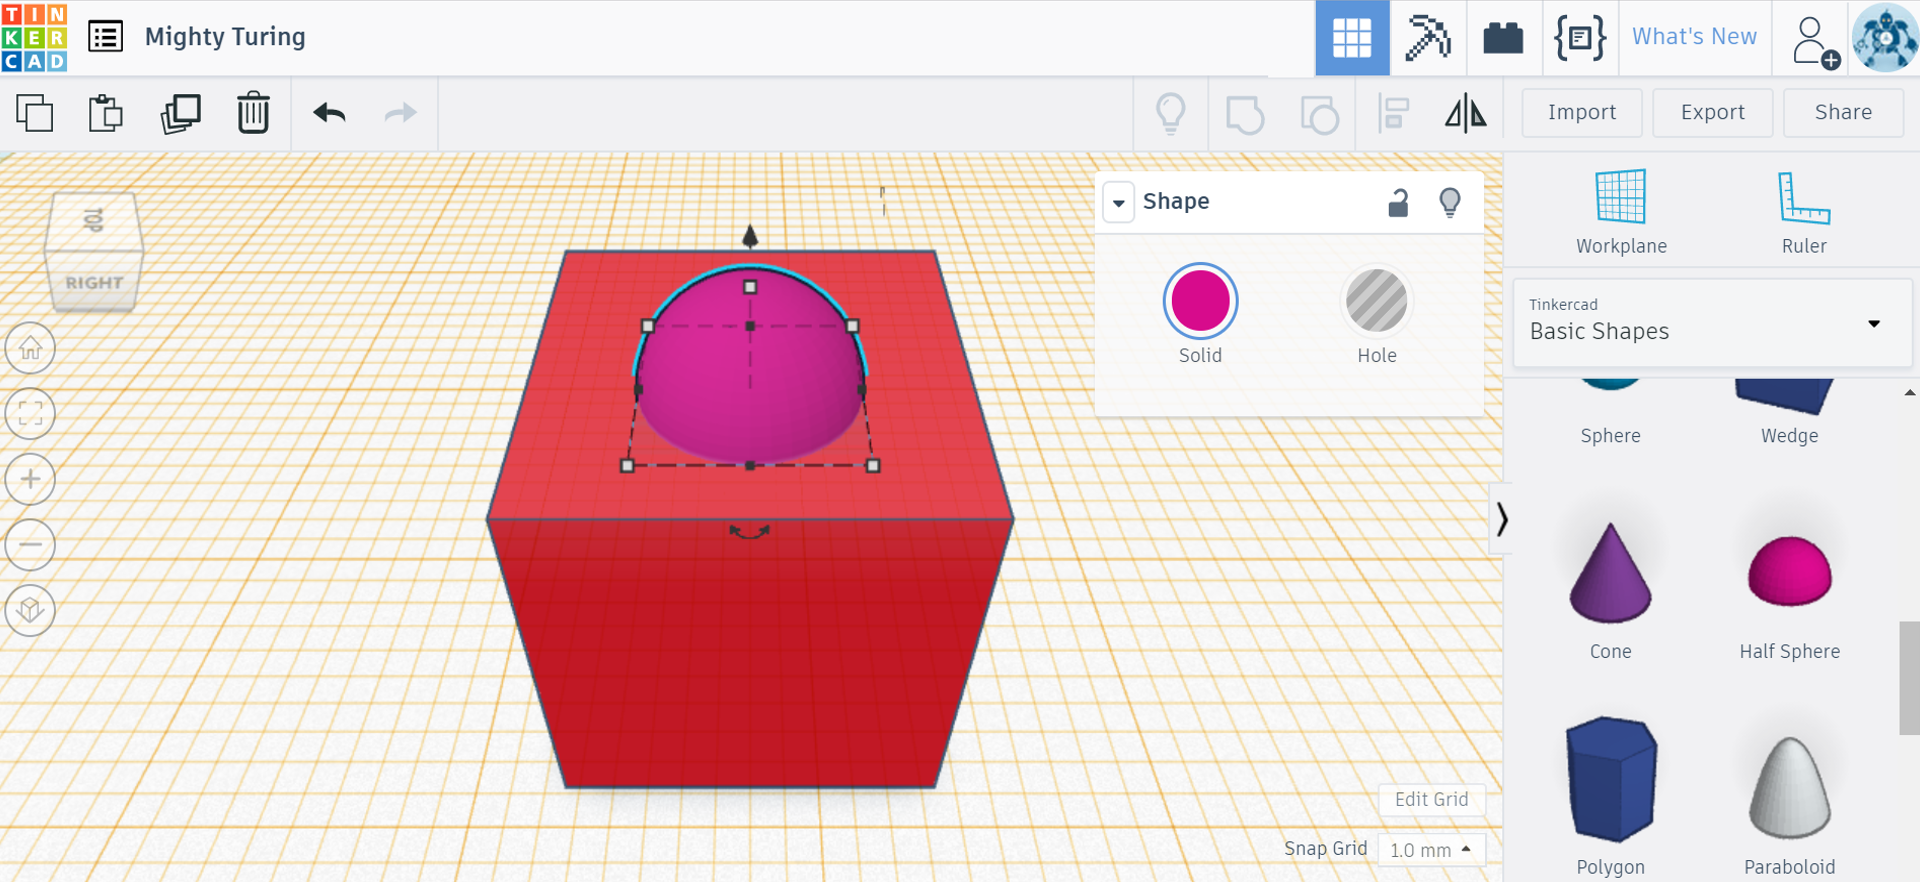
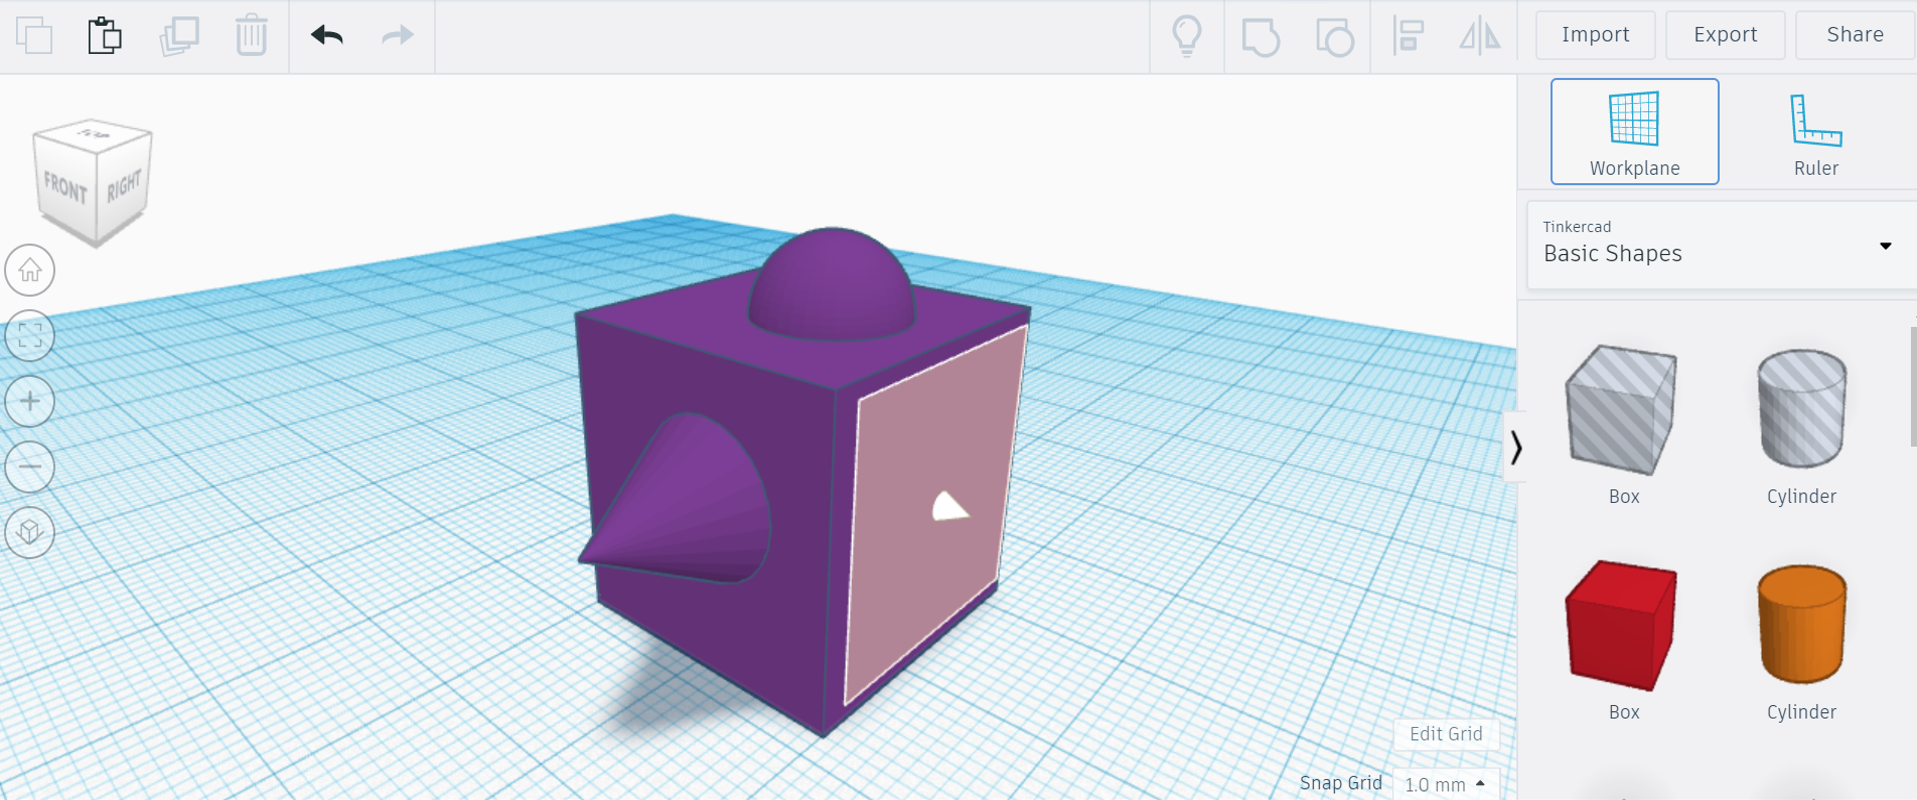
Since those two shapes are adjoining, you can now select them both and select the command Group to join them into one shape.
Now that you can create new horizontal workplanes, practice setting up vertical workplanes. Select your workplane tool and hover over a vertical side of the cube.
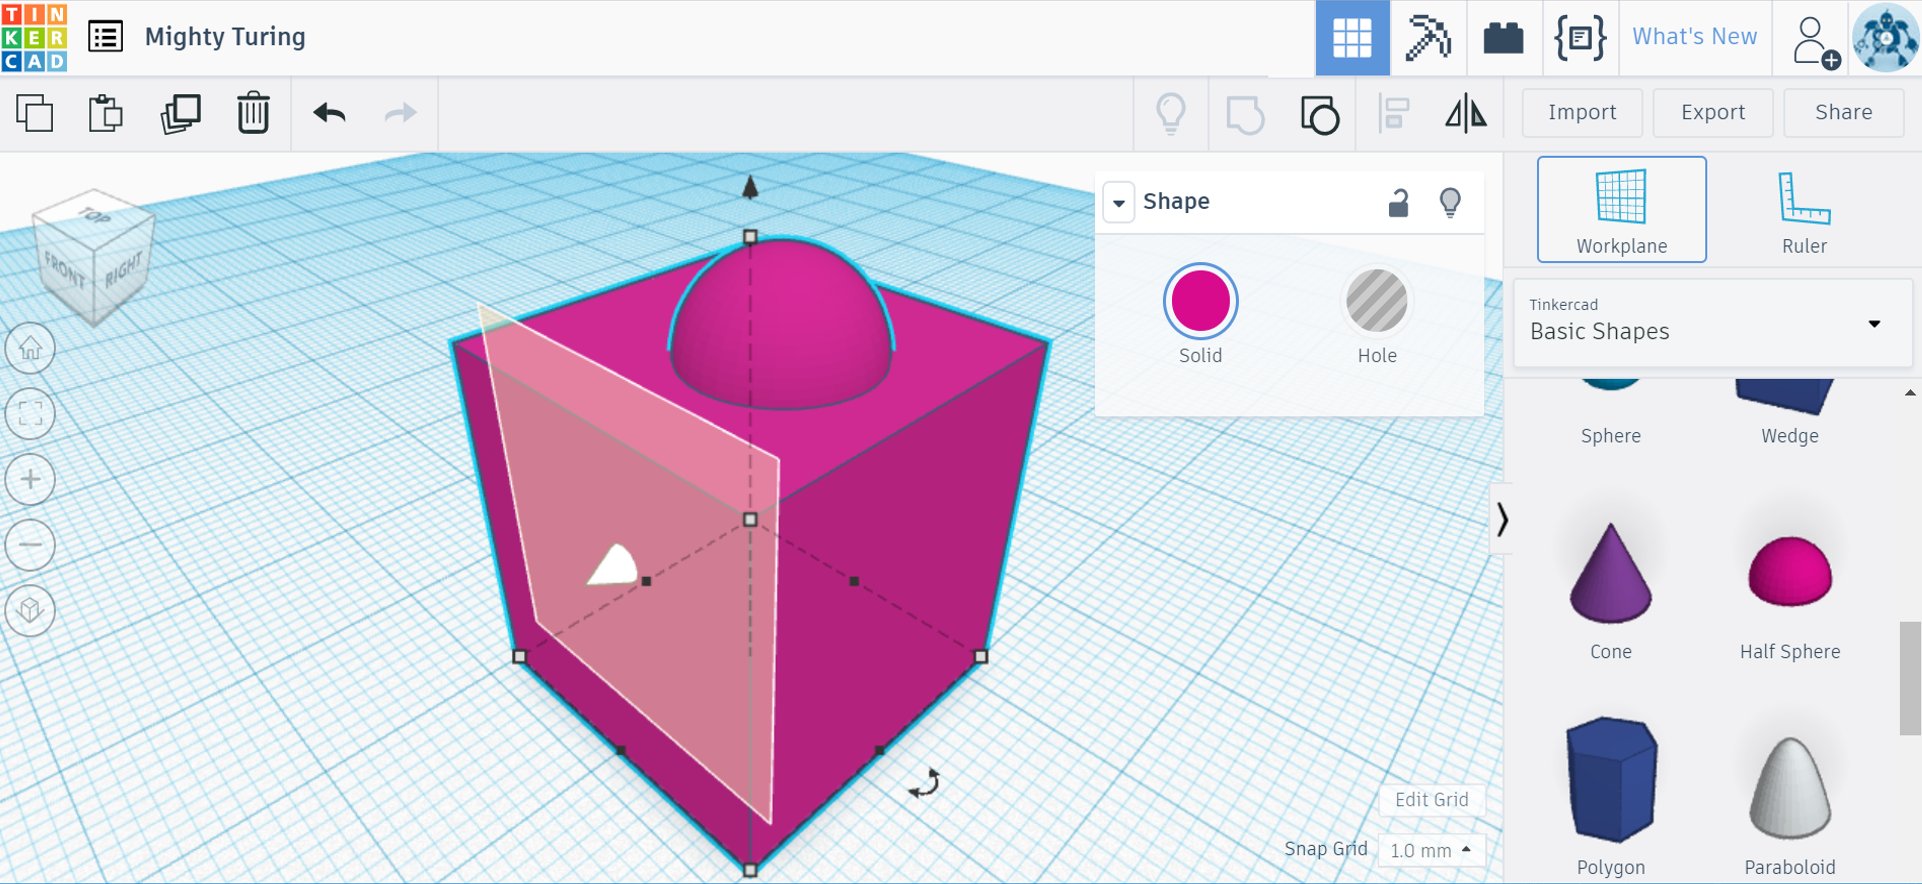
Select that face. You will see a new vertical workplane grid in orange. Select a cone or another shape to build on that new workplane.
Use the command Group to join those two shapes into one complex shape.

Alternatively, you can also use these workplanes to create holes halfway through a shape. Start by creating a new workplane on a previously unused face of your cube.
Select the Hole Cylinder tool and draw a hole cylinder on the side of your cube. You’ll notice that your cube and your hole are not currently intersecting, so there is no hole of your cube.
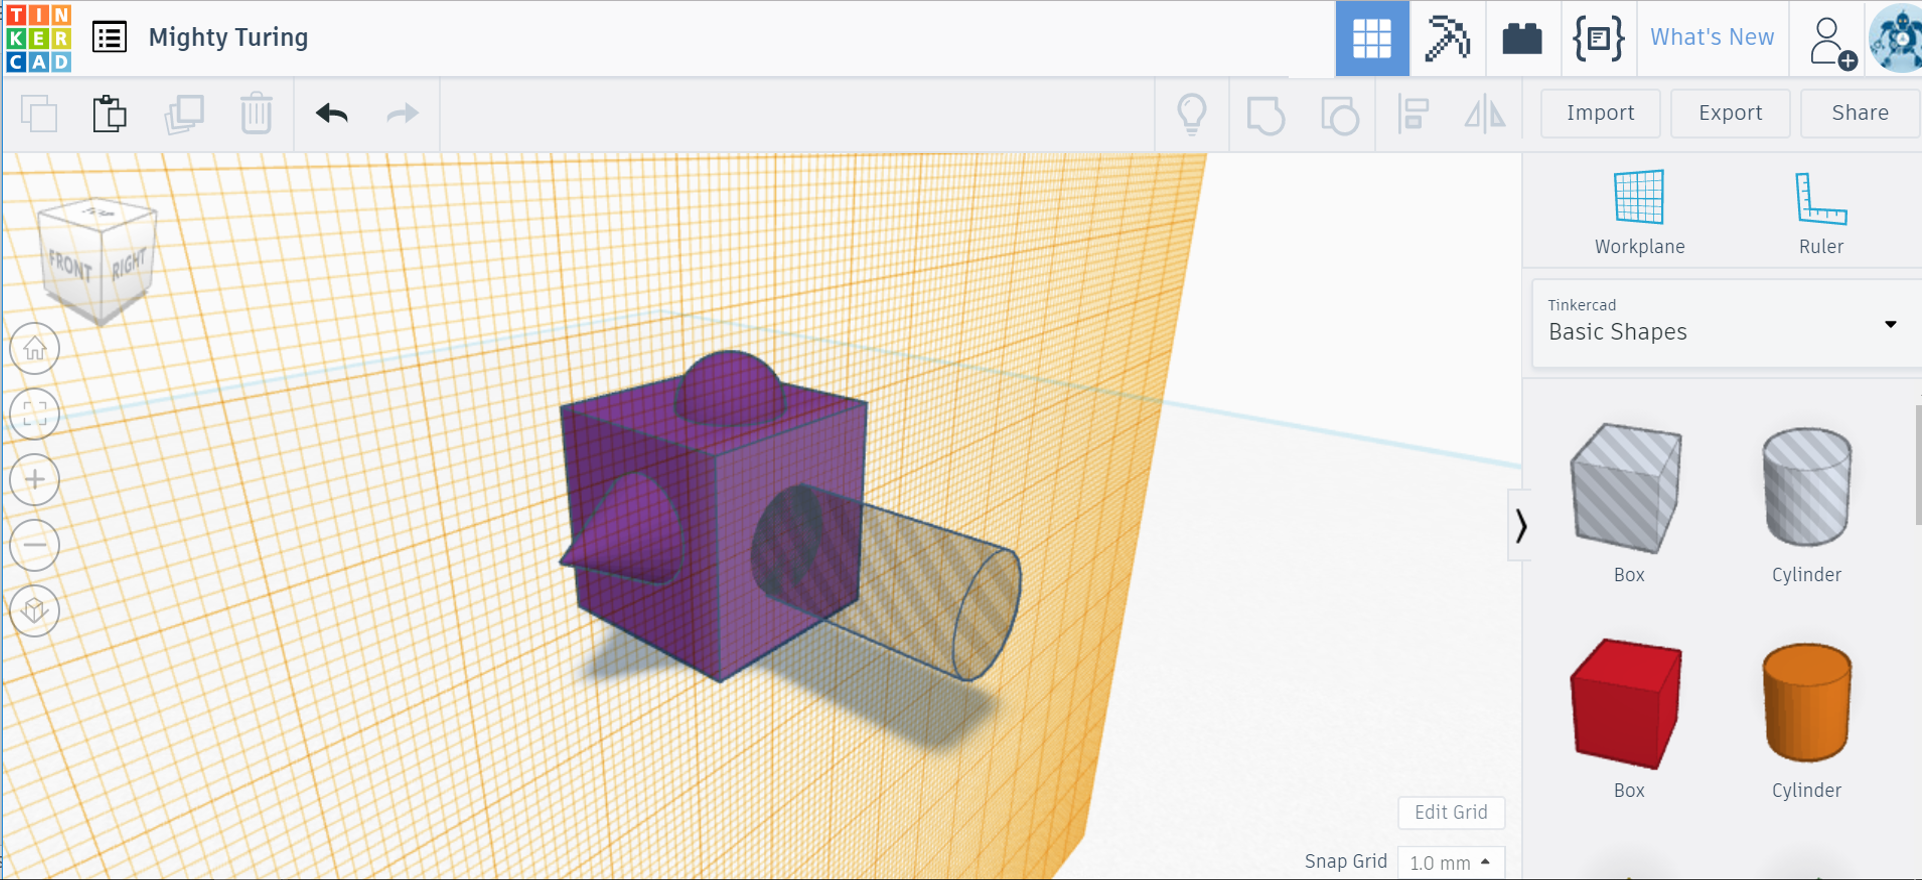
Select your hole and you will notice a small cone hovering above your hole shape.
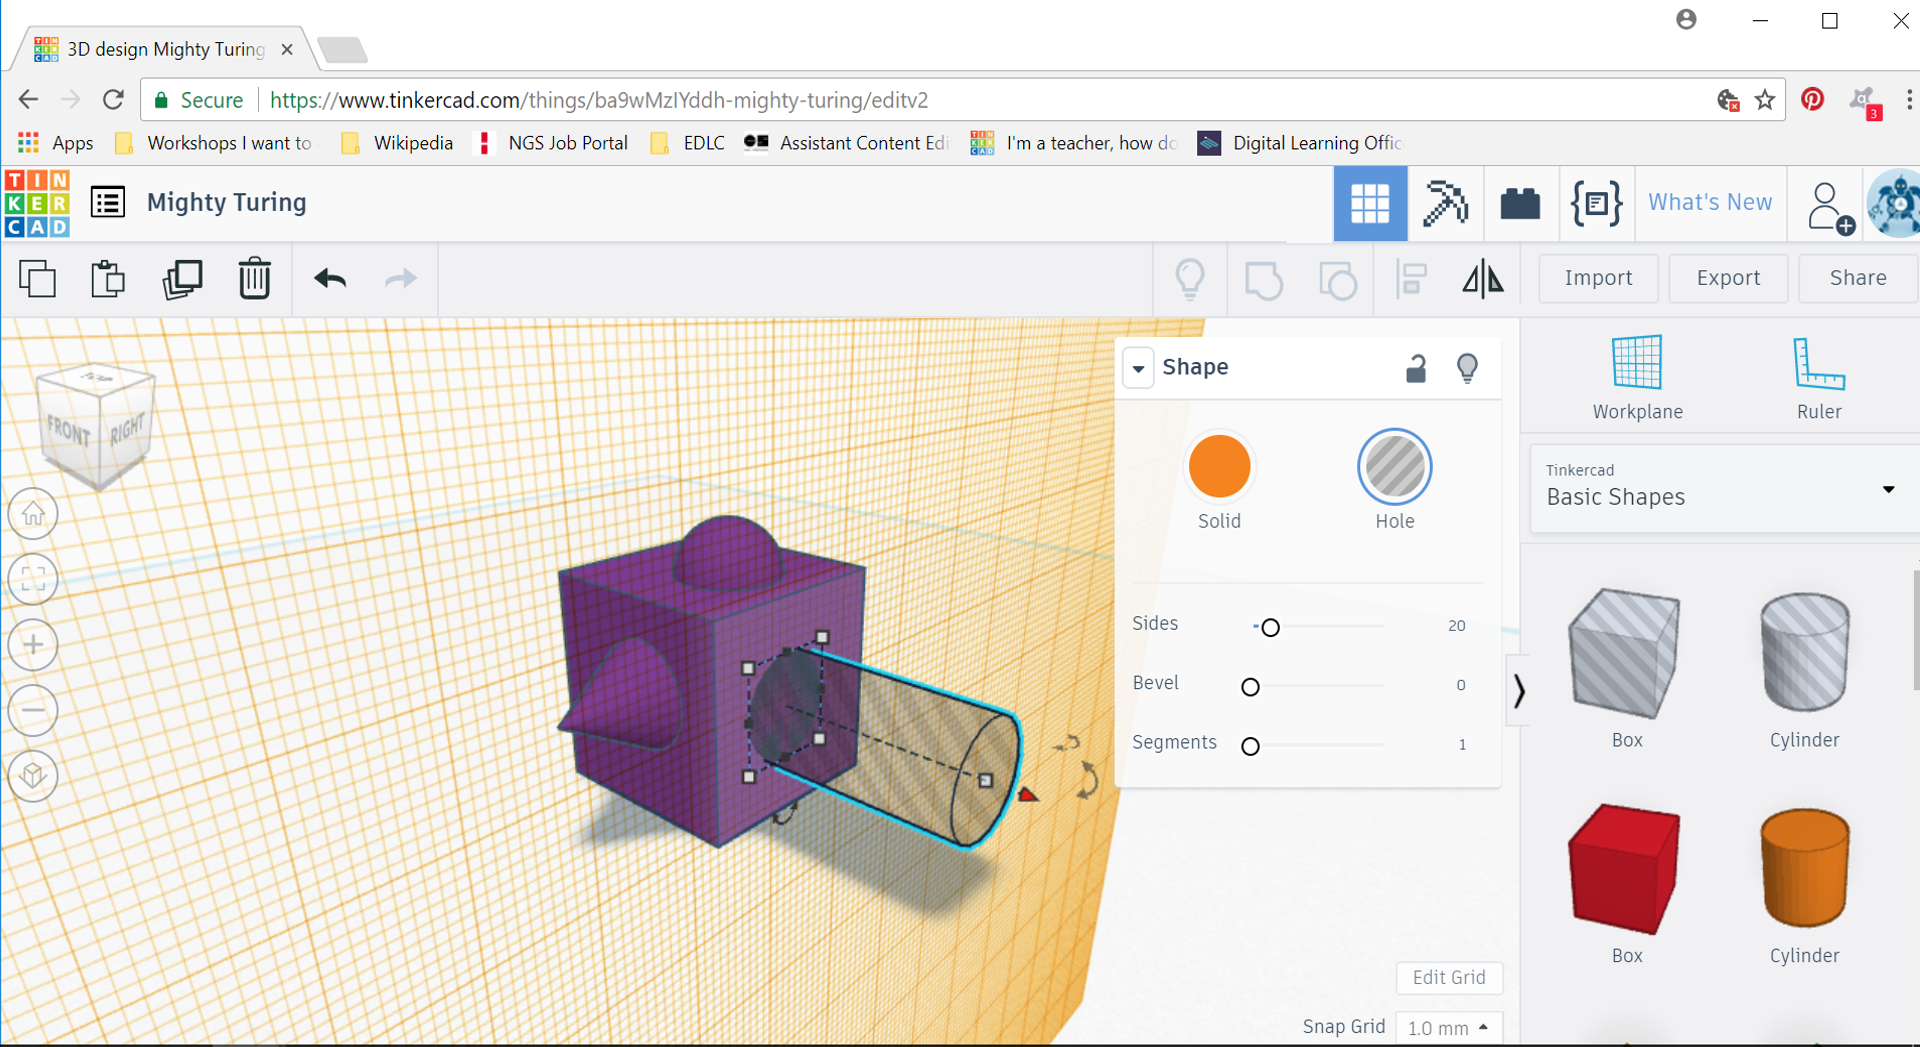
Select the cone and it will allow you to push the hole back and forth into the cube, giving you control over how deep a hole you wish to create.
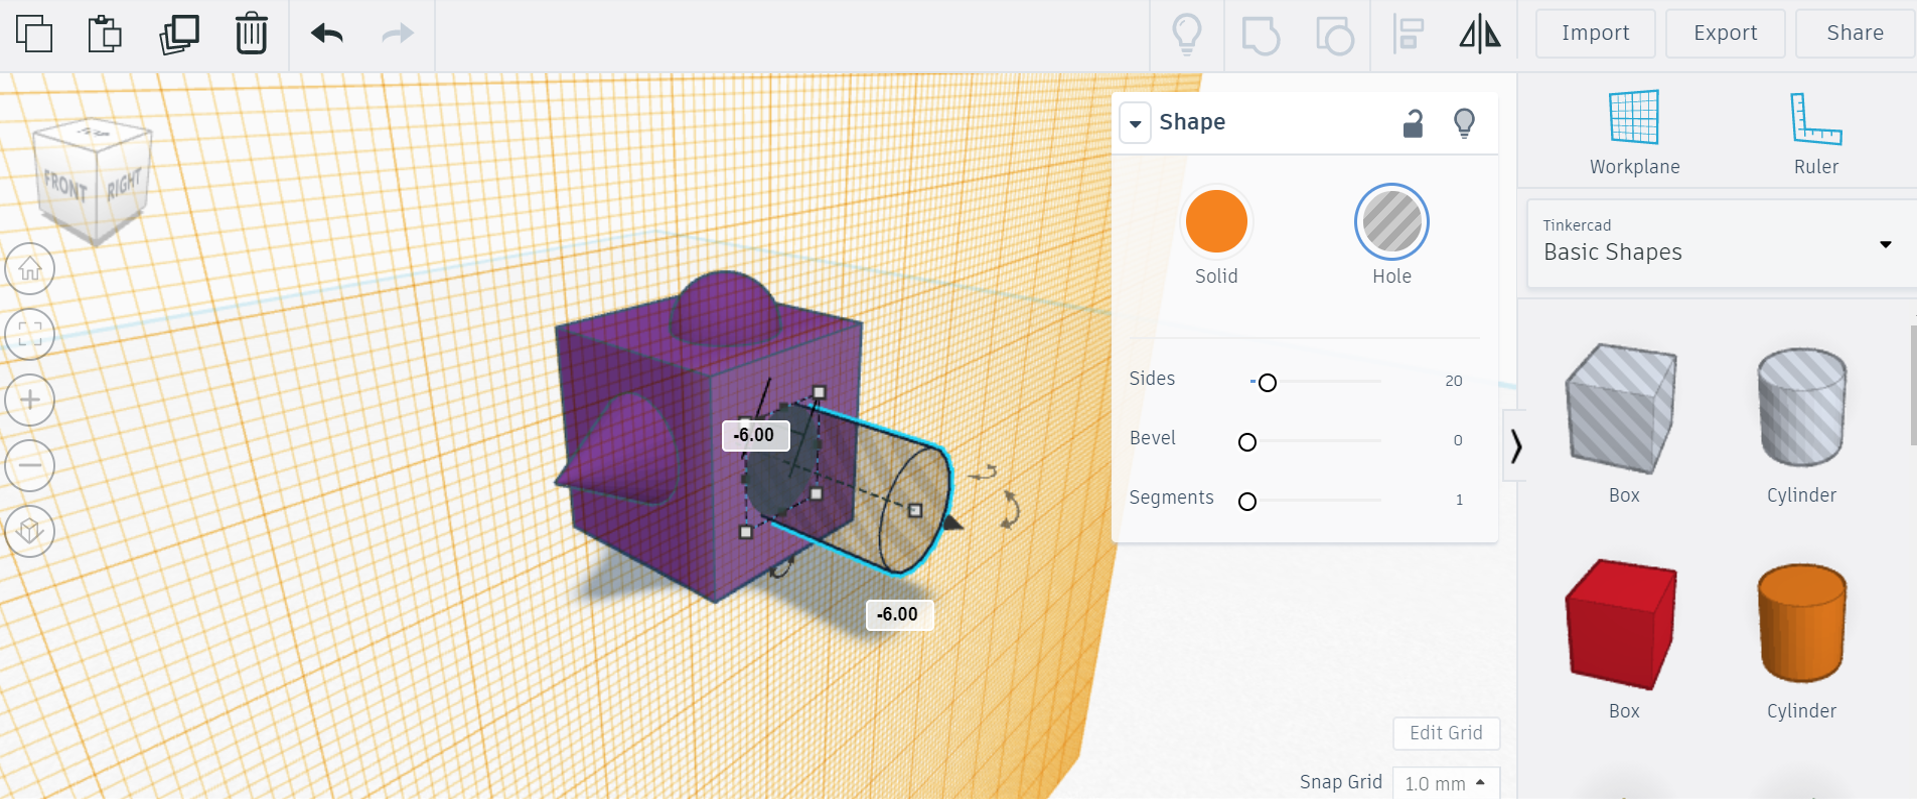
Once you’re satisfied with the position of the hole, you can select Group to see the final results.
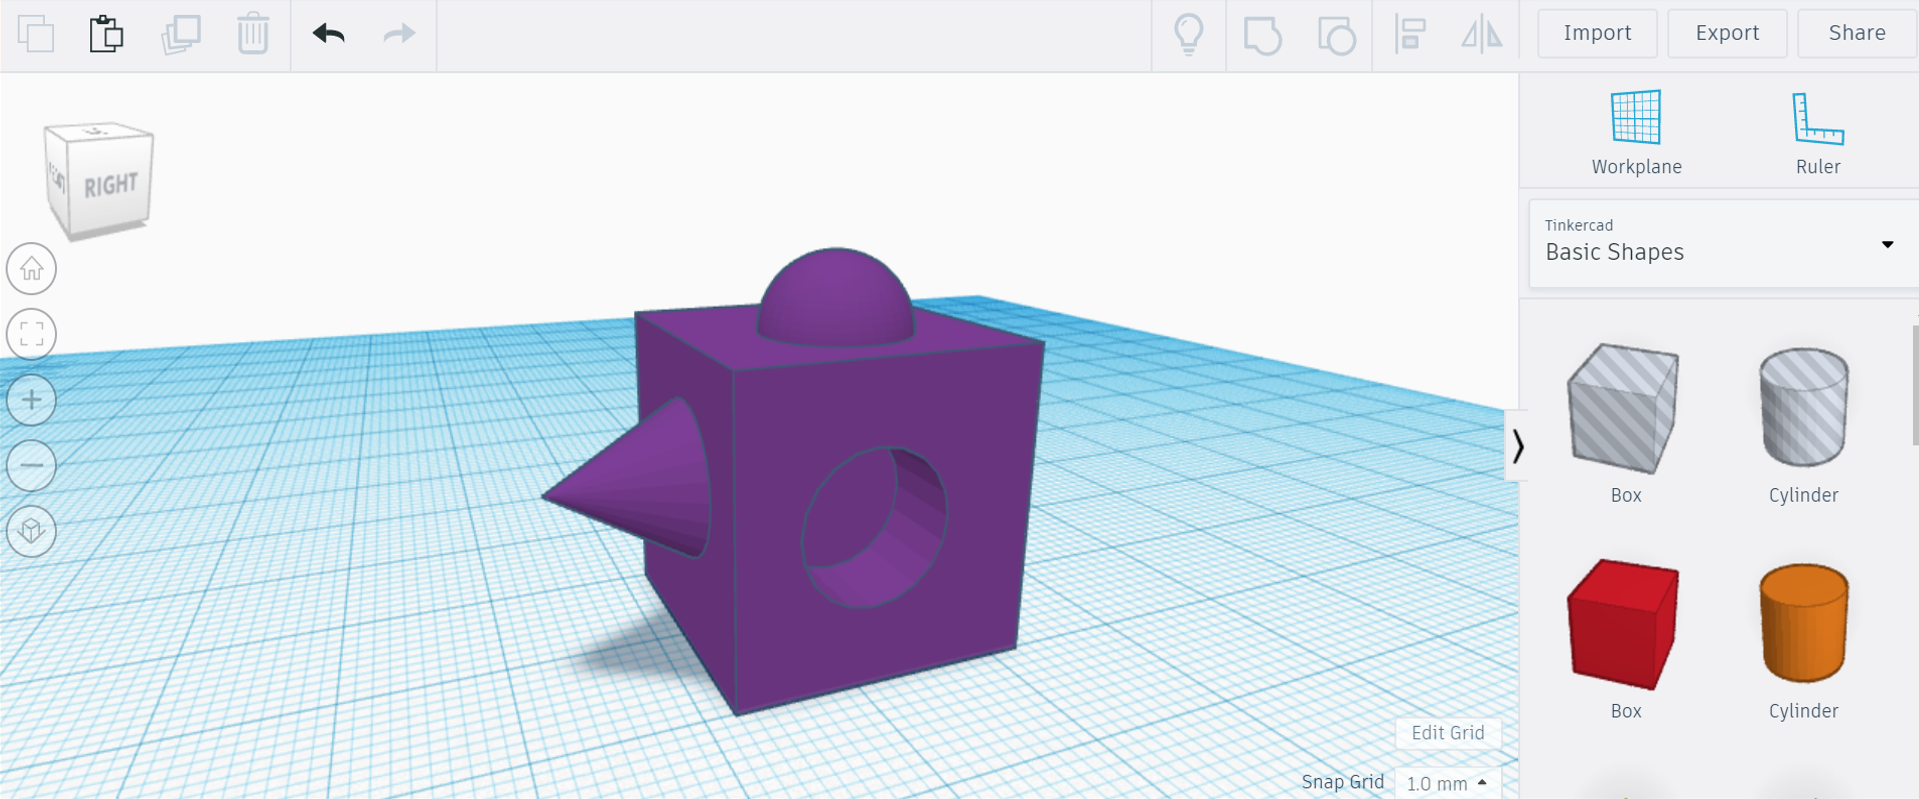
Congratulations! You can now add and subtract shapes to and from each other using both vertical and horizontal workplanes.
Step 4
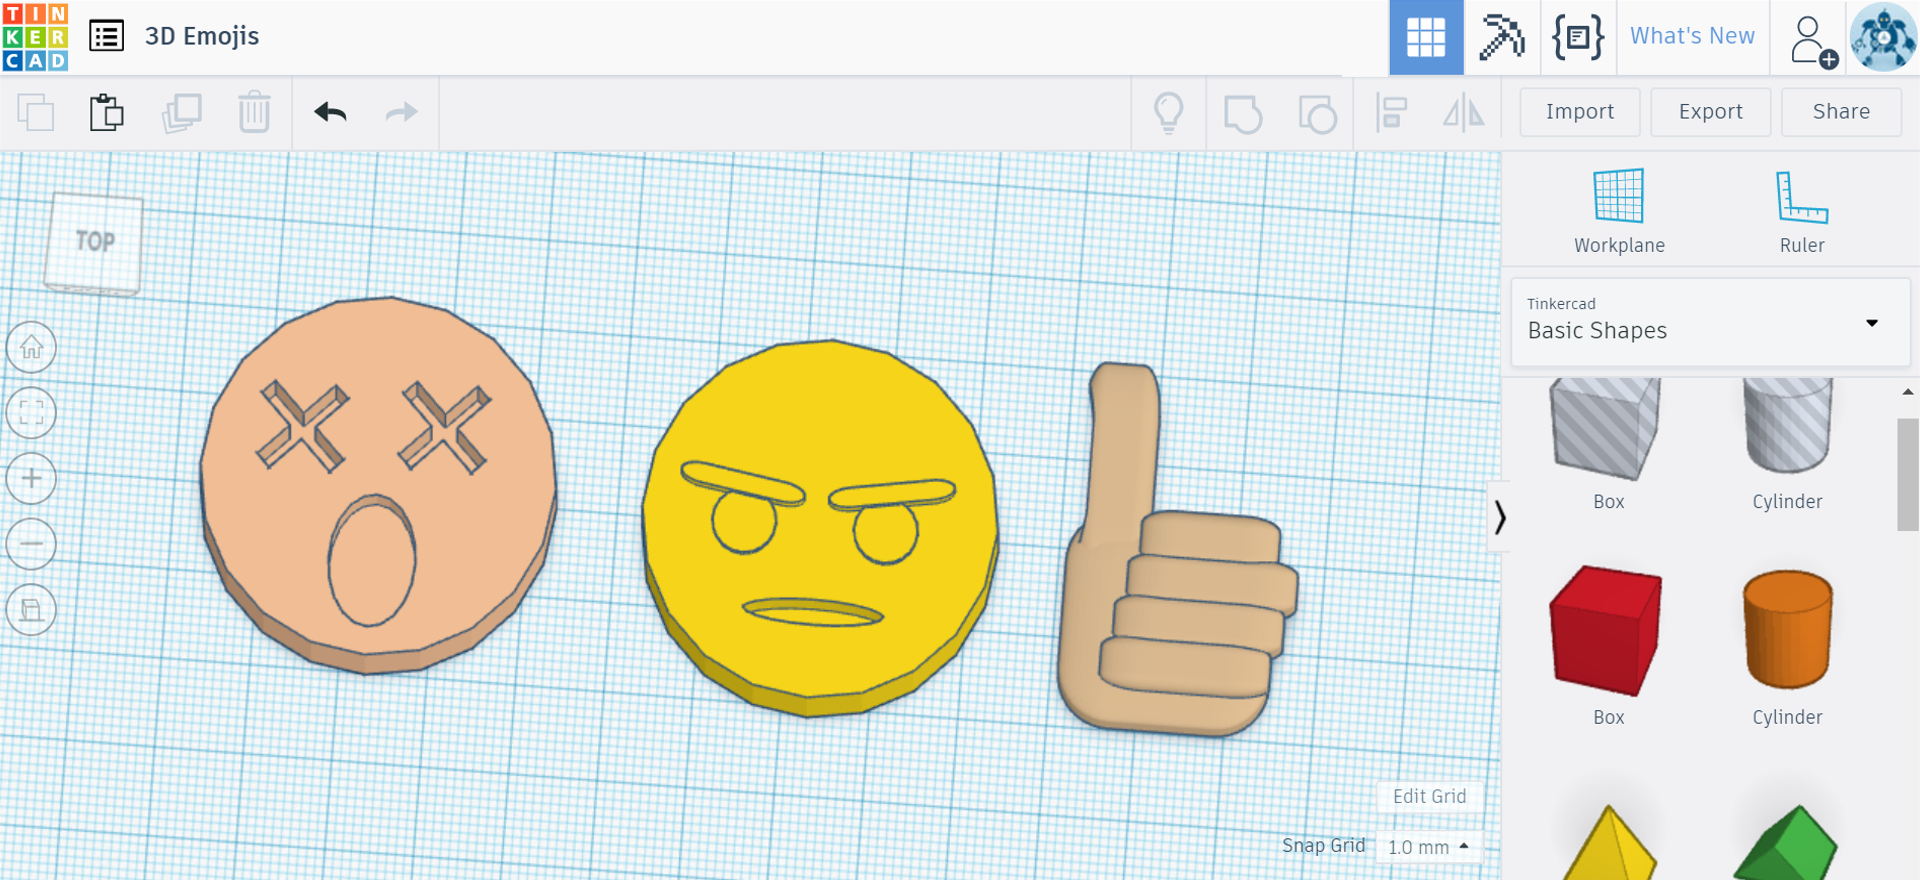
Now that you’ve had a practice with all the TinkerCAD tools, you have 15 - 20 mins to experiment and create your own choice of 3D emoji.