Course navigation
3D Printing Set Up
Step 1
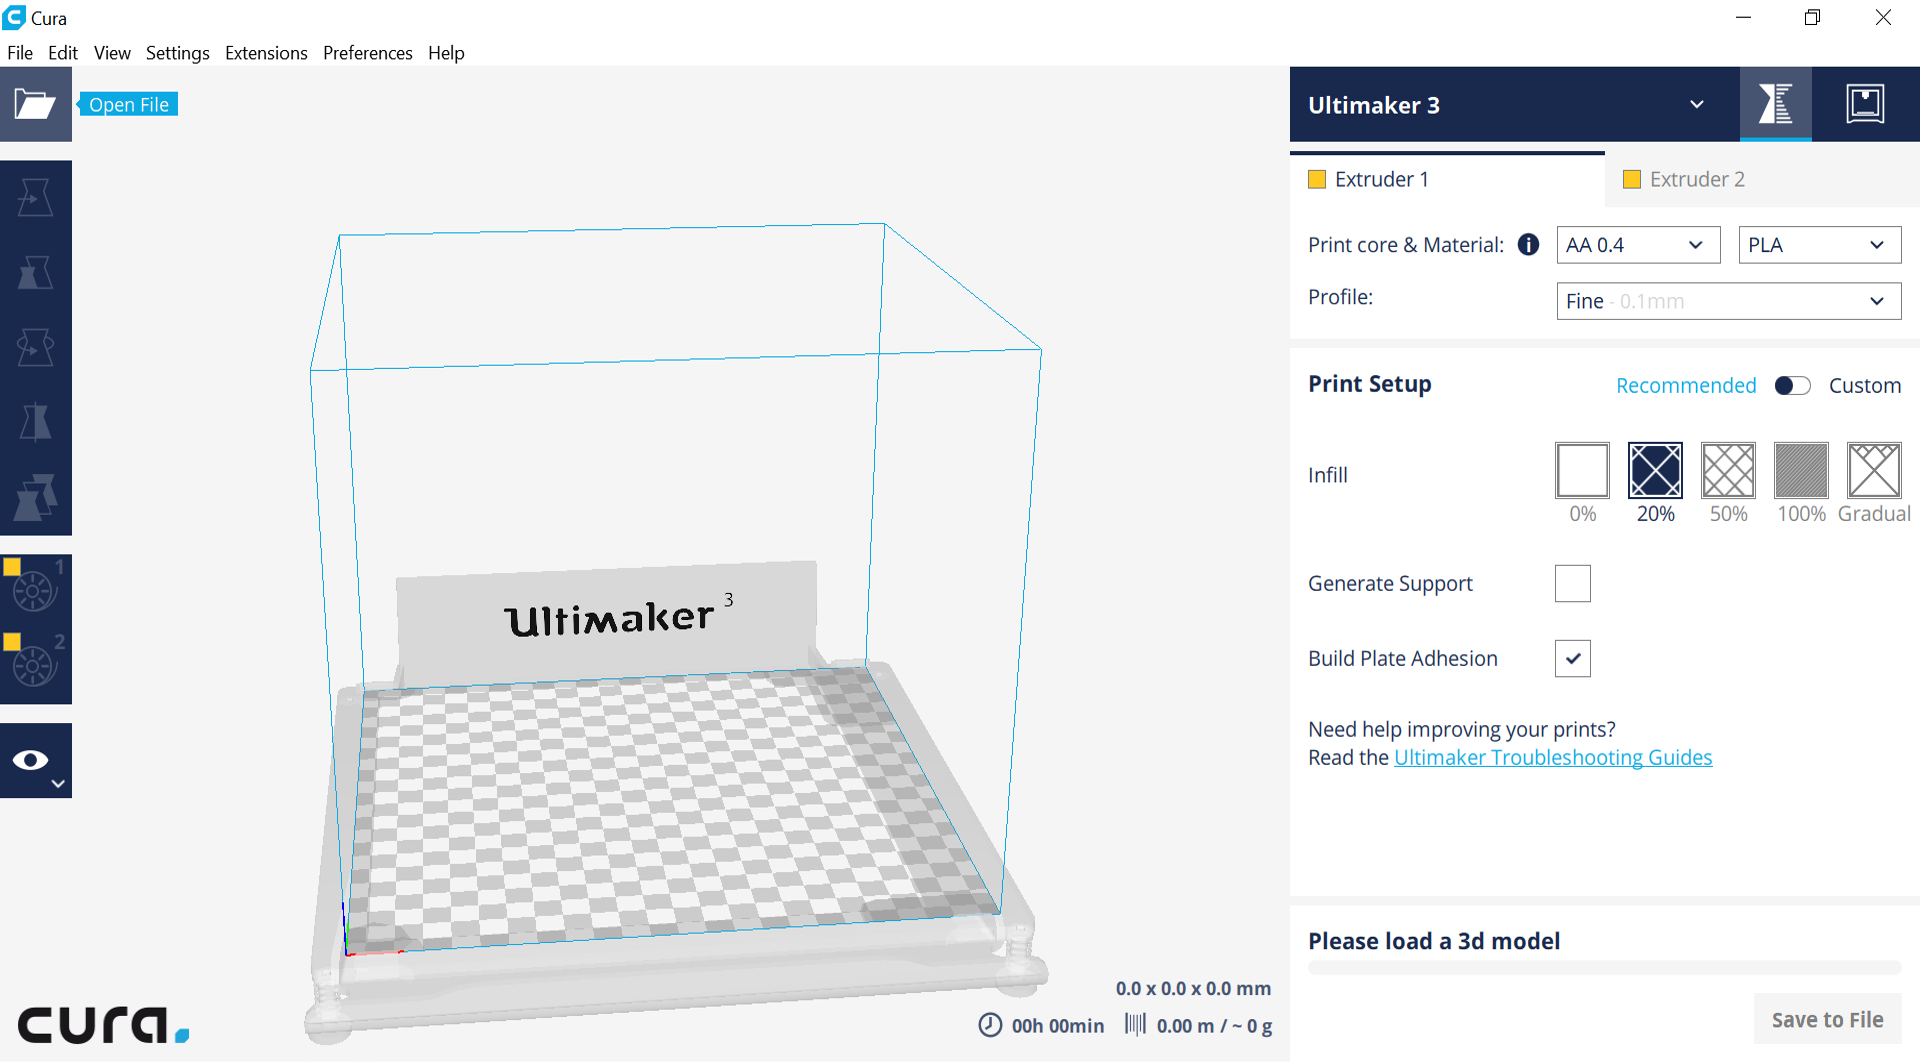
Find the Cura icon on your desktop and open the program.

Select Open File and import your perfume bottle 3D model.
Step 2
Use the Rotate tool to make sure that it is sitting flat on its base.
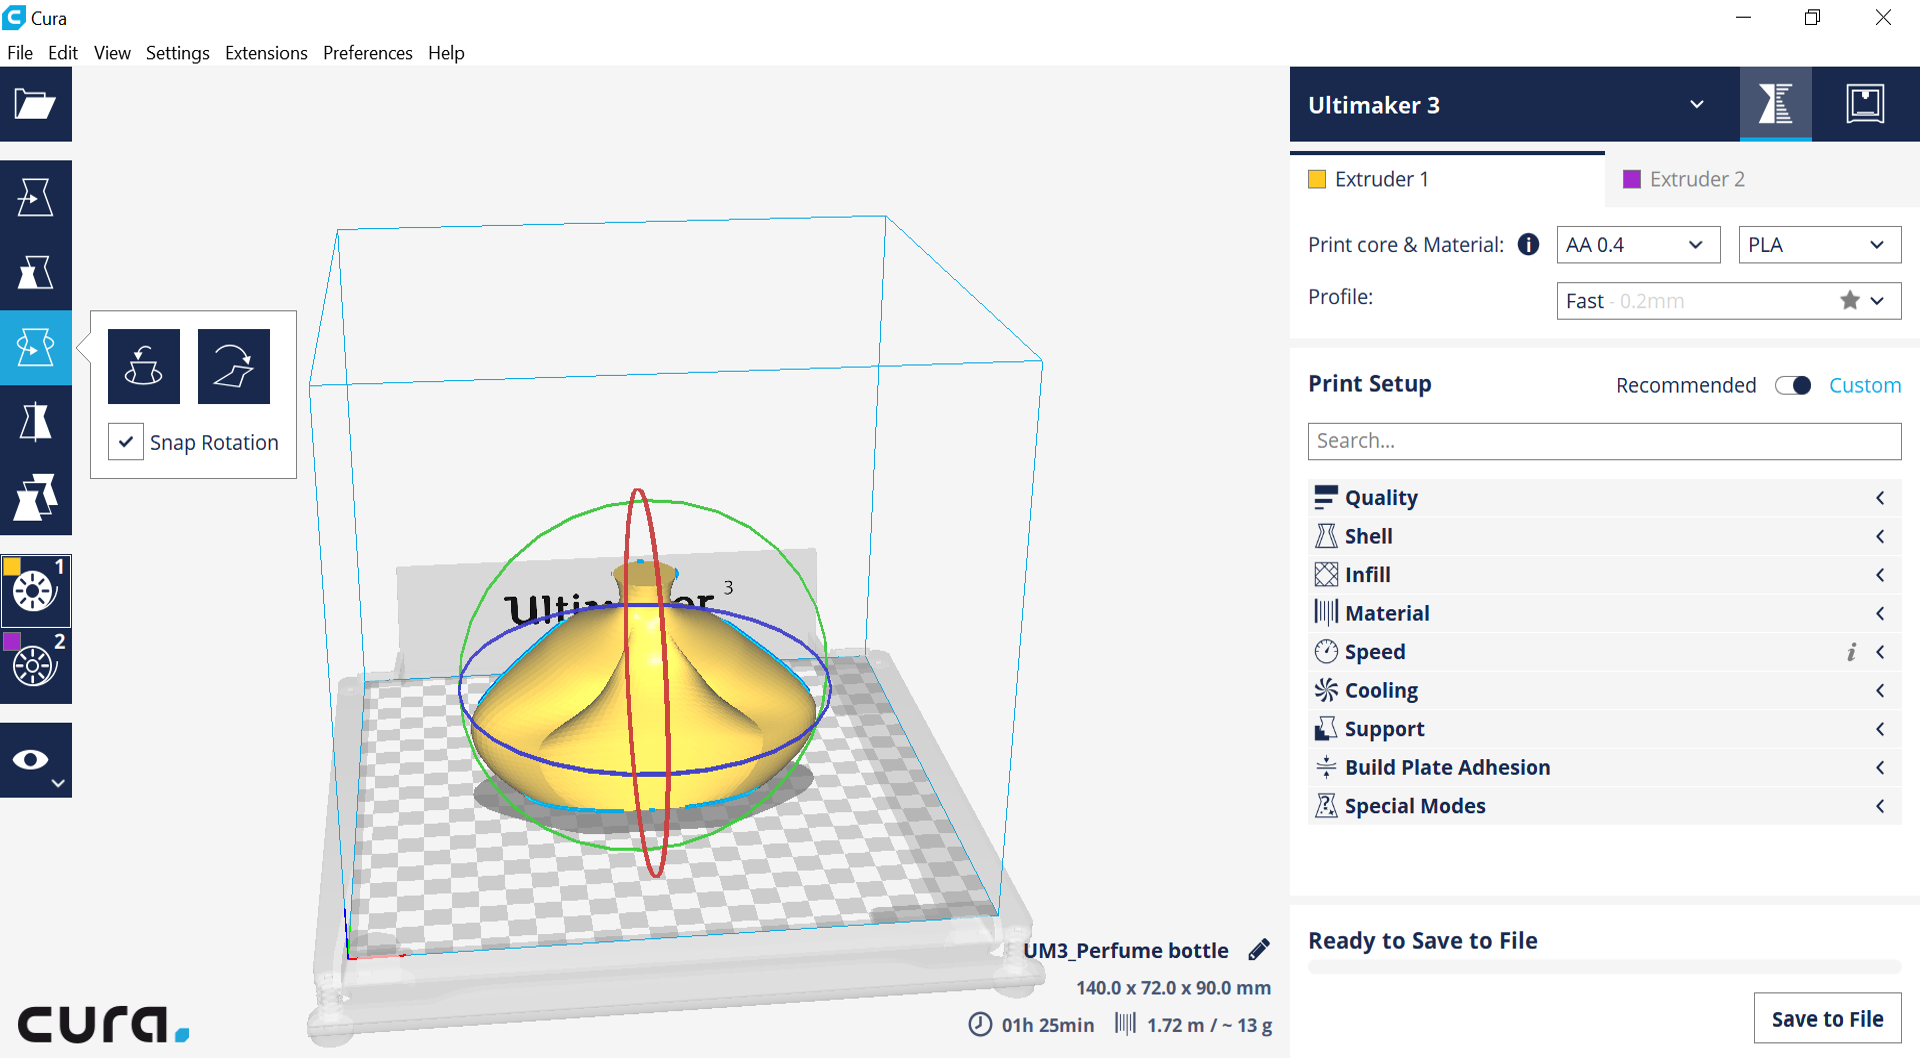
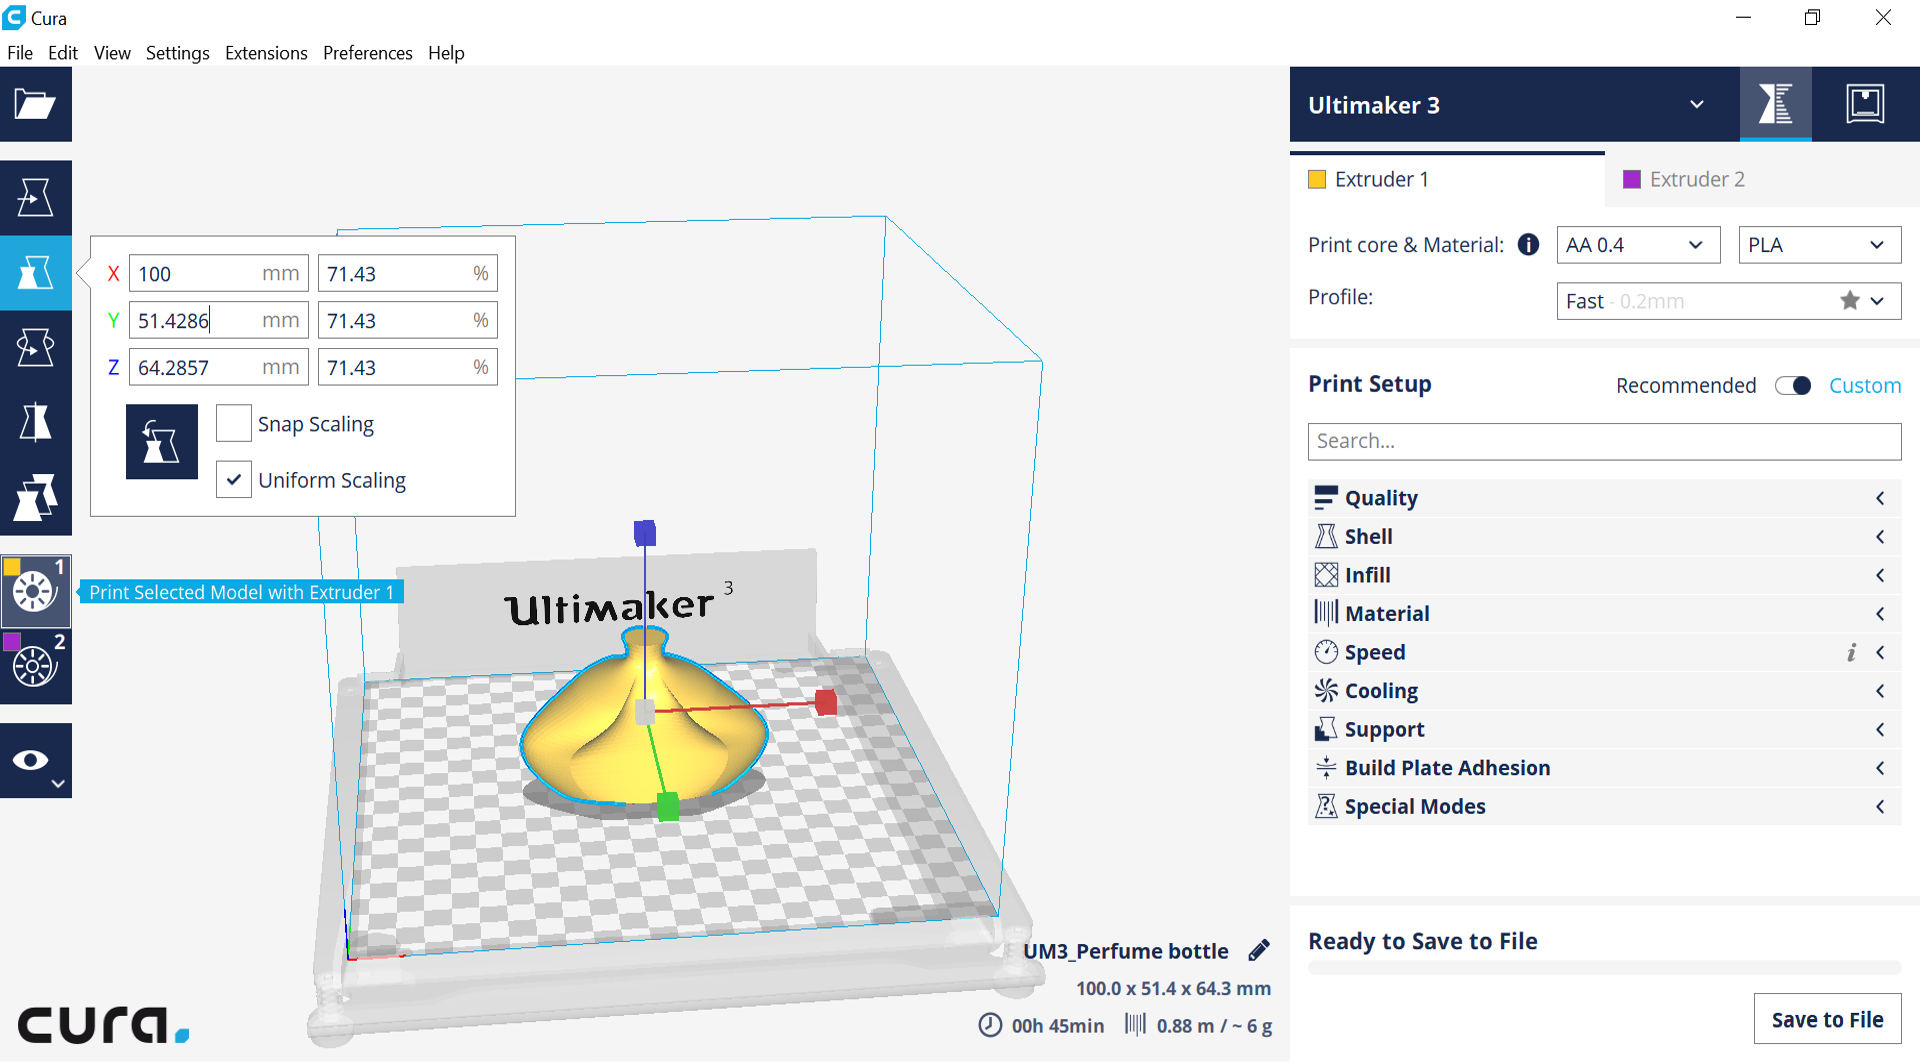
Use the Scale tool to resize your prototype to around 100mm on its longest measurement and check that your model is set to Extruder 1 (the reel icon should be highlighted in white).
Step 3
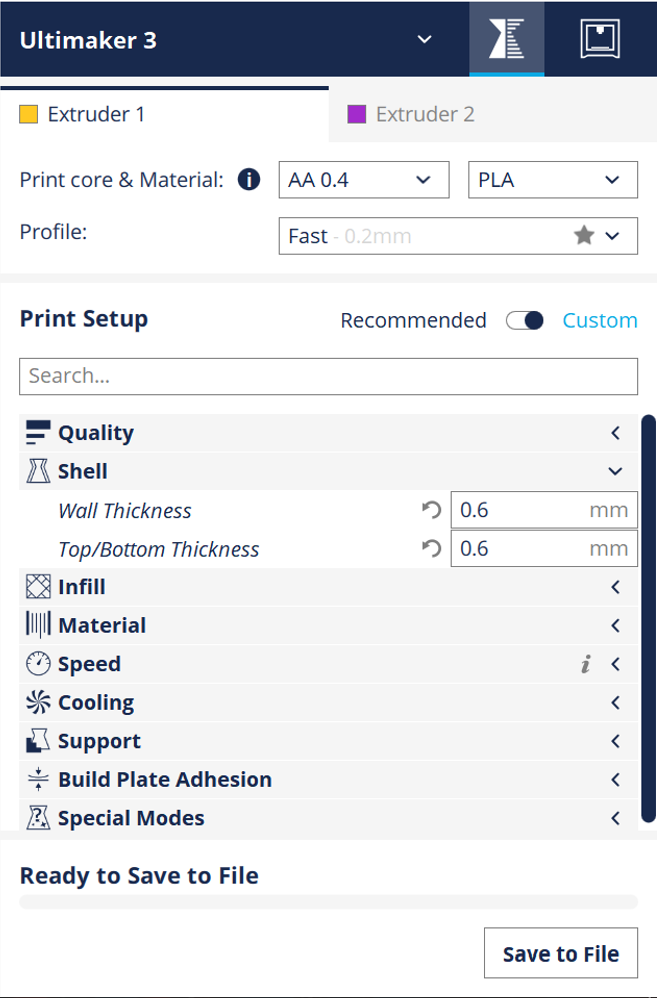
In the right-hand menu, select your printing settings for Extruder 1.
In Quality, set the Layer Height to 0.2mm.
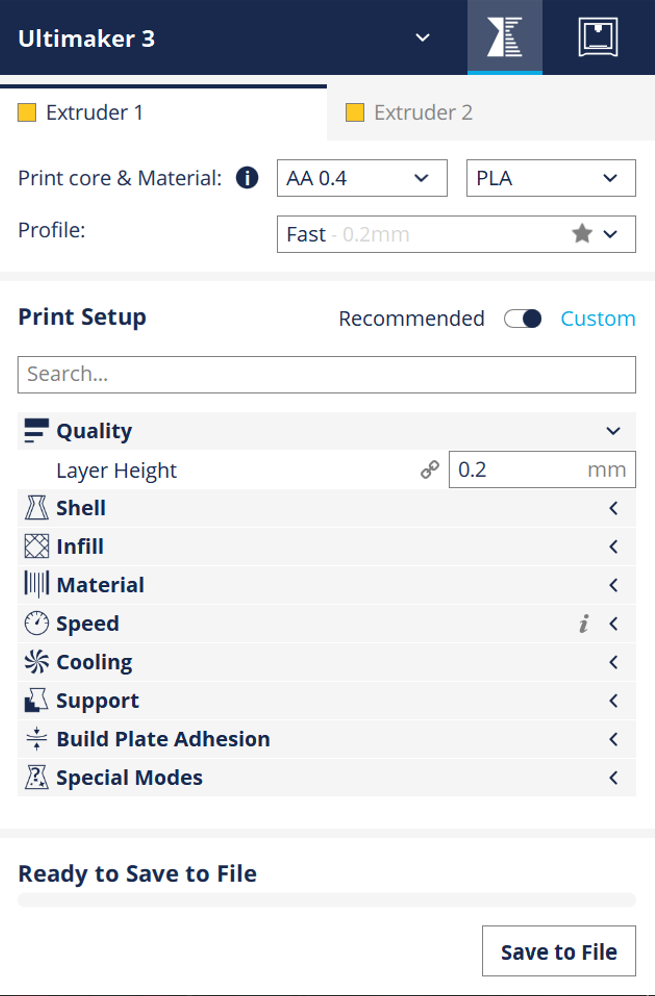
In Shell, set a Wall Thickness and Top/Bottom Thickness to 0.6 mm.
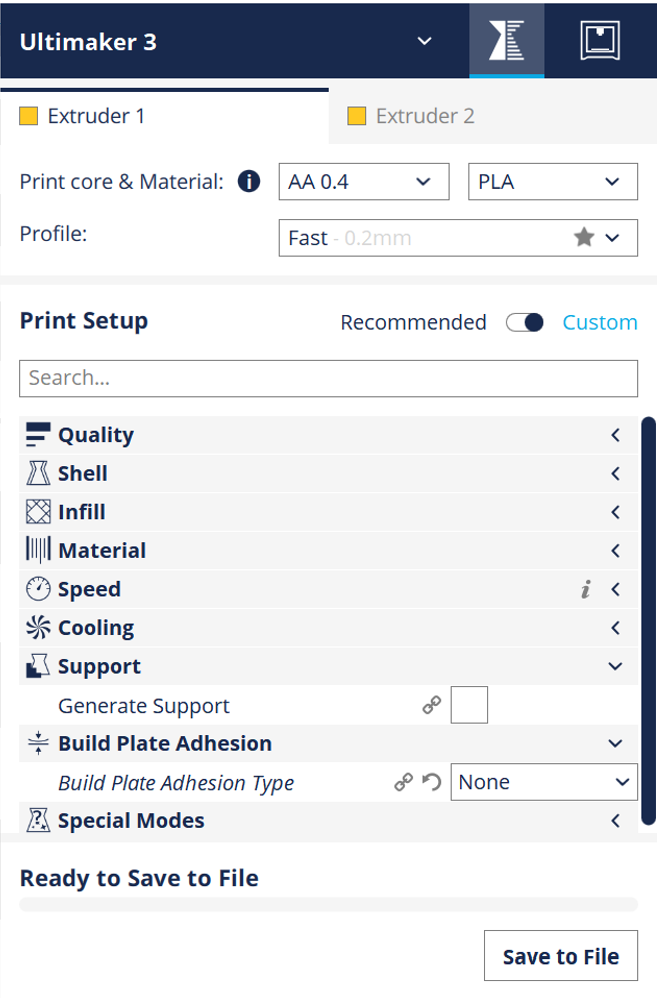
Go to Support and check that Generate Support is deselected. Go to Buildplate Adhesion and select None in Buildplate Adhesion Type.
In Special Modes, select Spiralize Outer Contour.
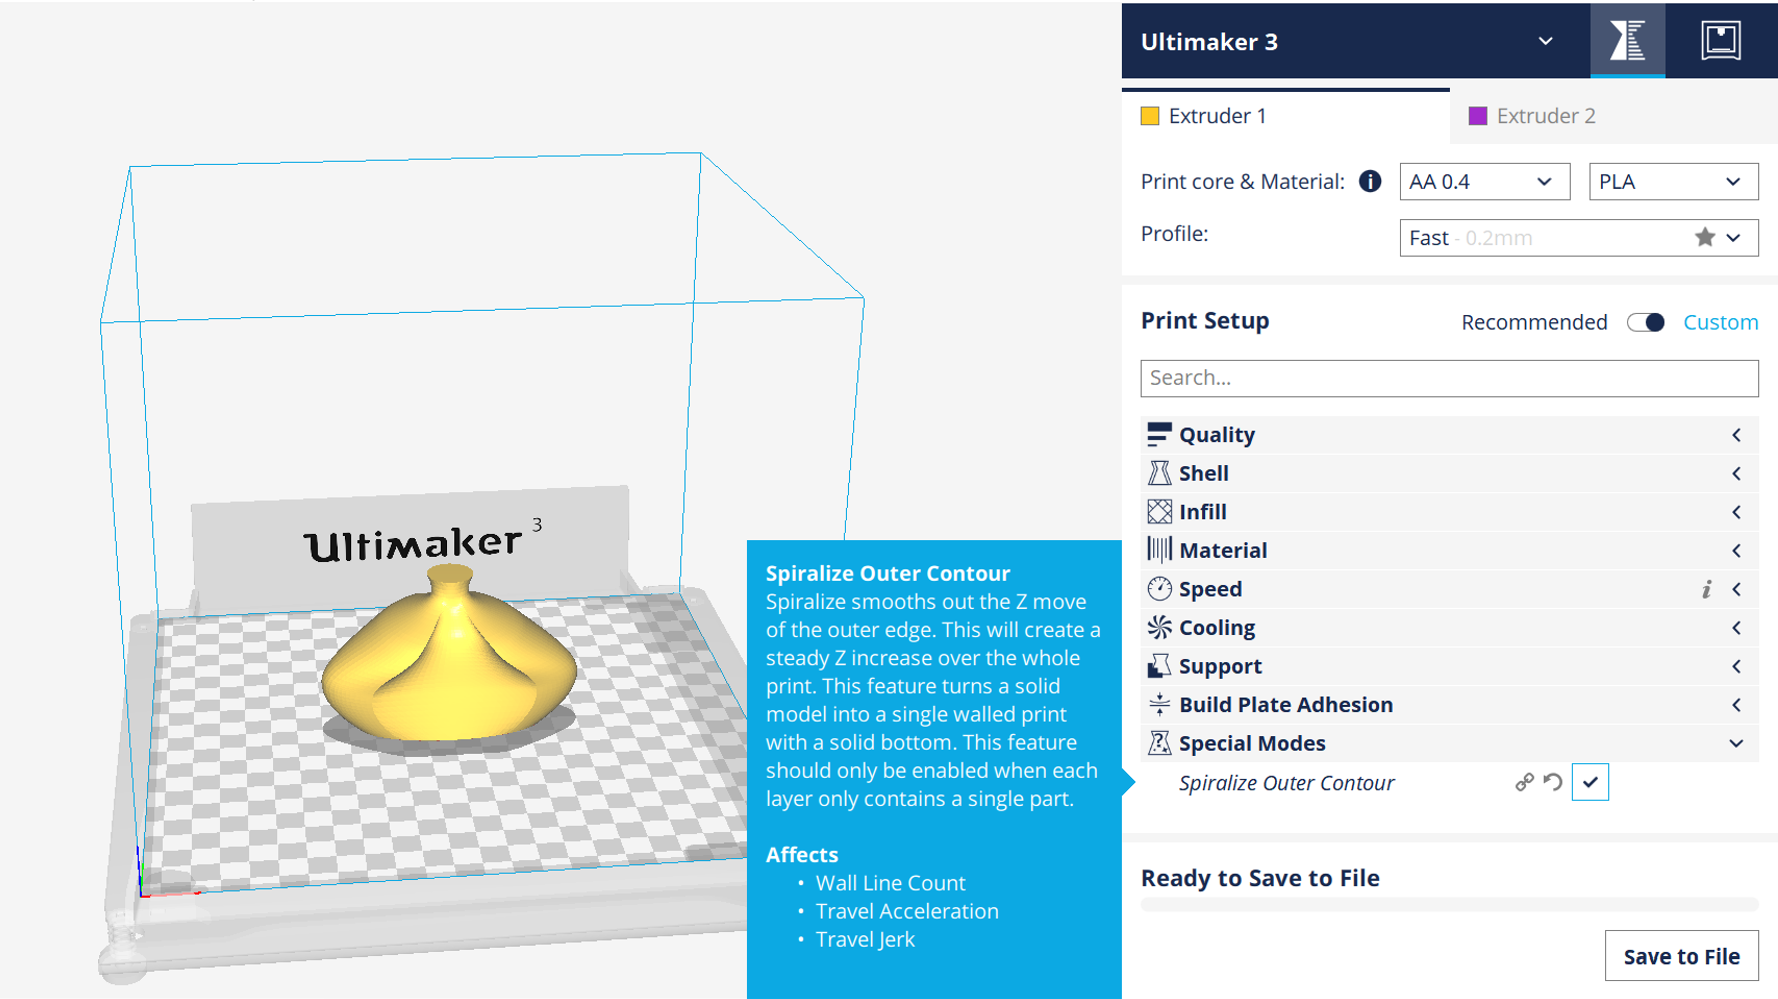
This option is particularly well suited to 3D models created using parametric tools such as Revolve, Loft or Sweep. The Spiralize mode disables the infill setting and maps out the outer contour of your model so it can be printed in a continuous one-shell extrusion. This method of printing is particularly useful when rapid prototyping as it allows us to 3D print large objects accurately in a short period of time.
Your model is now fully setup for 3D printing.
Step 4
You are now ready to save your file. Insert a USB stick in your computer and go to the bottom right hand corner of your screen and click Save to File. Use the drop-down arrow next to Save to File to check that it is saving to your Removable Drive.
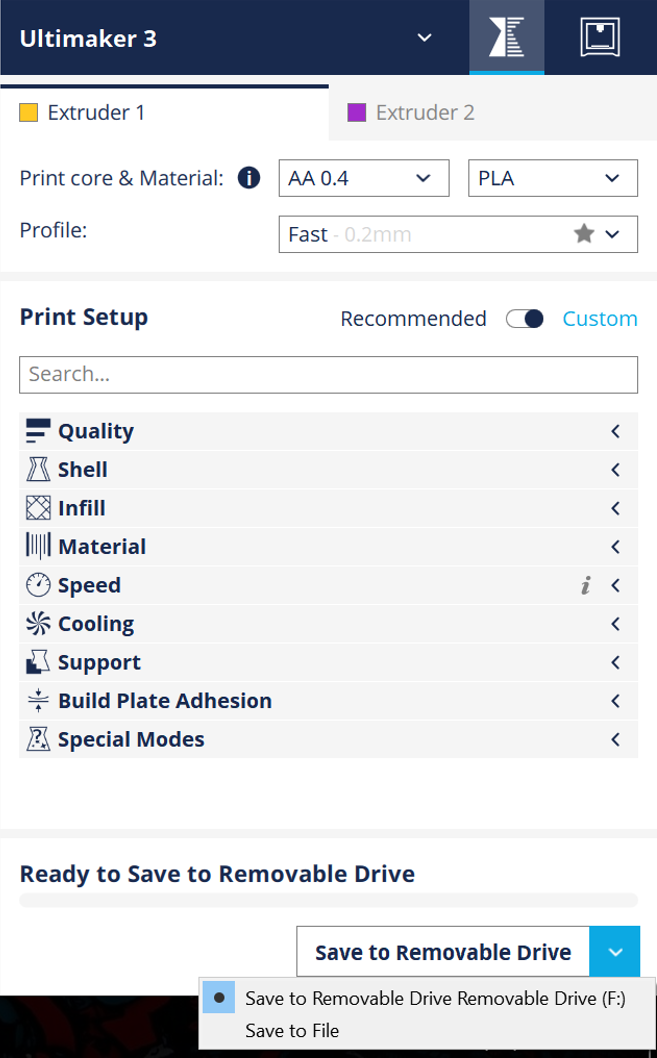
The file type you’ll be saving to is called .gcode.
Step 5
Eject your USB key and take it over to the 3D printer.
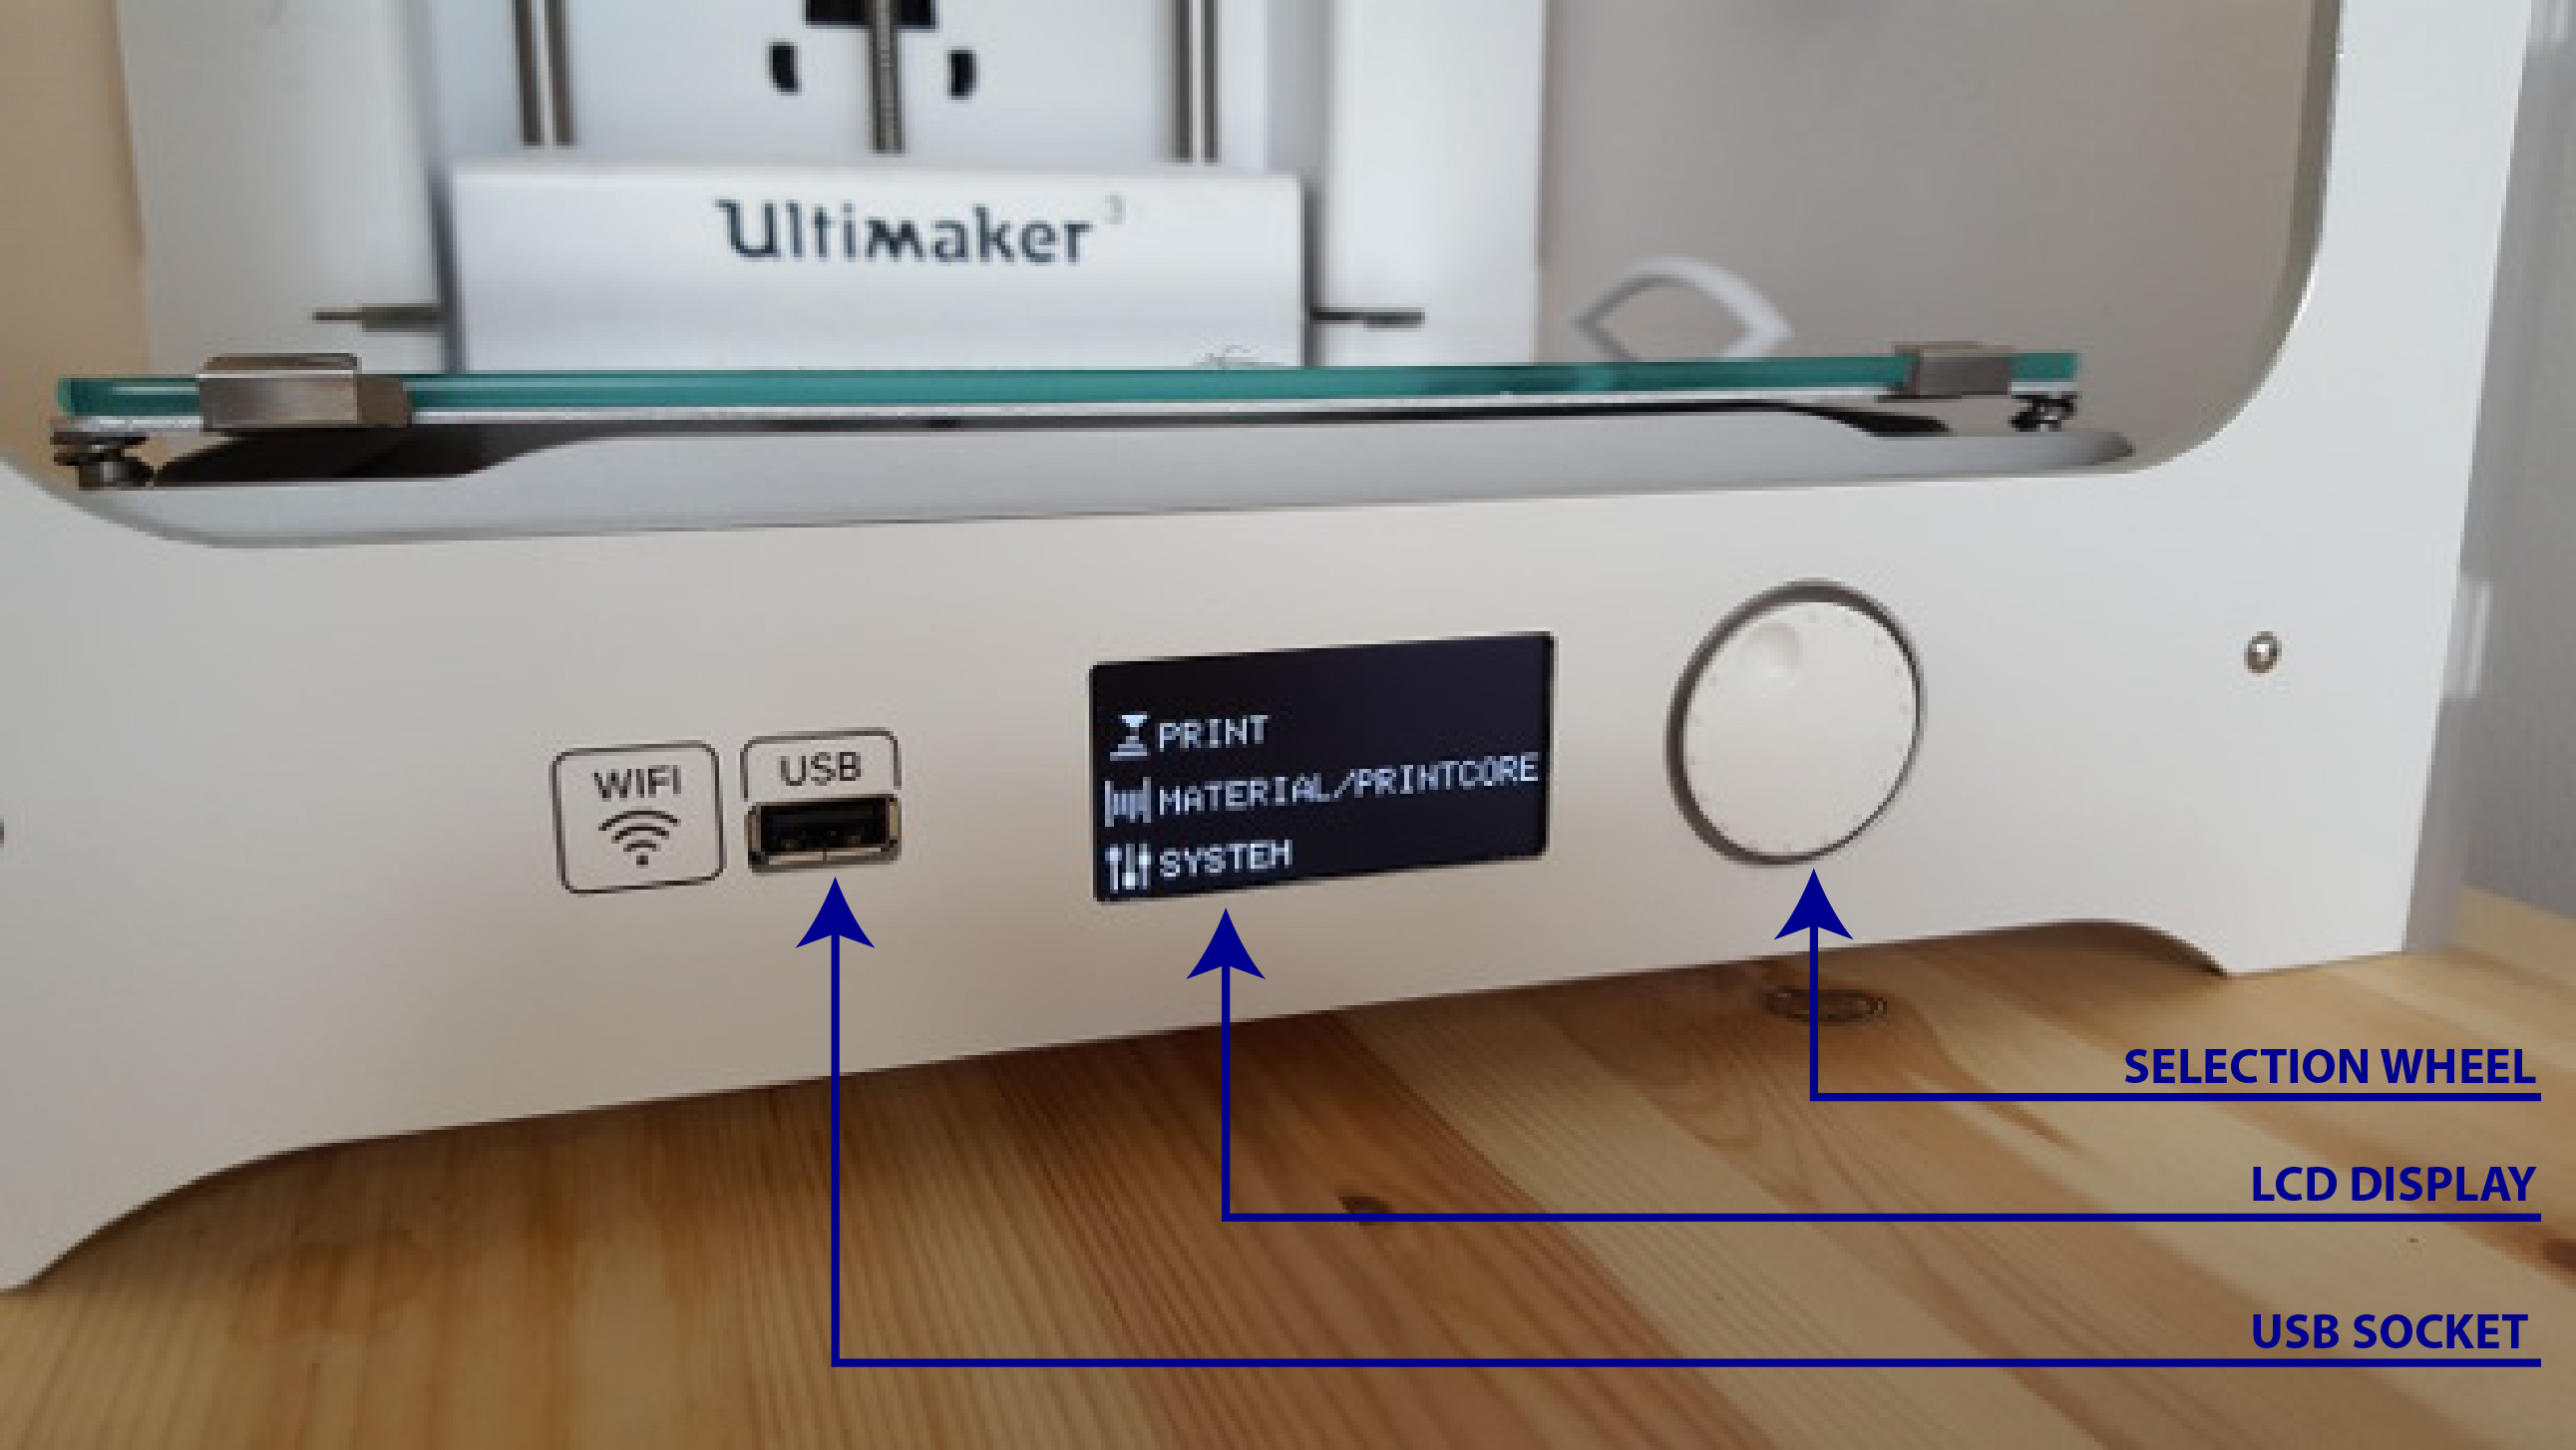
Insert your USB stick in the front socket marked USB.
Use the circular wheel on the front display as a mouse and rotate to select the Print menu, press on the wheel once to enter the menu.
You will now find a list of files to print from your USB, select your file by rotating the wheel and press once to send it to print.
The Ultimaker 3 will now go through its warm-up routine before starting to print! Congratulations, your prototype is about to get 3D printed!