Course navigation
Loft
Step 1
Open a New Design in Fusion 360 in the top menu bar.
Step 2
Create a new sketch by clicking on the first icon.
In the middle of the workspace you should now see three orange squares. Click on the bottom square. This will select to work on the bottom plane.

Step 3
Click on Circle on the drop down menu and select Center Diameter Circle.

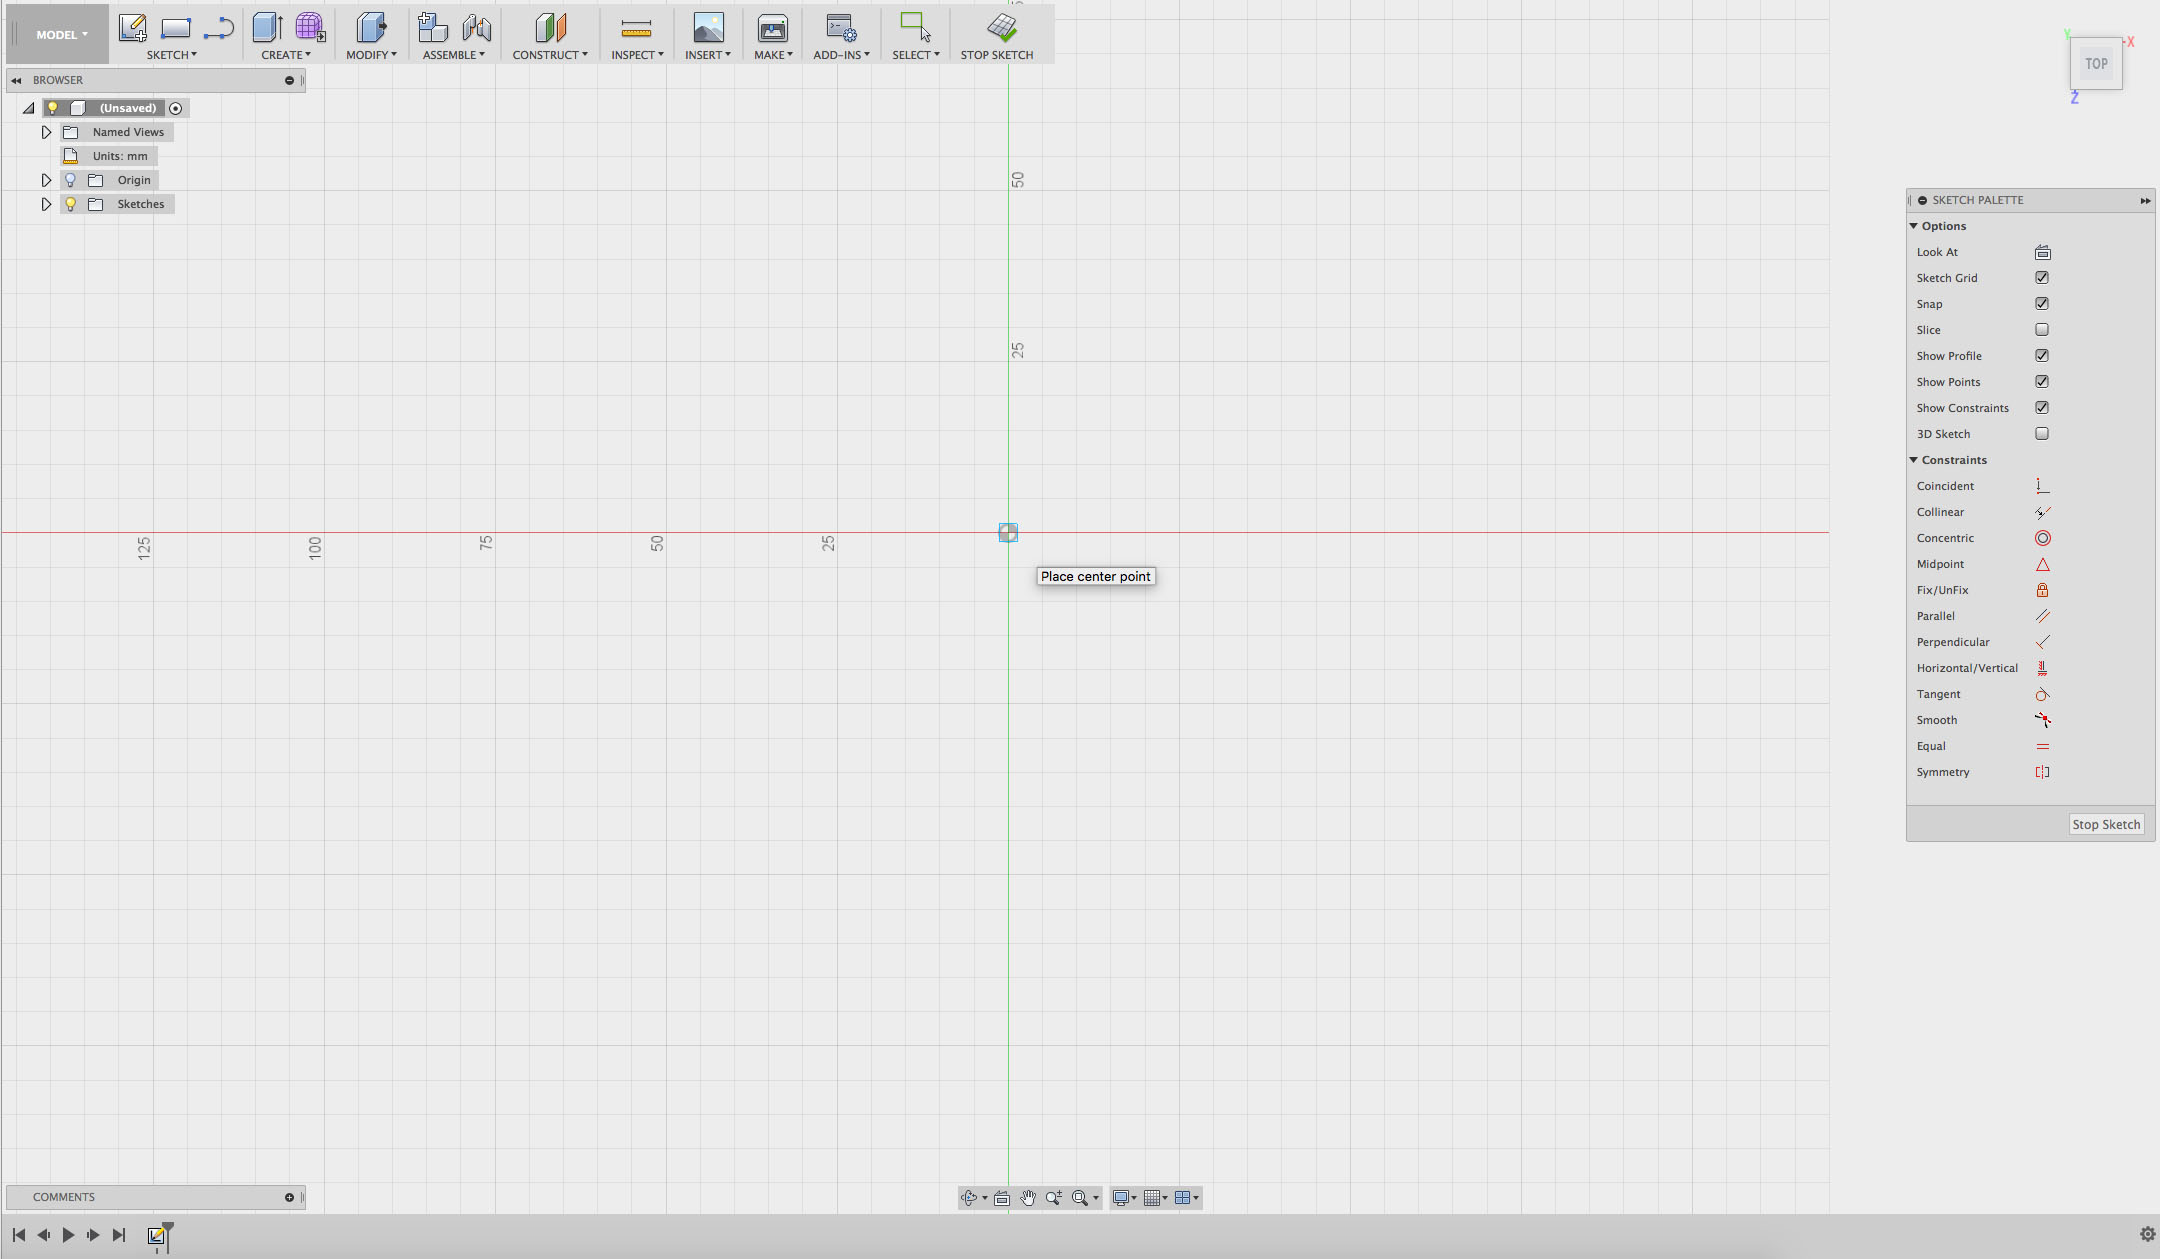
Step 4
To draw a circle, specify the centre point. Click on the point where the two axes cross at the centre of your workspace.
Step 5
Move your pointer away from the centre of the circle.
A box with a number in it has appeared. This tells you the diameter of your circle.
Type 90 into the box and press Enter. This will create a circle with a diameter of 90mm.

Click STOP SKETCH or FINISH SKETCH.
Step 6
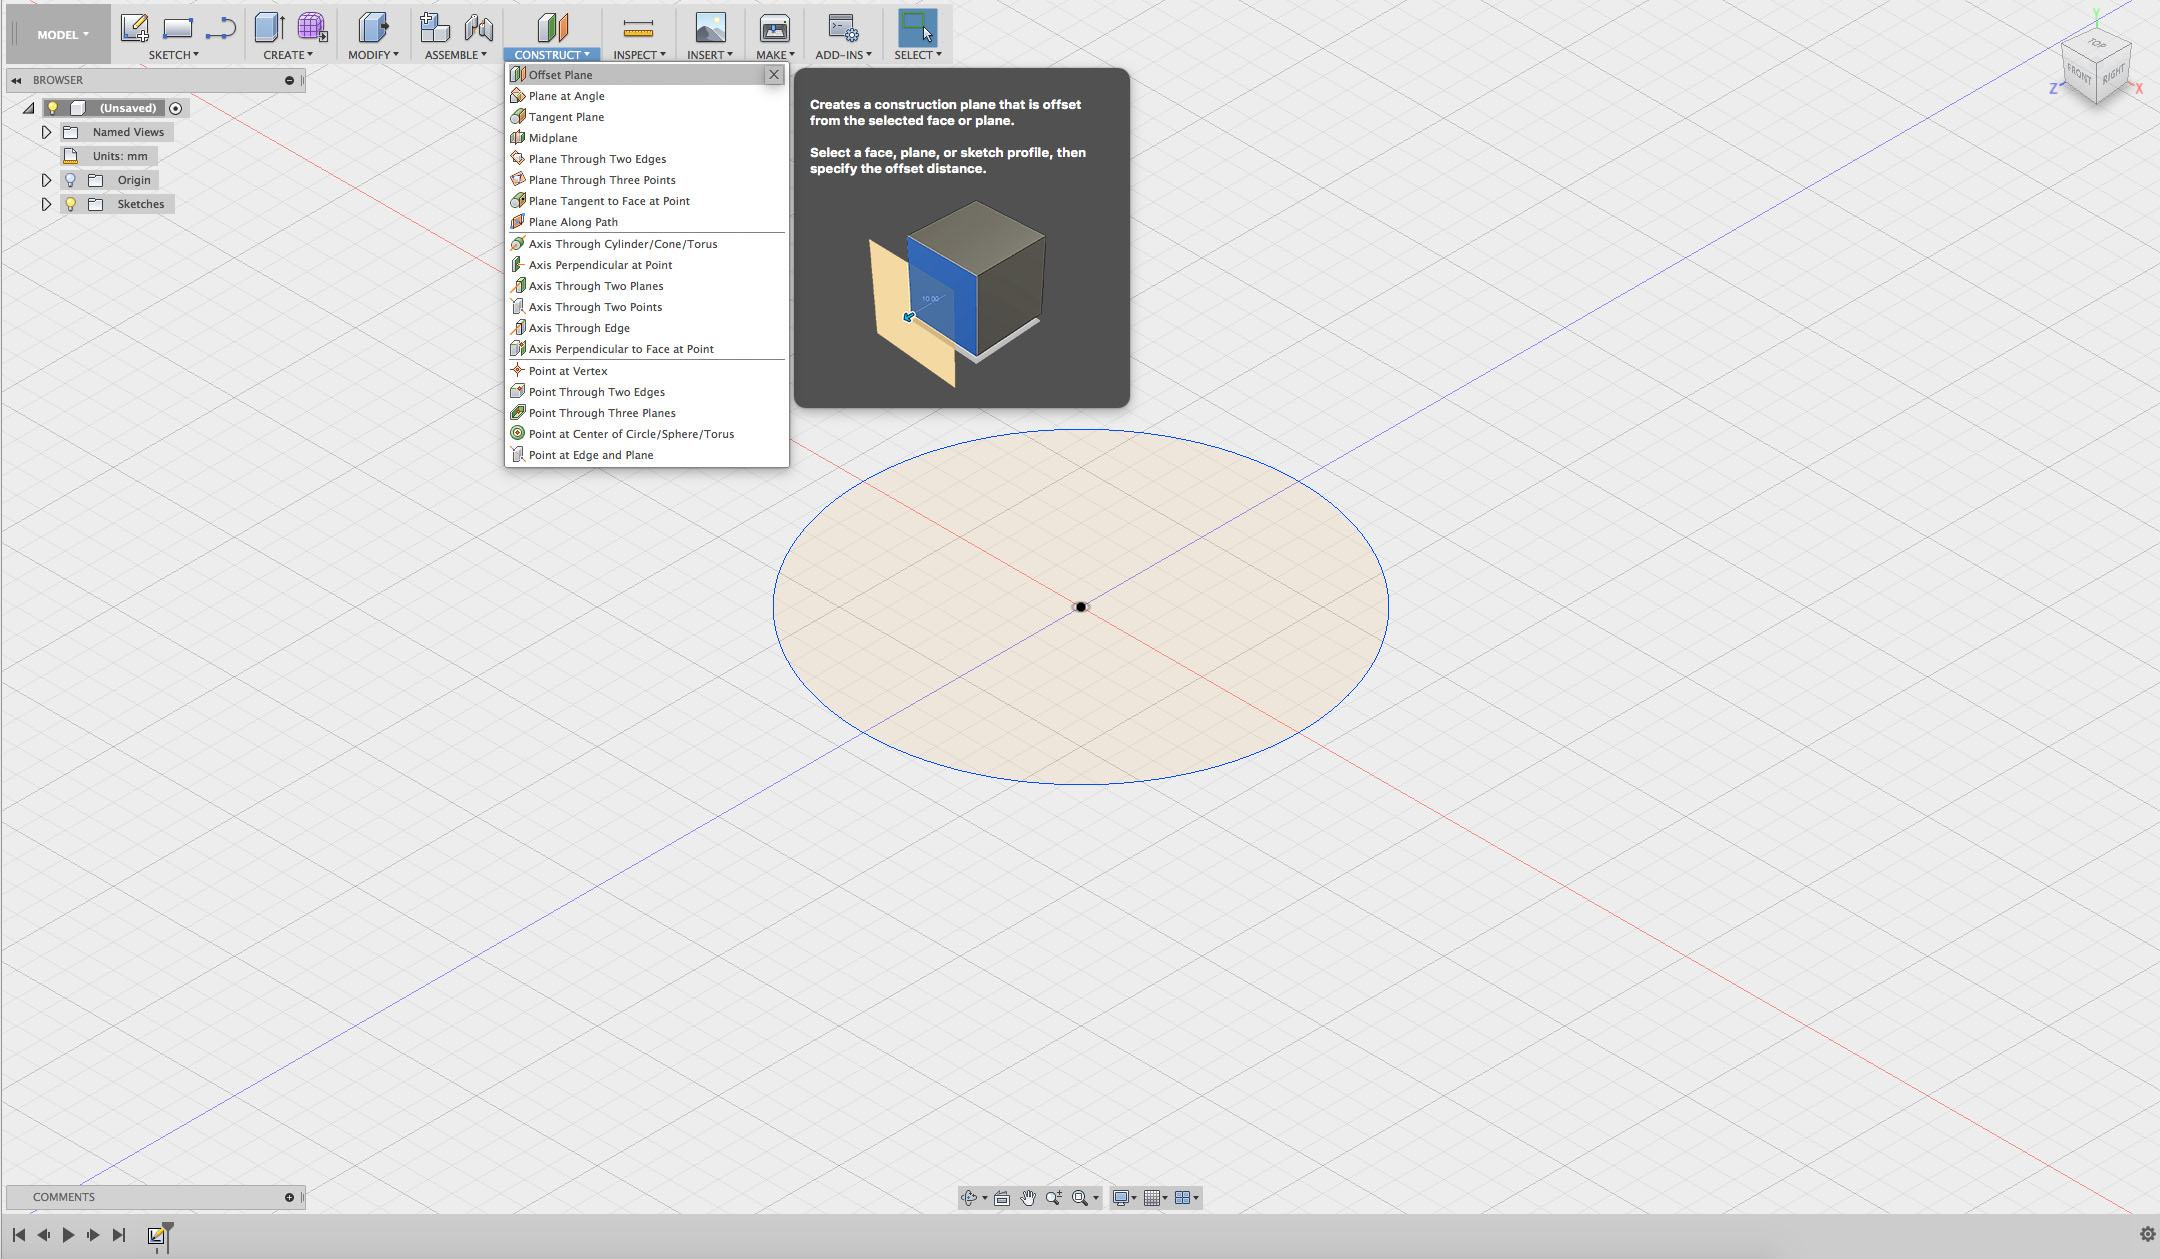
At the top of your screen is CONSTRUCT.
Click on the CONSTRUCT drop-down menu and select Offset Plane.
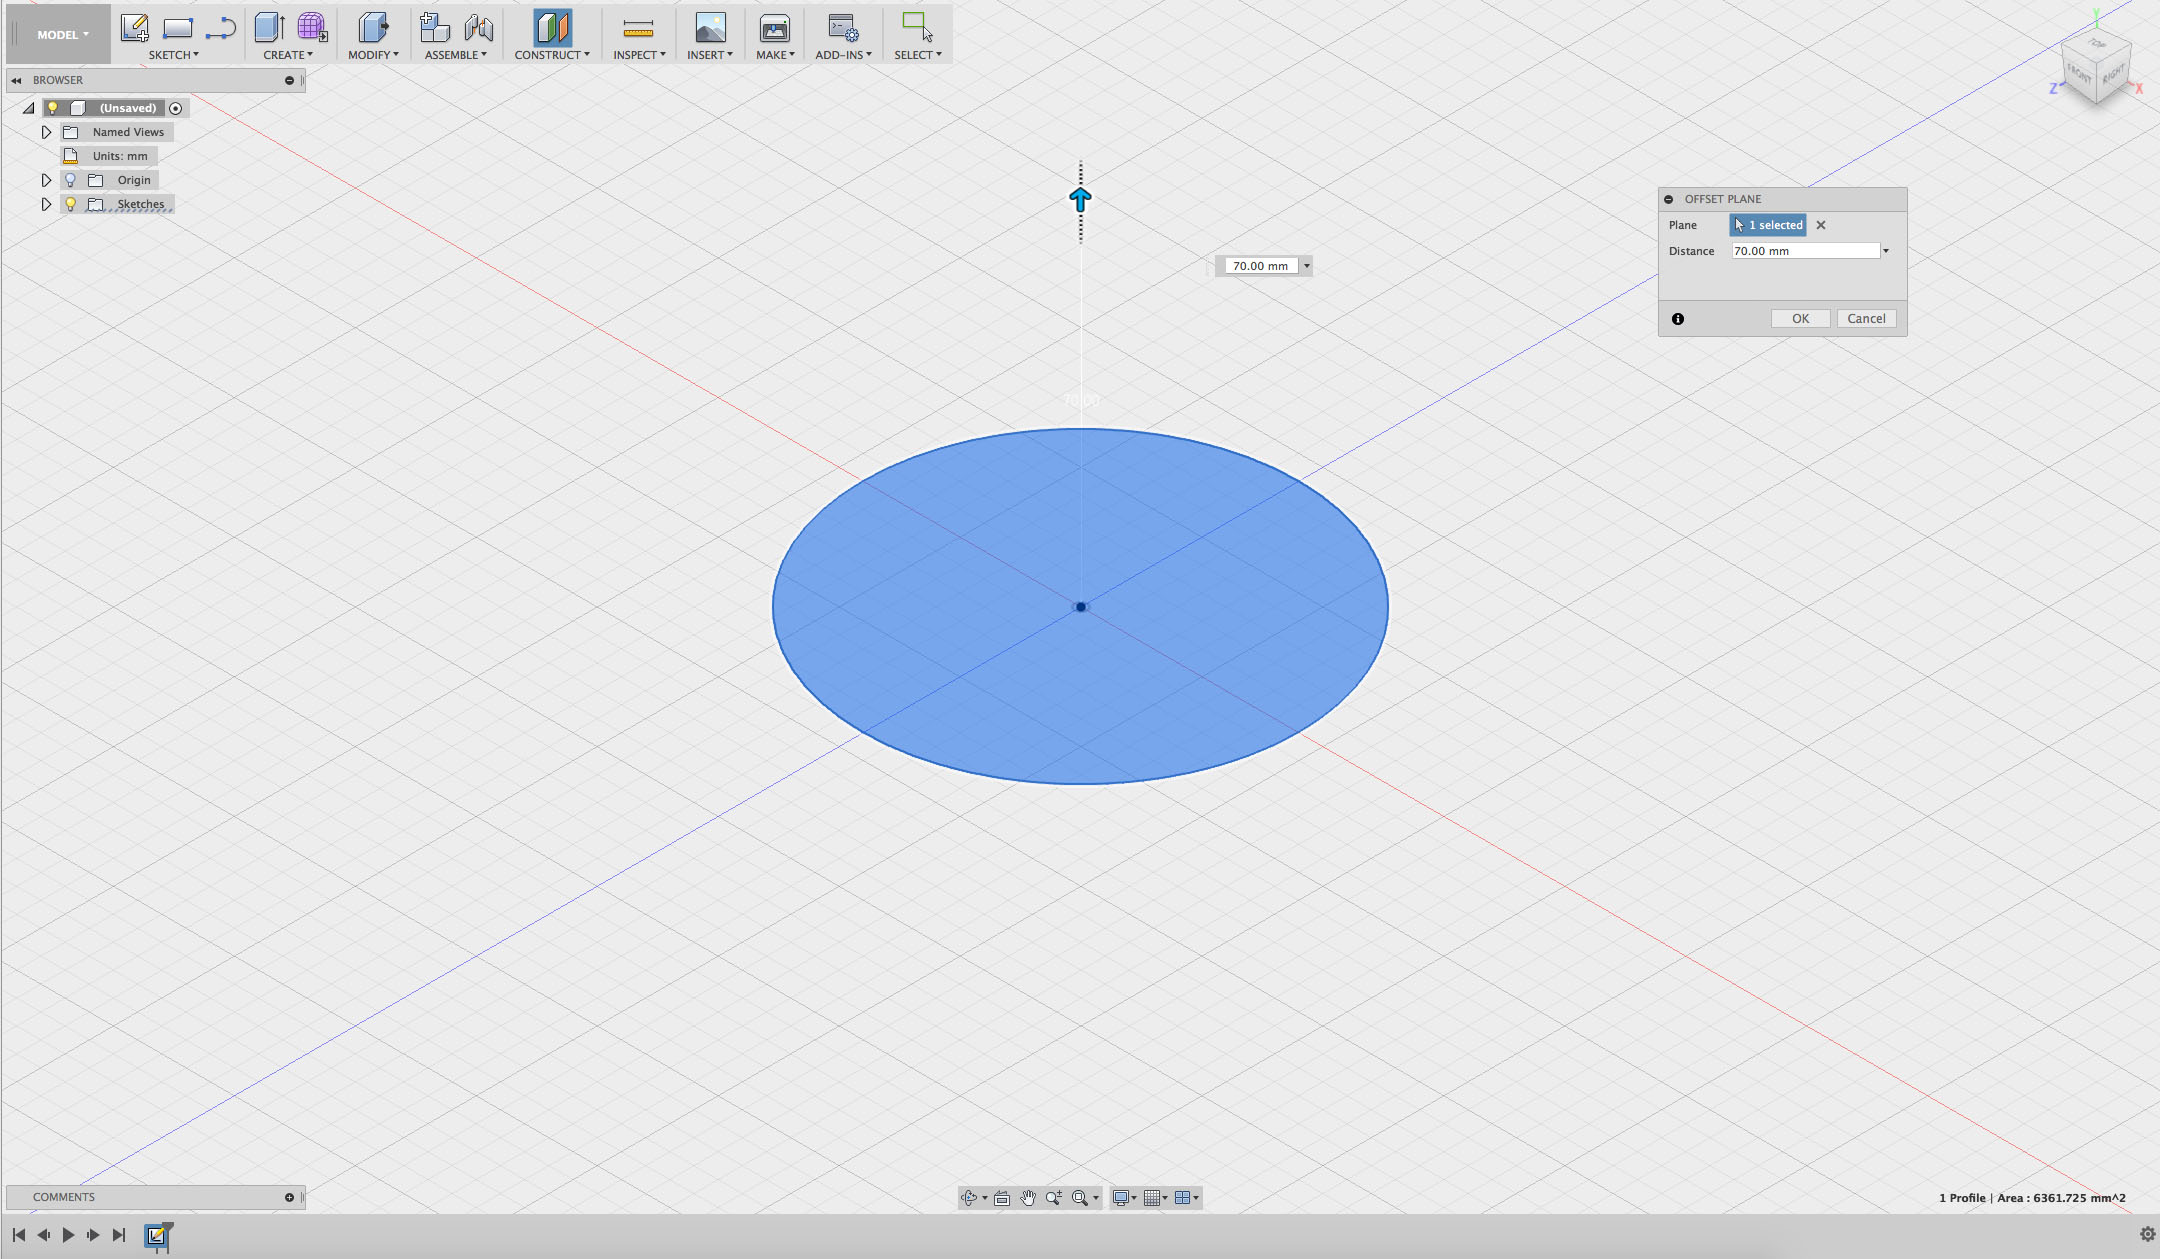
Step 7
Click on your circle shape and it will select the plane. An arrow will appear above the circle. You can use the arrow to drag the plane up or down. Click on the arrow and drag it upwards until the number in the dimension box says 70.00mm.
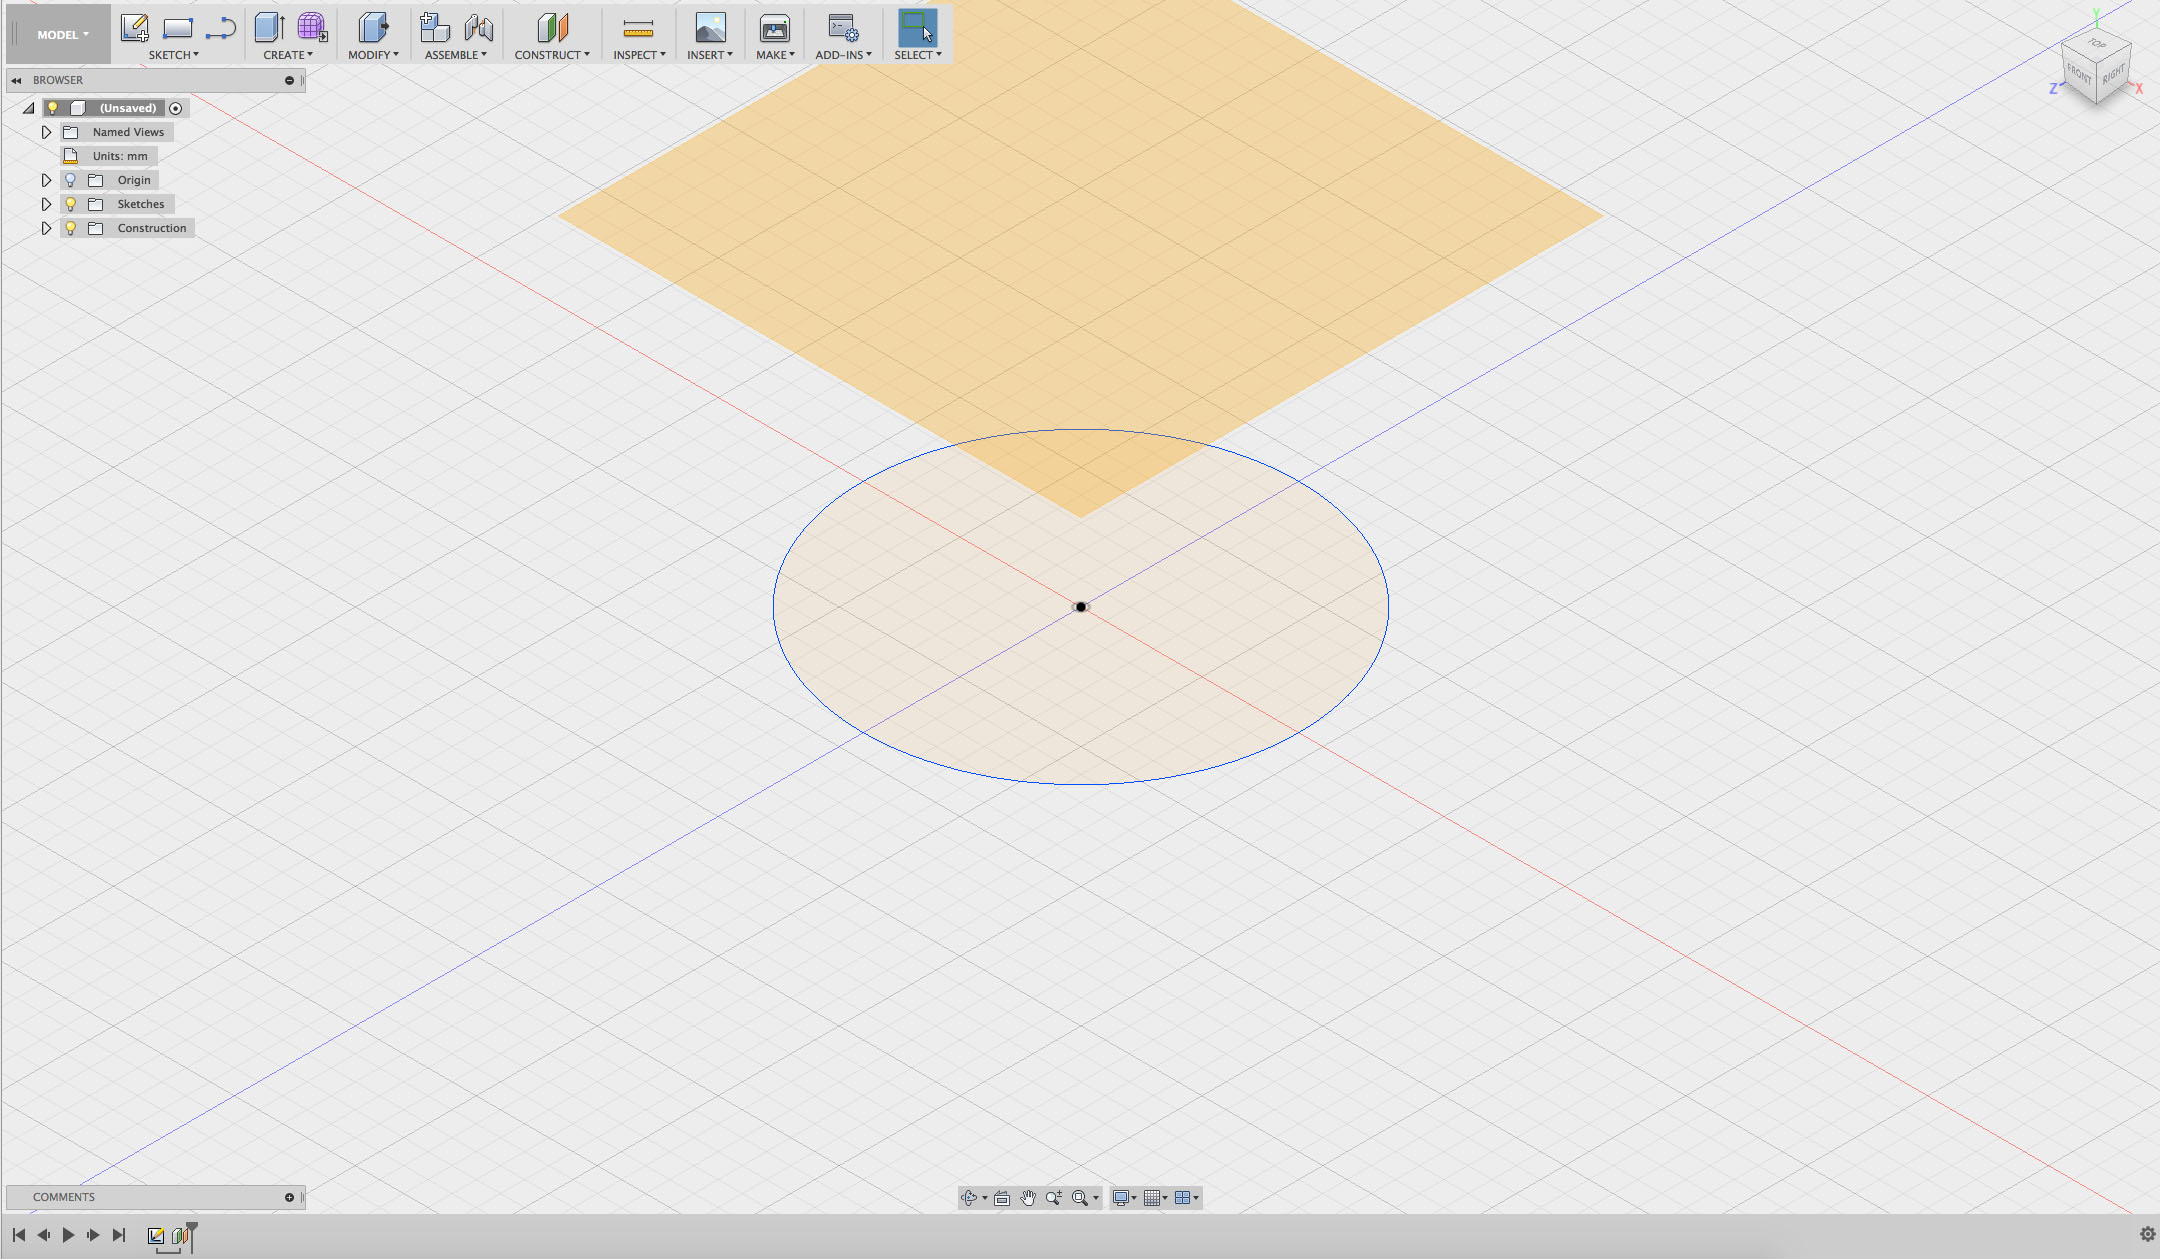
Step 8
Use the new plane as a surface to work on.
Click Create Sketch and then click on the newly created plane.
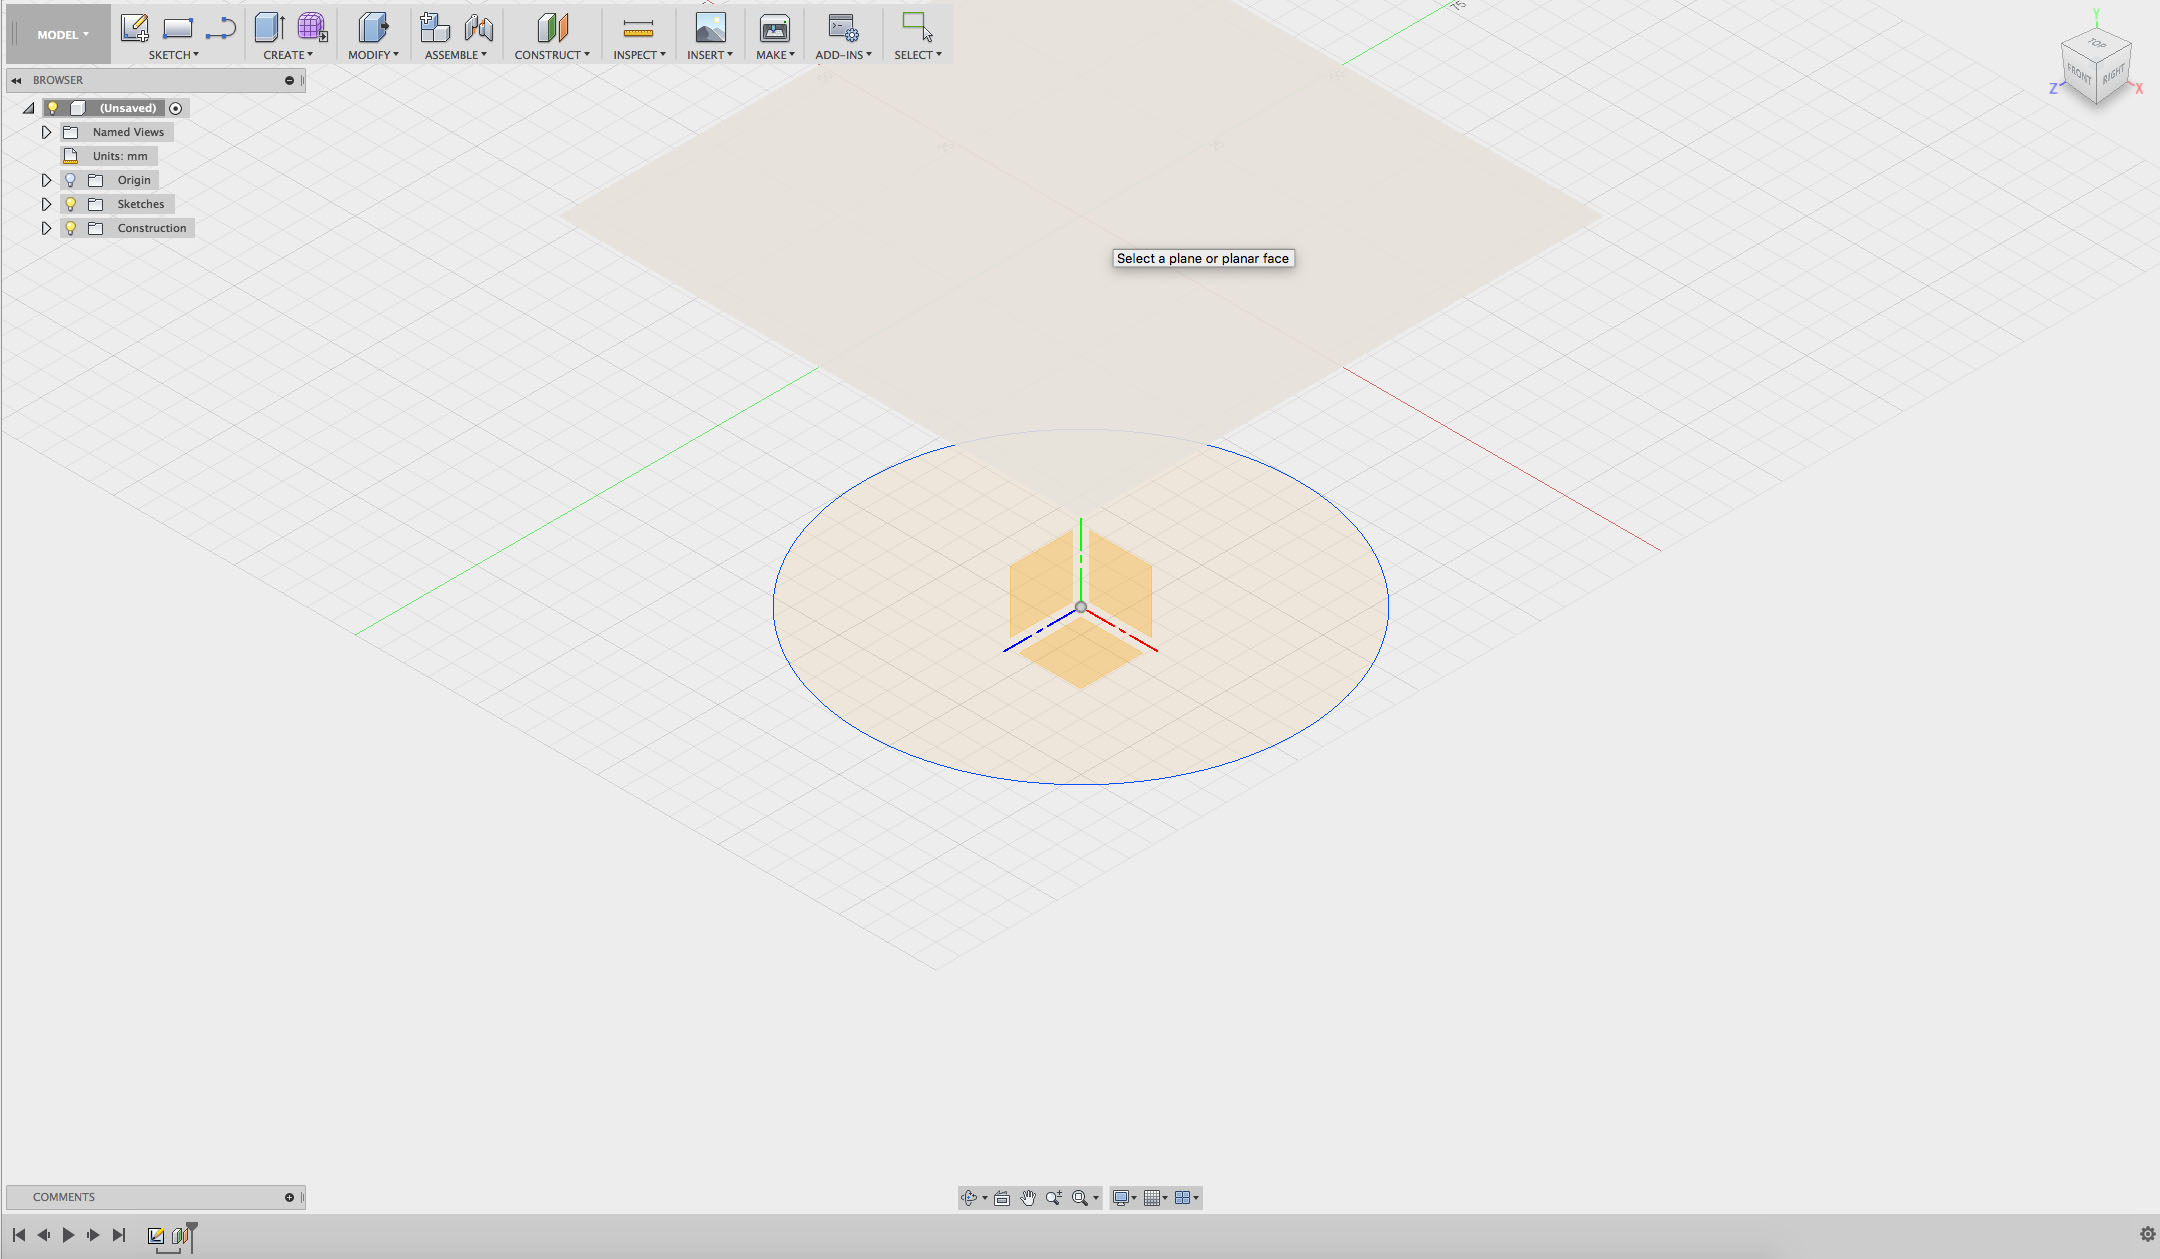
Step 9
You are now working on the new plane.
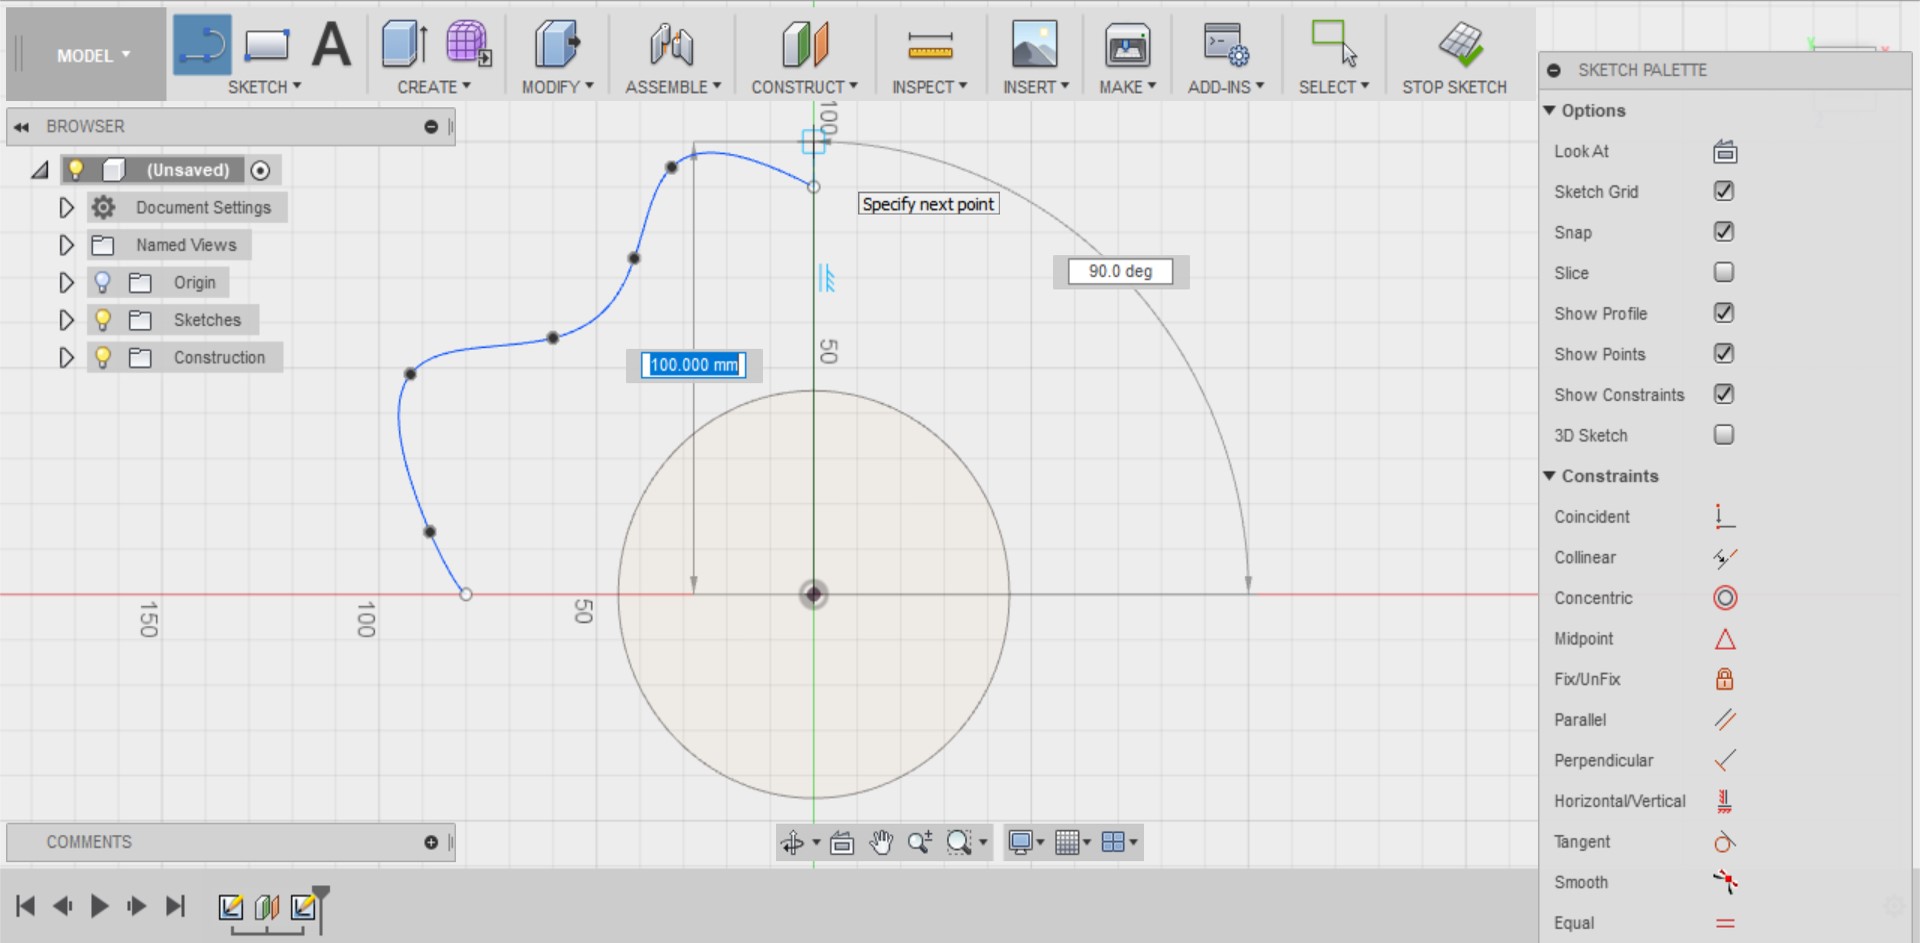
Select the Spline tool and create a shape between two axes. Make sure your line starts on one axis and finishes on the other. Be careful not to cross either of the axes (the red and green lines).

Step 10
Create a new type of line, called a construction line. The line should run along the y-axis (green line).
Click the SKETCH drop-down menu and select Line.
Draw a line from the centre of the workspace where the axes cross, up along the y-axis (green line). To do this, click on the centre and then click on the y-axis where you want your line to end.
Step 11
Click SELECT from the top menu and then click on your vertical line to select it.
On the far right of the screen is the Sketch Palette. If you can’t see it, look for the little arrows at the top and click them to expand the palette.
Click on the 'Normal/Construction' option or 'Construction' linetype which is at the top of the Sketch Palette.
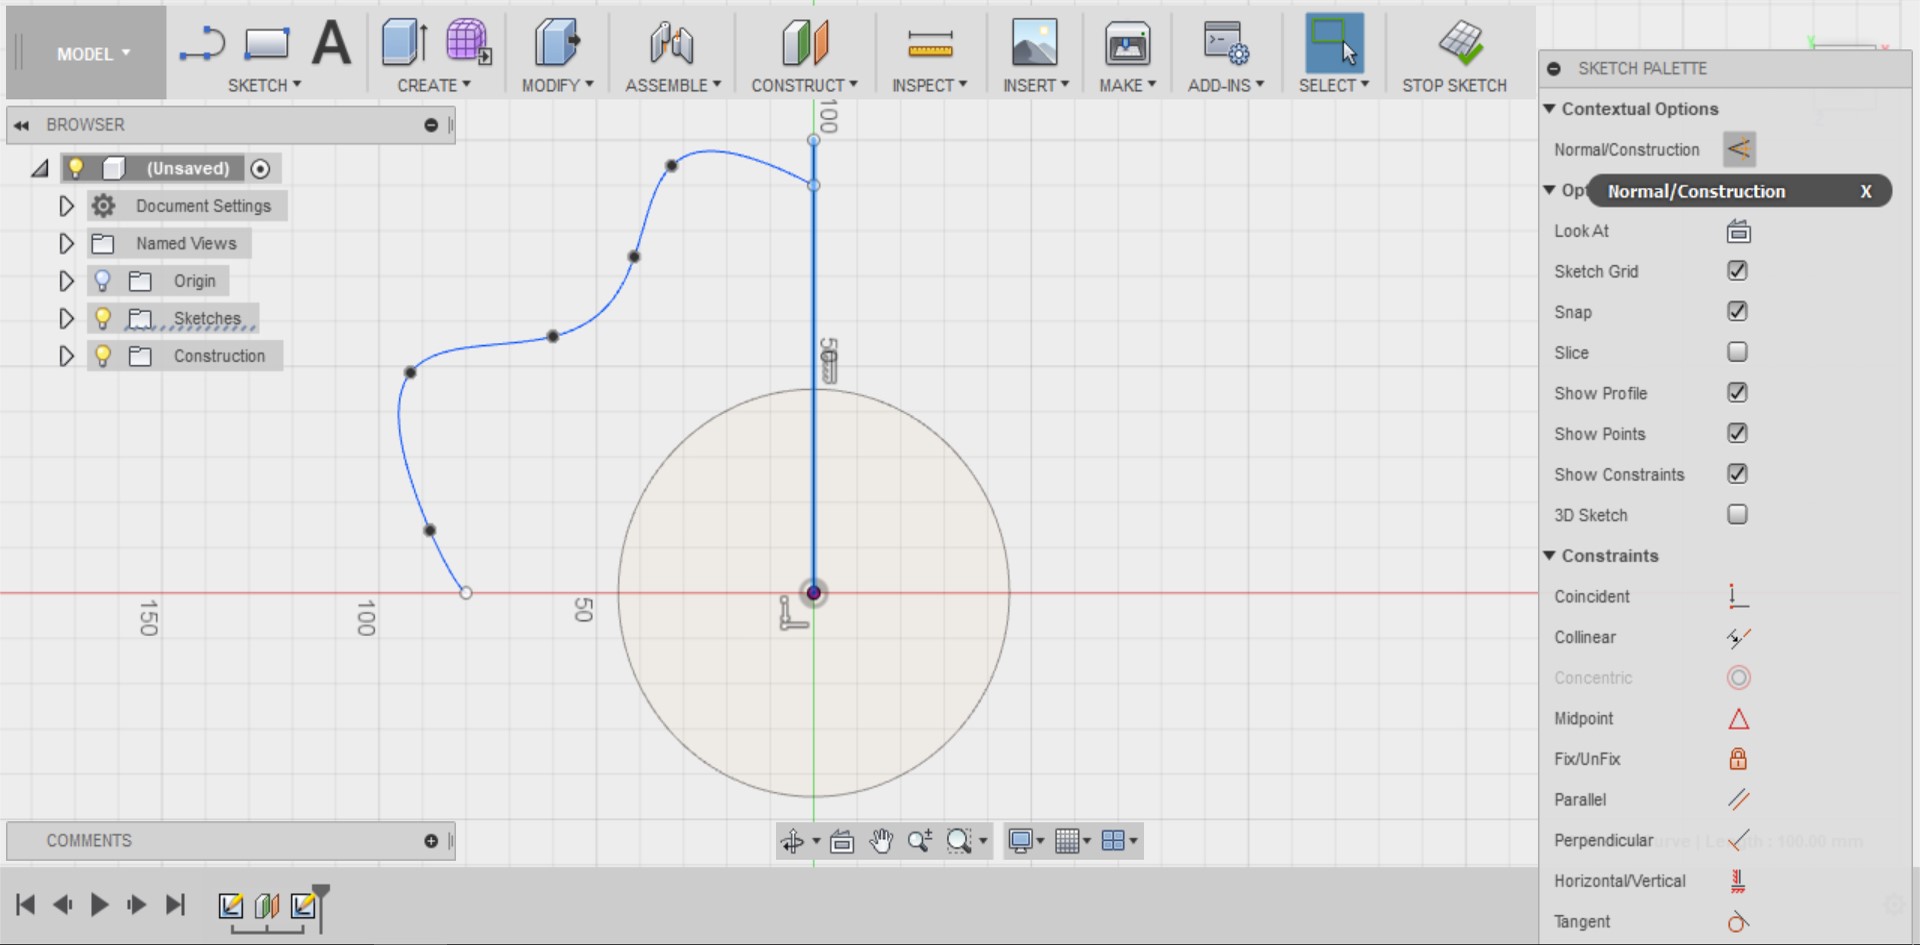
This now means that the line you’ve created is only used as a reference and won’t interact with your design.
Step 12
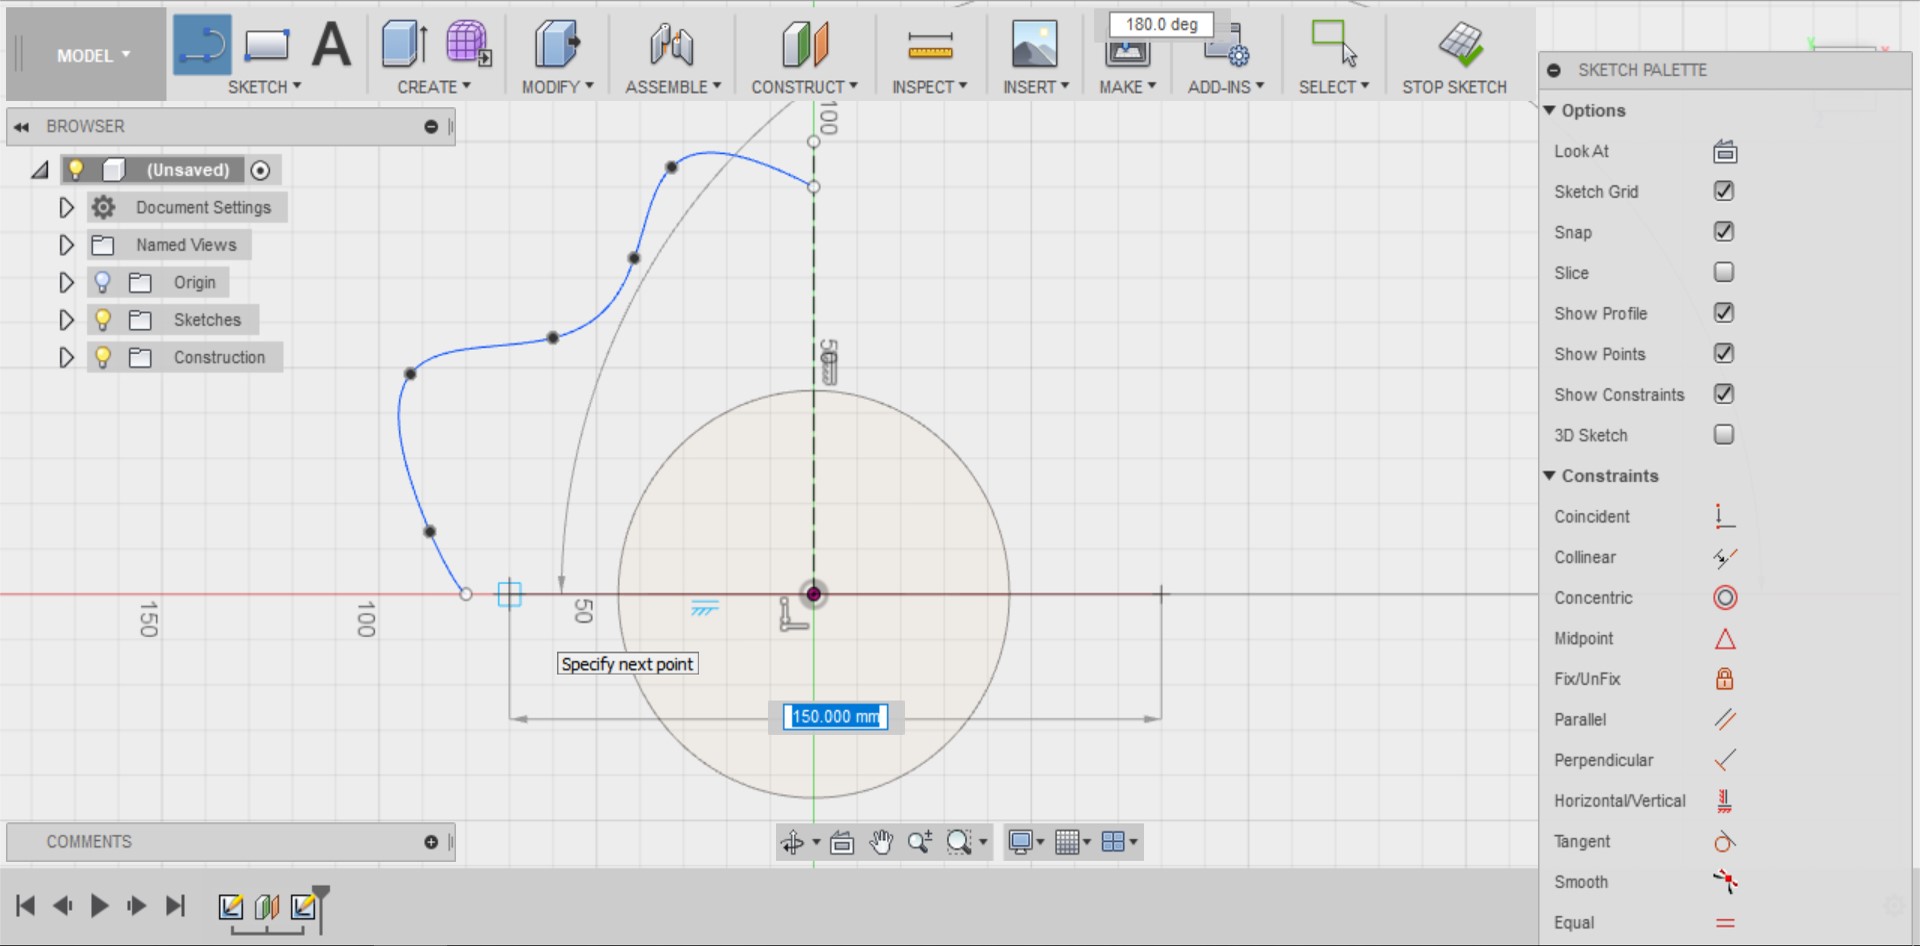
Draw another construction line along the x-axis (red line).
Turn this line into a construction line by selecting it and choosing Normal/Construction in the Sketch Palette.
Step 13
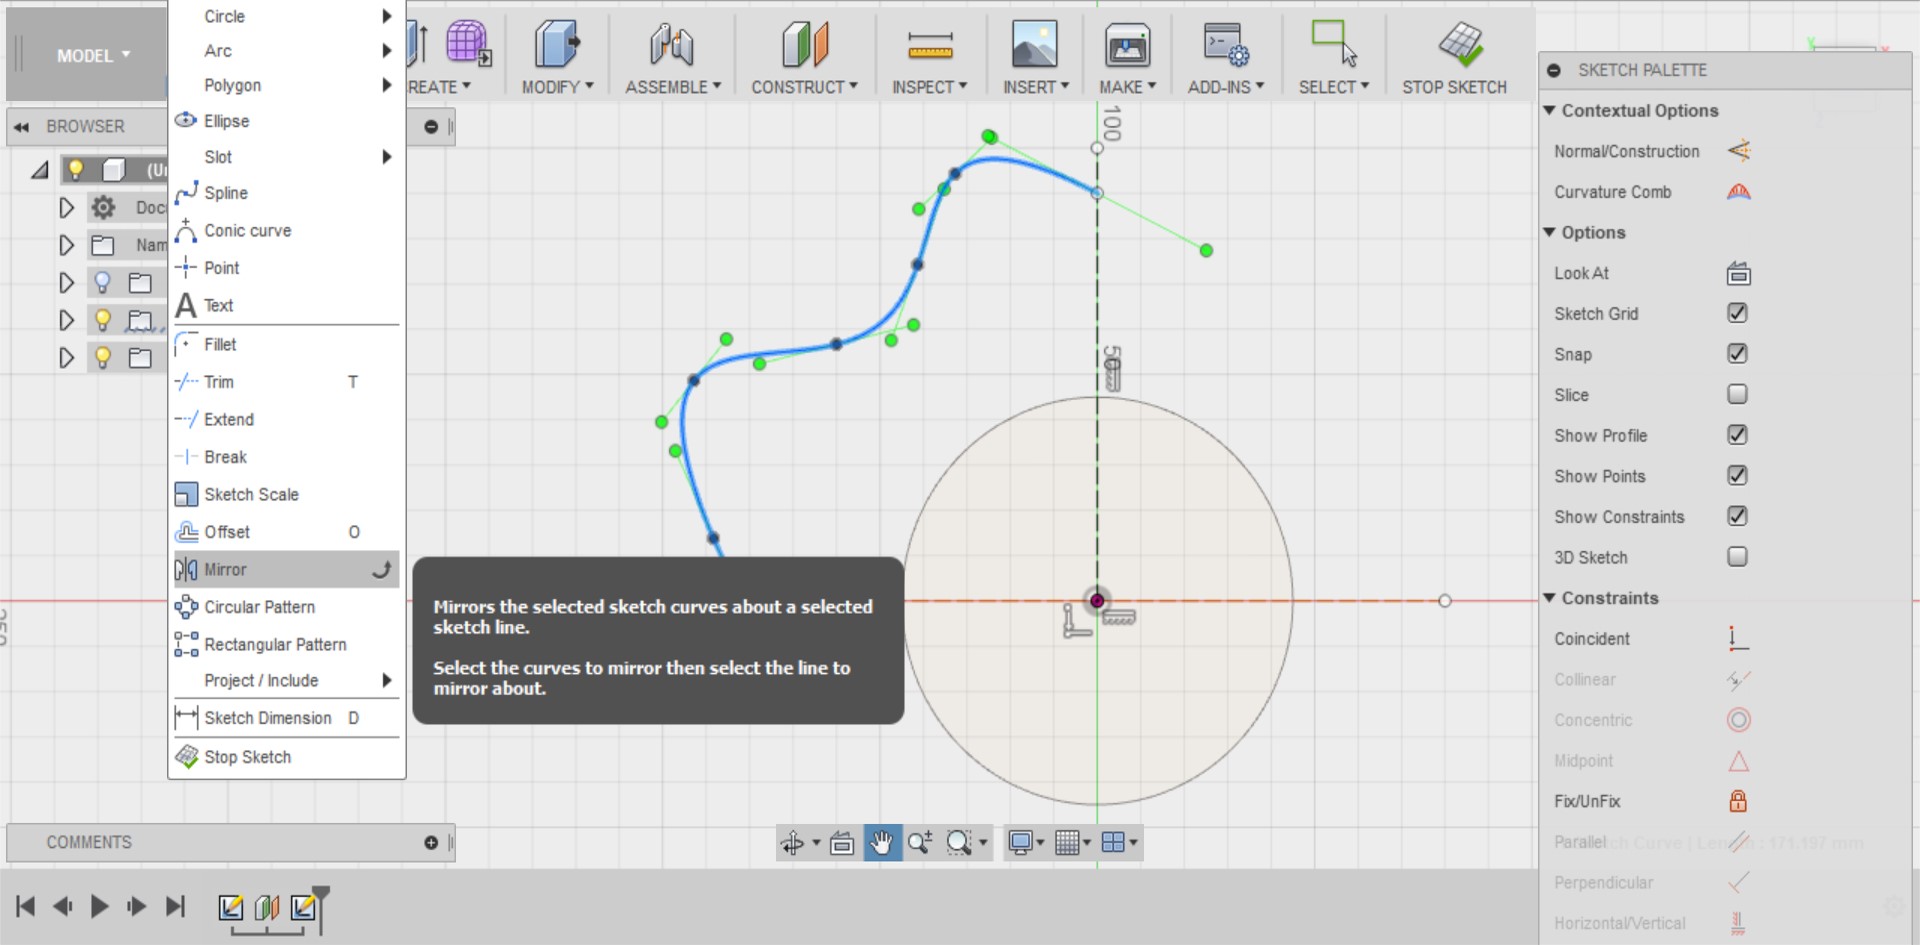
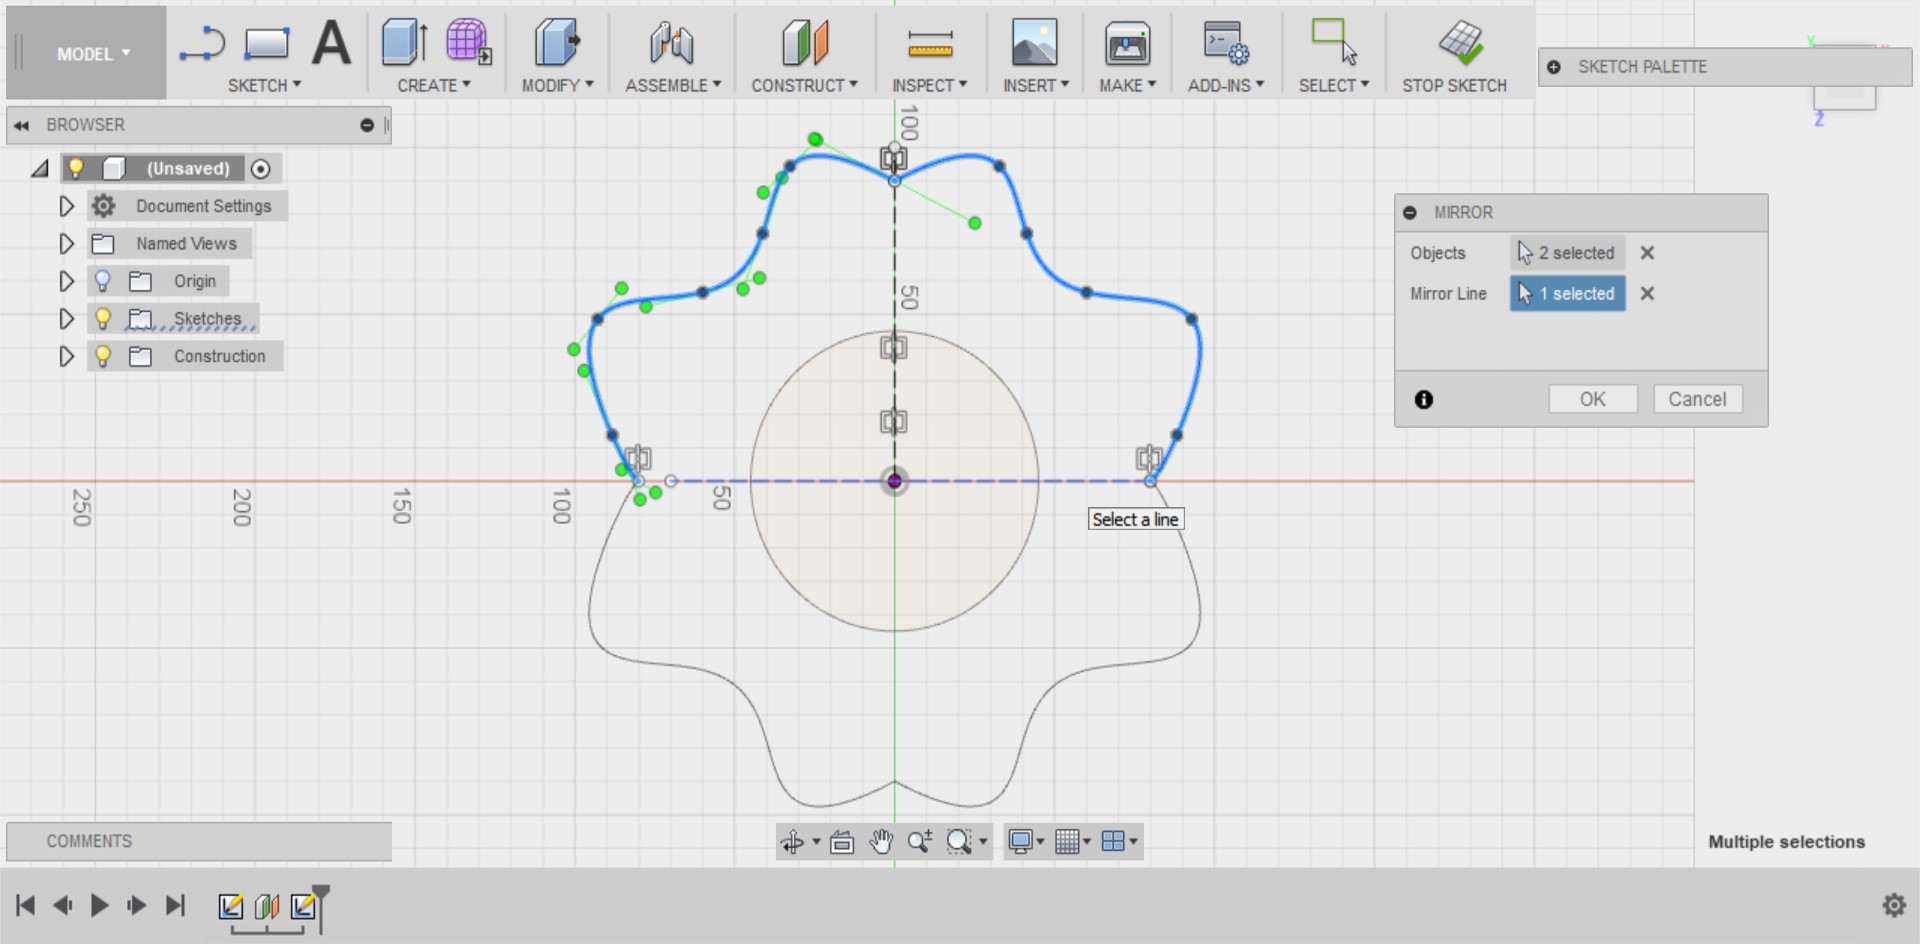
Make a mirror-image of your spline.
Go to the SKETCH drop-down menu and select the Mirror command.
Step 14
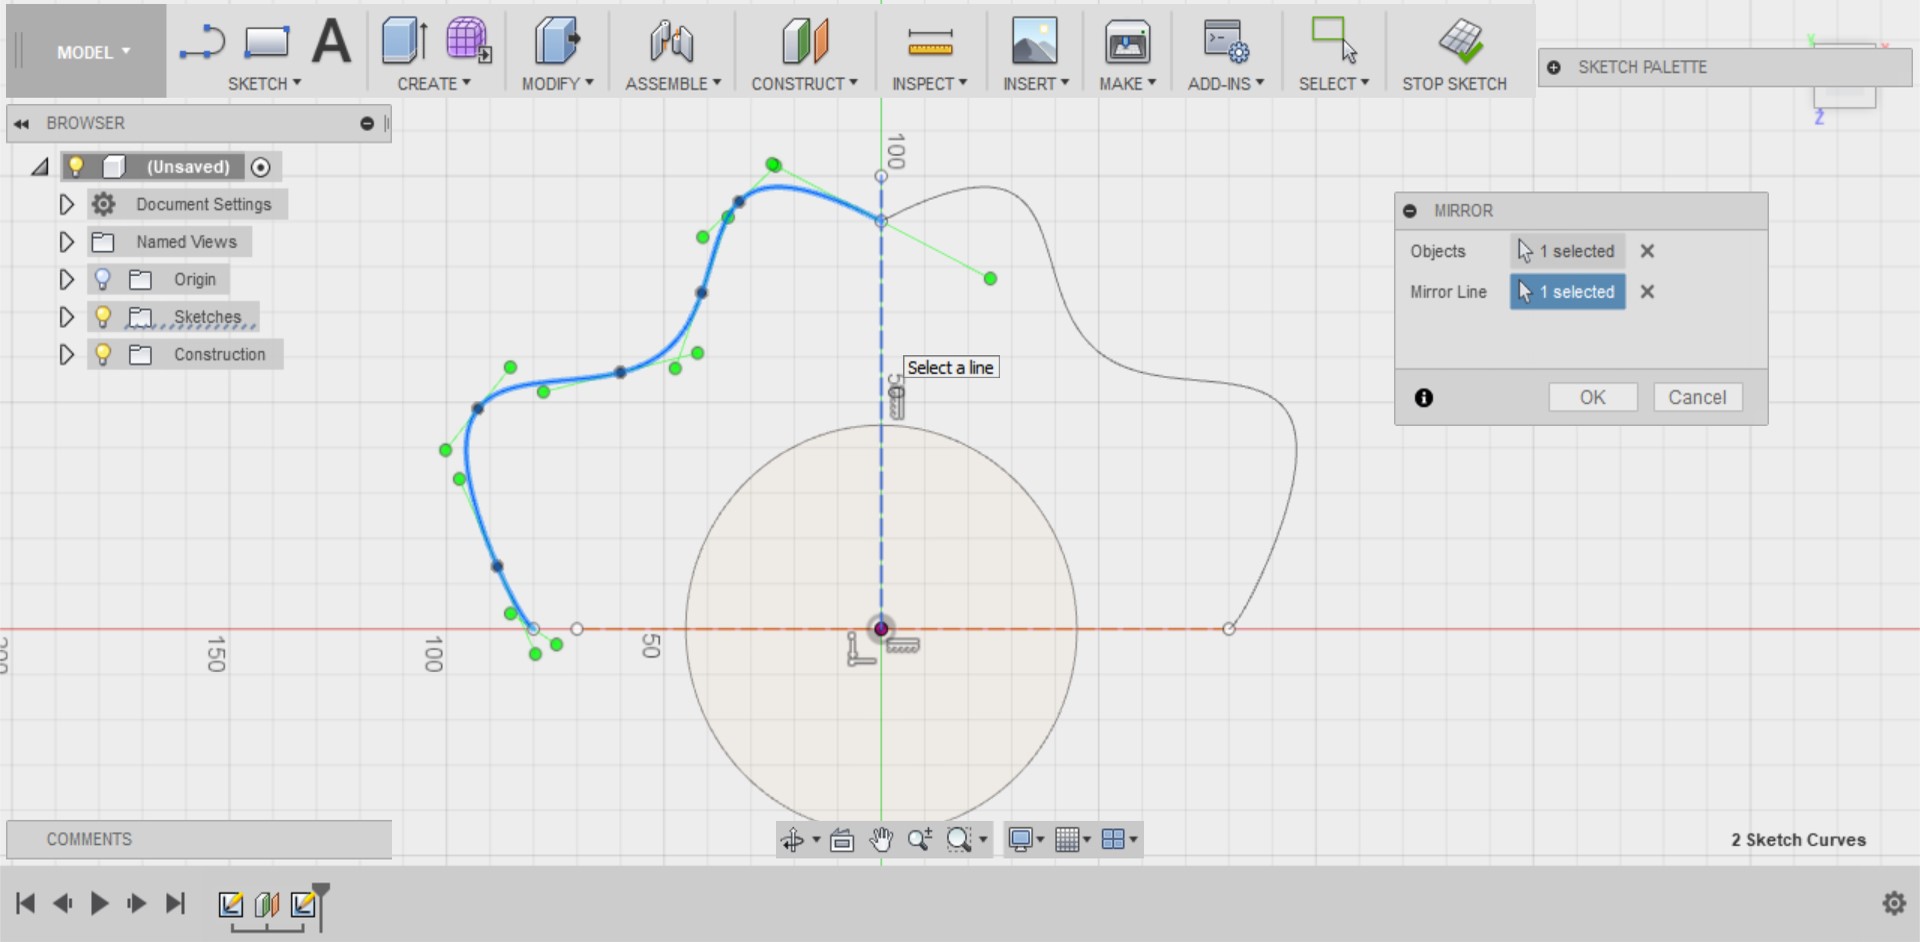
You should now see a box that allows you to select which object is the mirror and which is the mirror line.
Click to select Objects in the mirror box and then click on your spline to choose it.
Click to select Mirror Line in the mirror box and then click on the shorter construction line to choose it.
Your spline should now automatically appear as a mirror image.
Step 15
Repeat the mirror image process with both of your new splines and the red axis construction line.
Click STOP SKETCH.
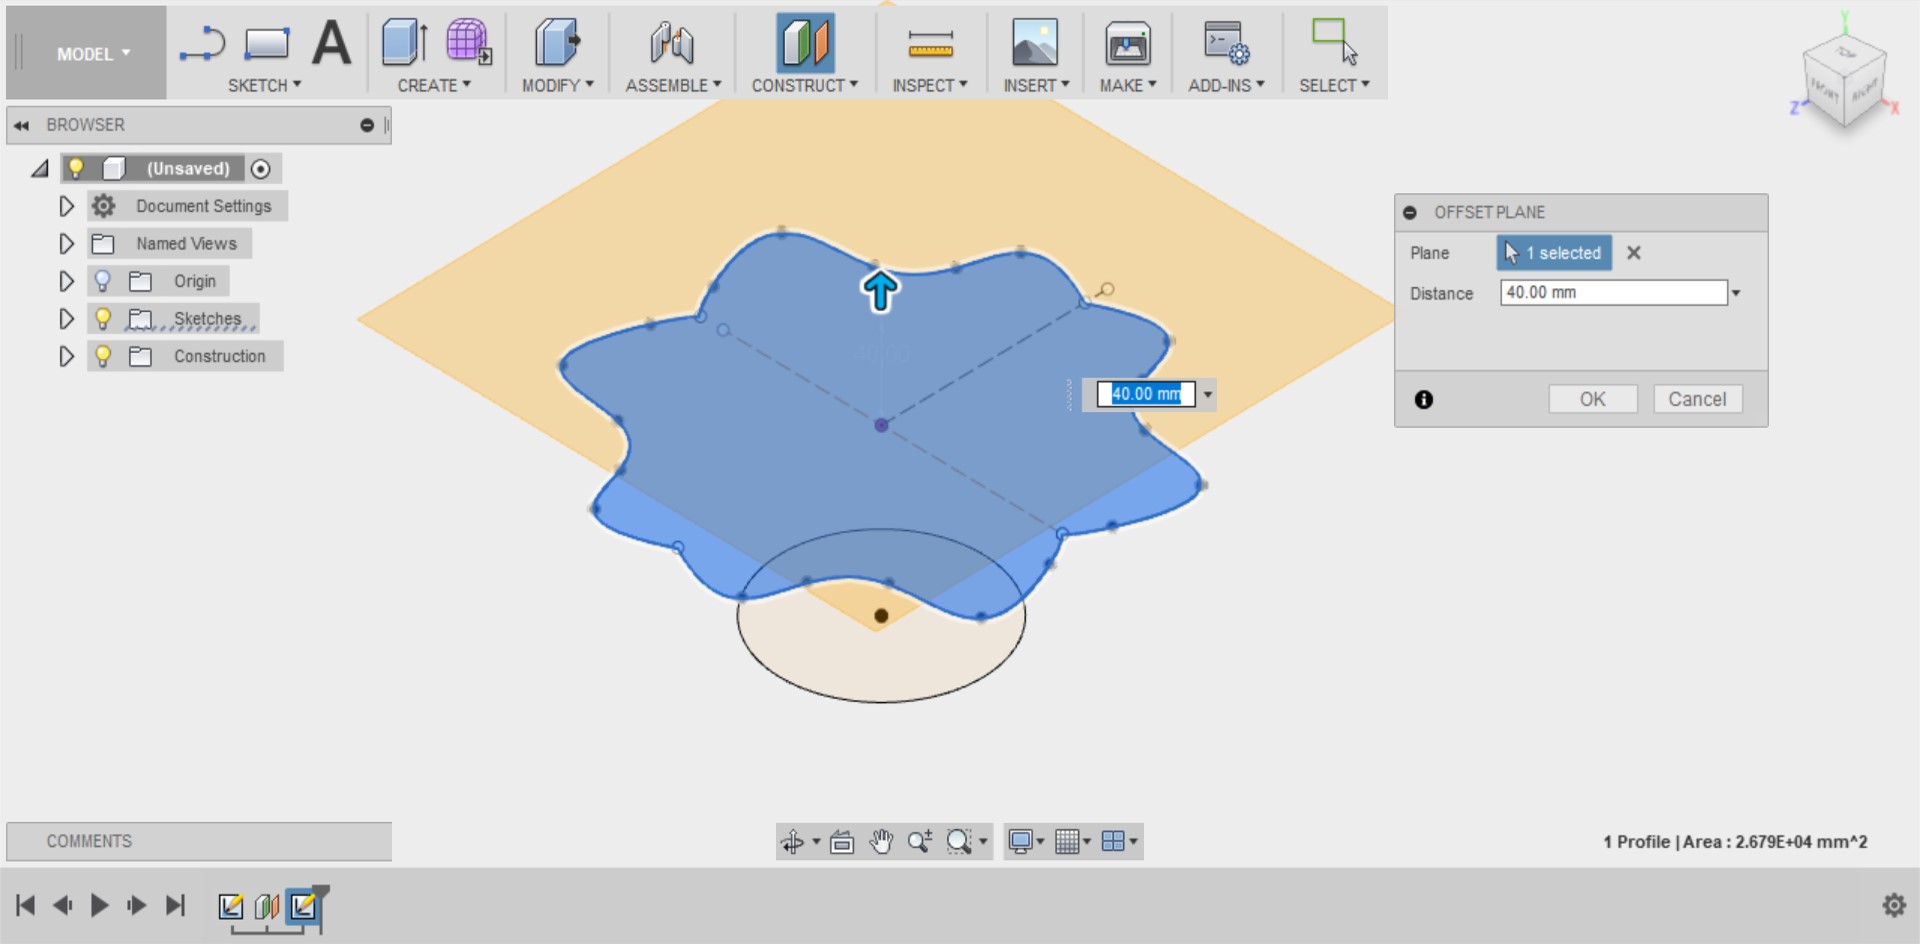
Step 16
Create a third sketch. Click on the CONSTRUCT drop-down menu and click on Offset Plane. Click on your latest sketch and create a new plane 40mm above it.
Create a new sketch in your new plane. Select the Origin as your centre point, then draw a new circle to a diameter of your choice.
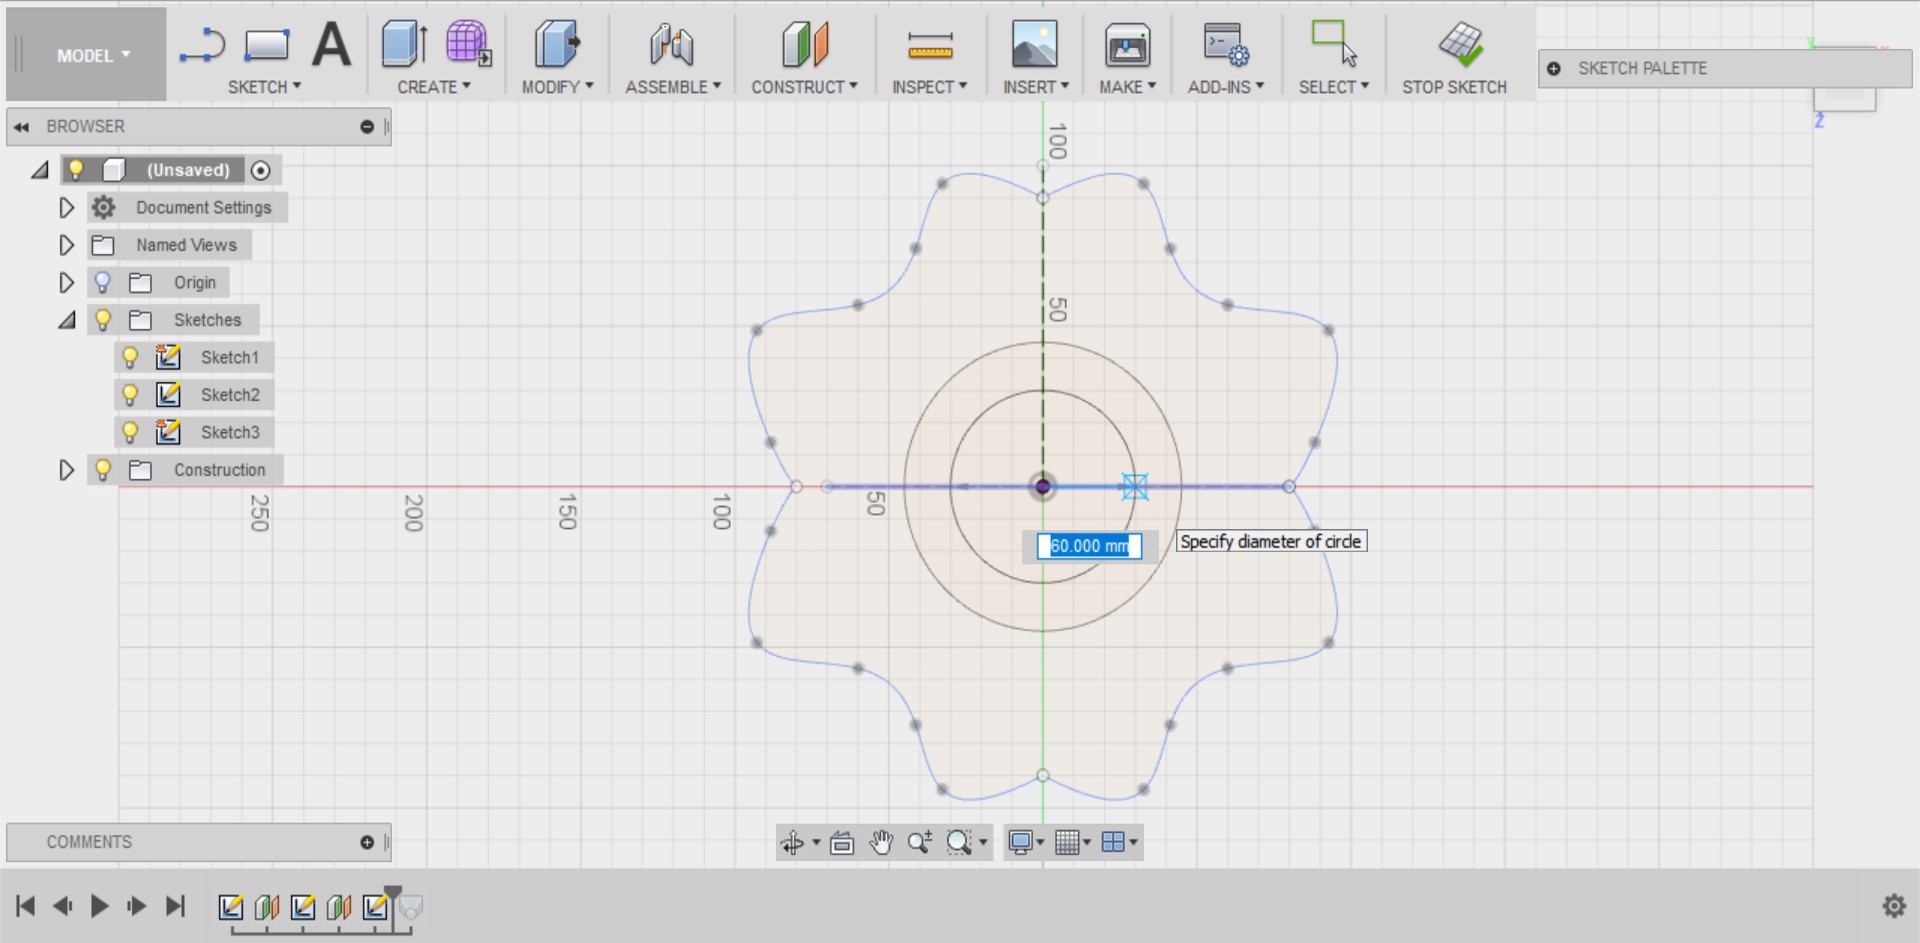
Click STOP SKETCH.
Step 17
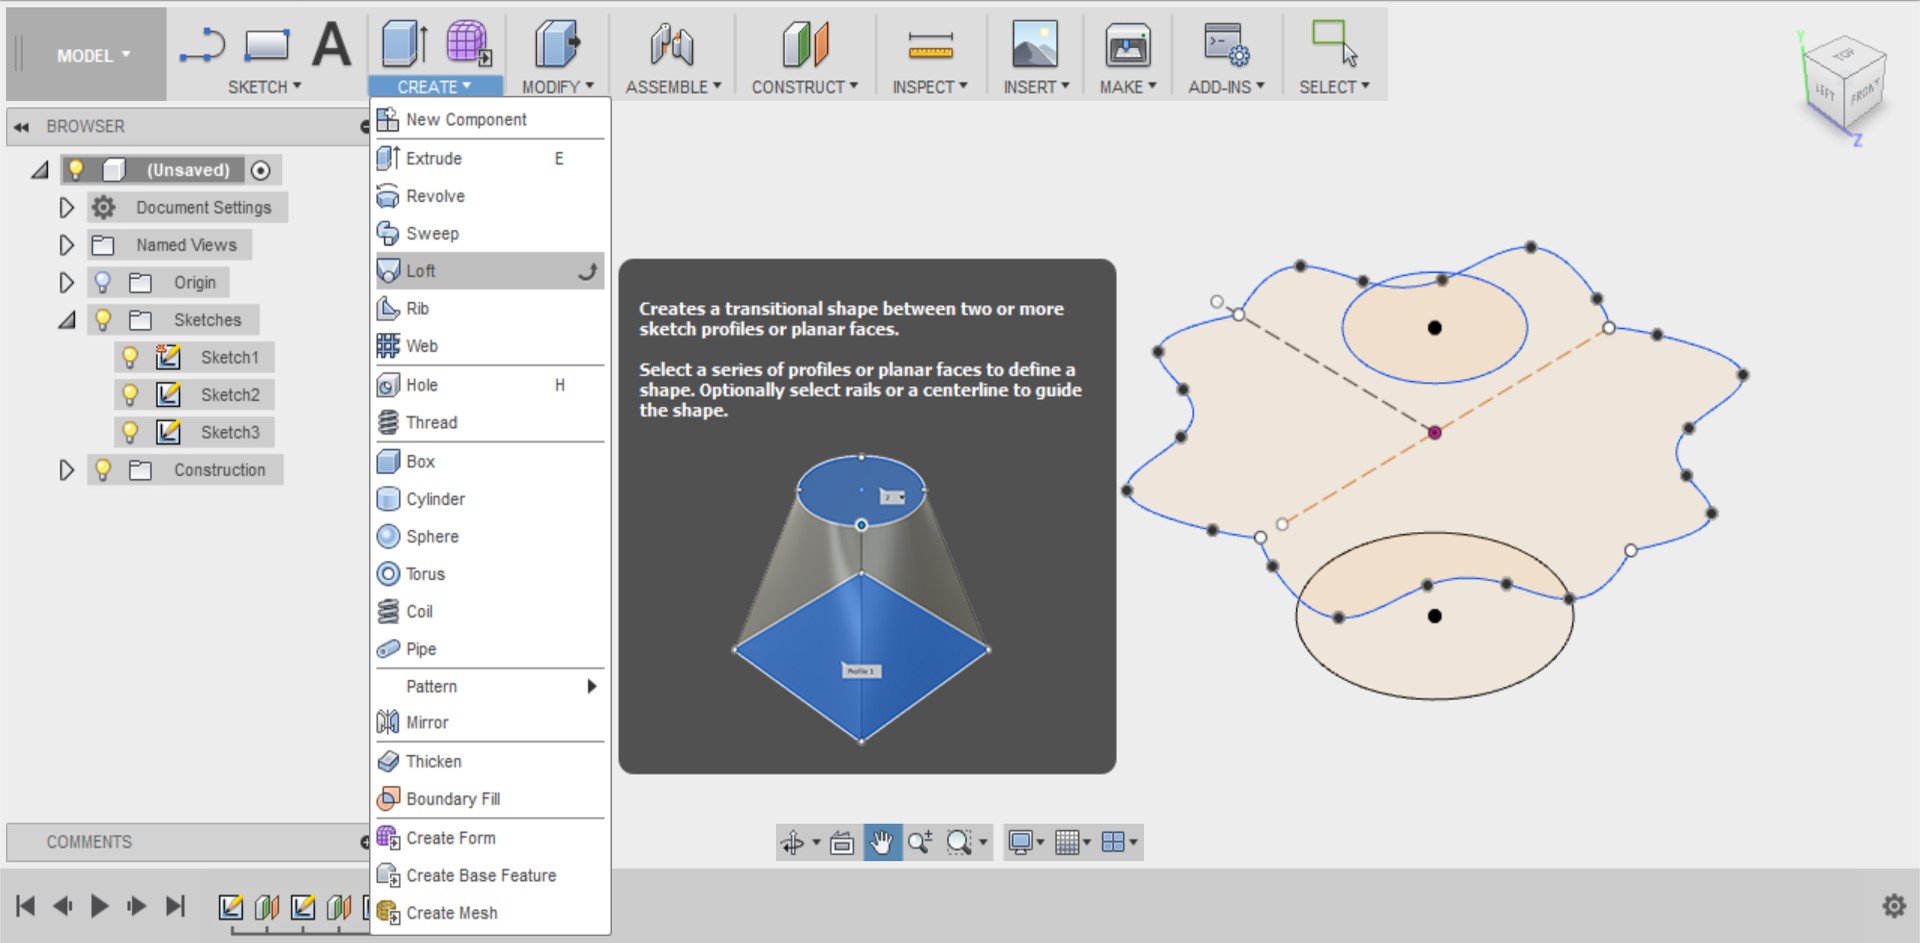
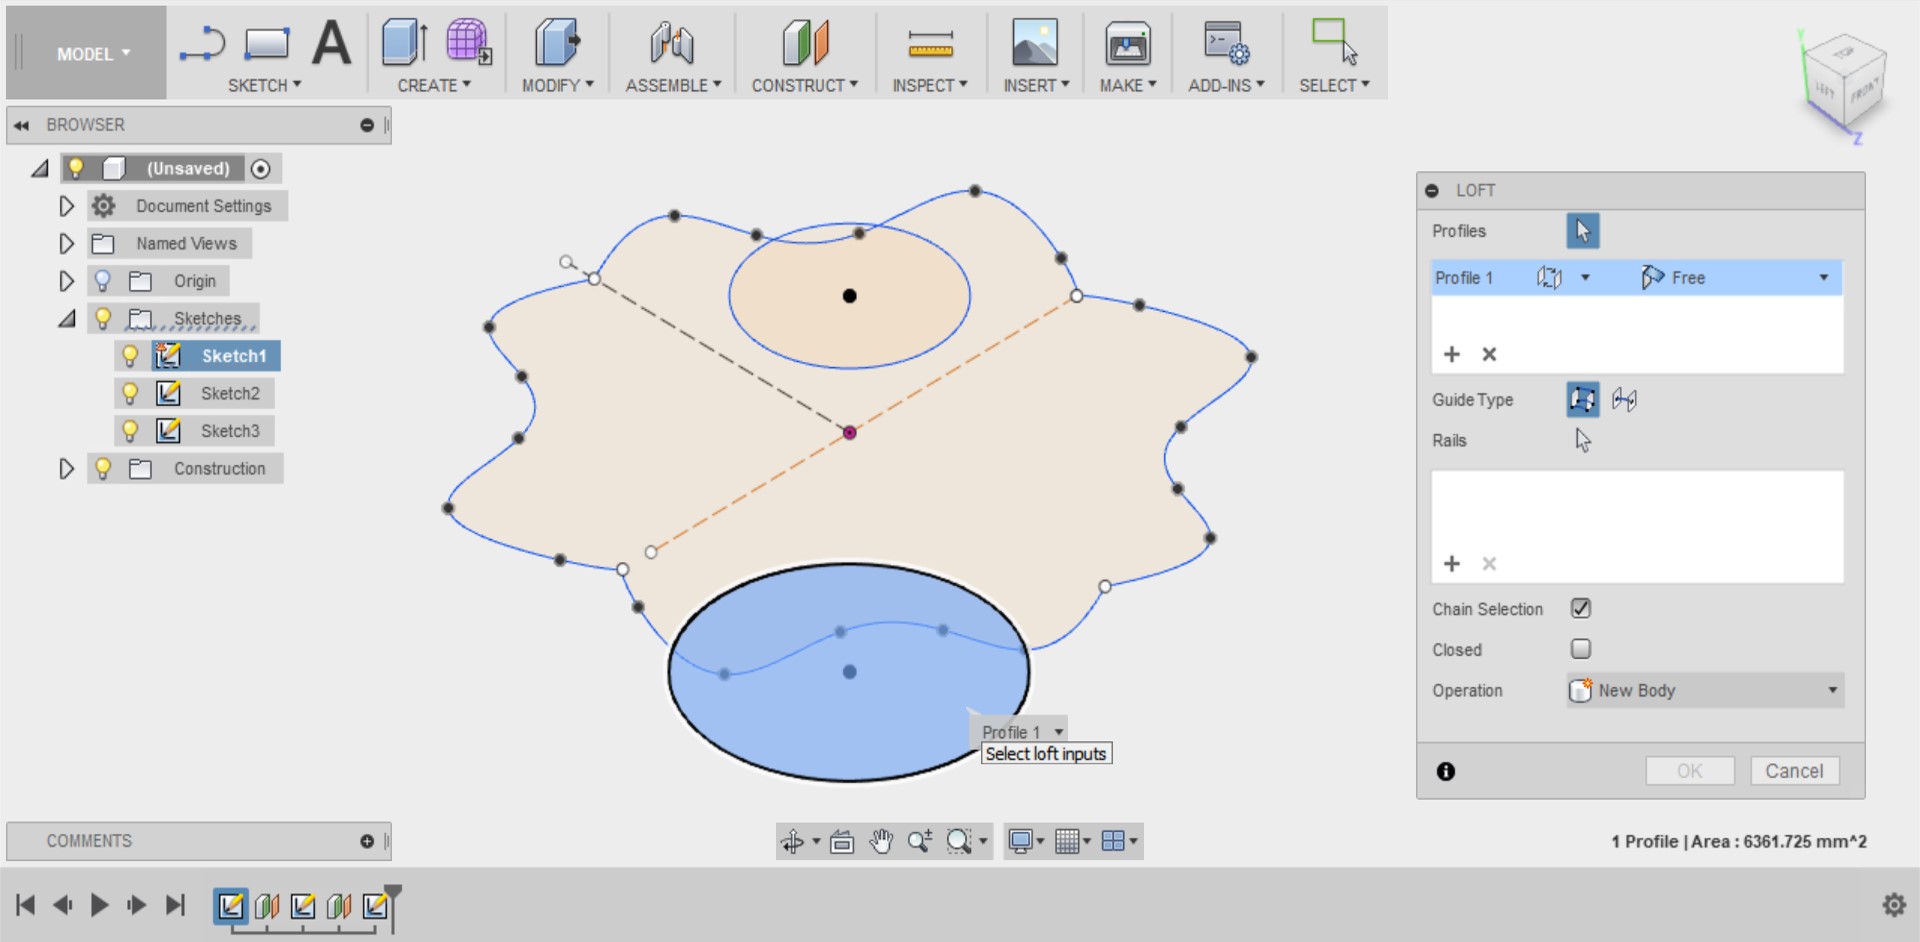
Connect your two shapes together to create a single 3D shape called a loft.
Click on the CREATE drop-down menu and select the Loft tool.
Step 18
A command panel will appear on the right of your screen.
Select your sketches in the order in which you created them starting with the Circle and finishing with the Ellipse.
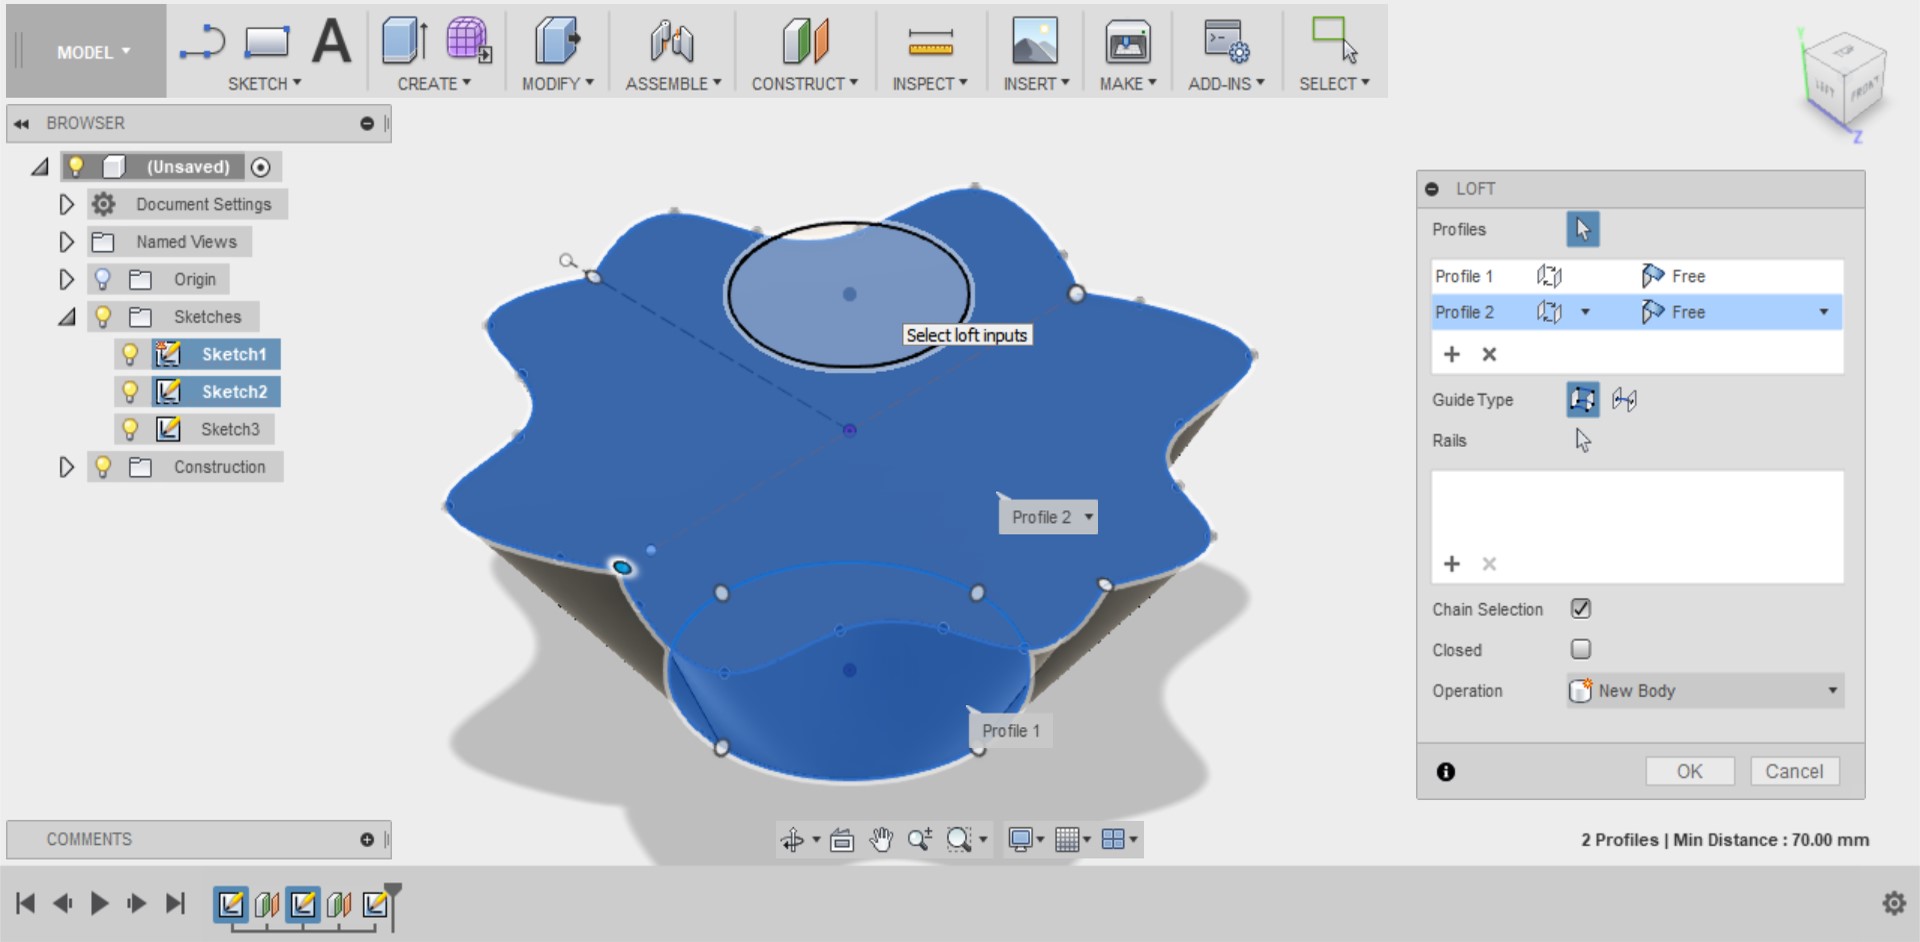
Step 19
When both shapes have been selected you'll see a preview of your loft!

When all three shapes are selected, press OK.
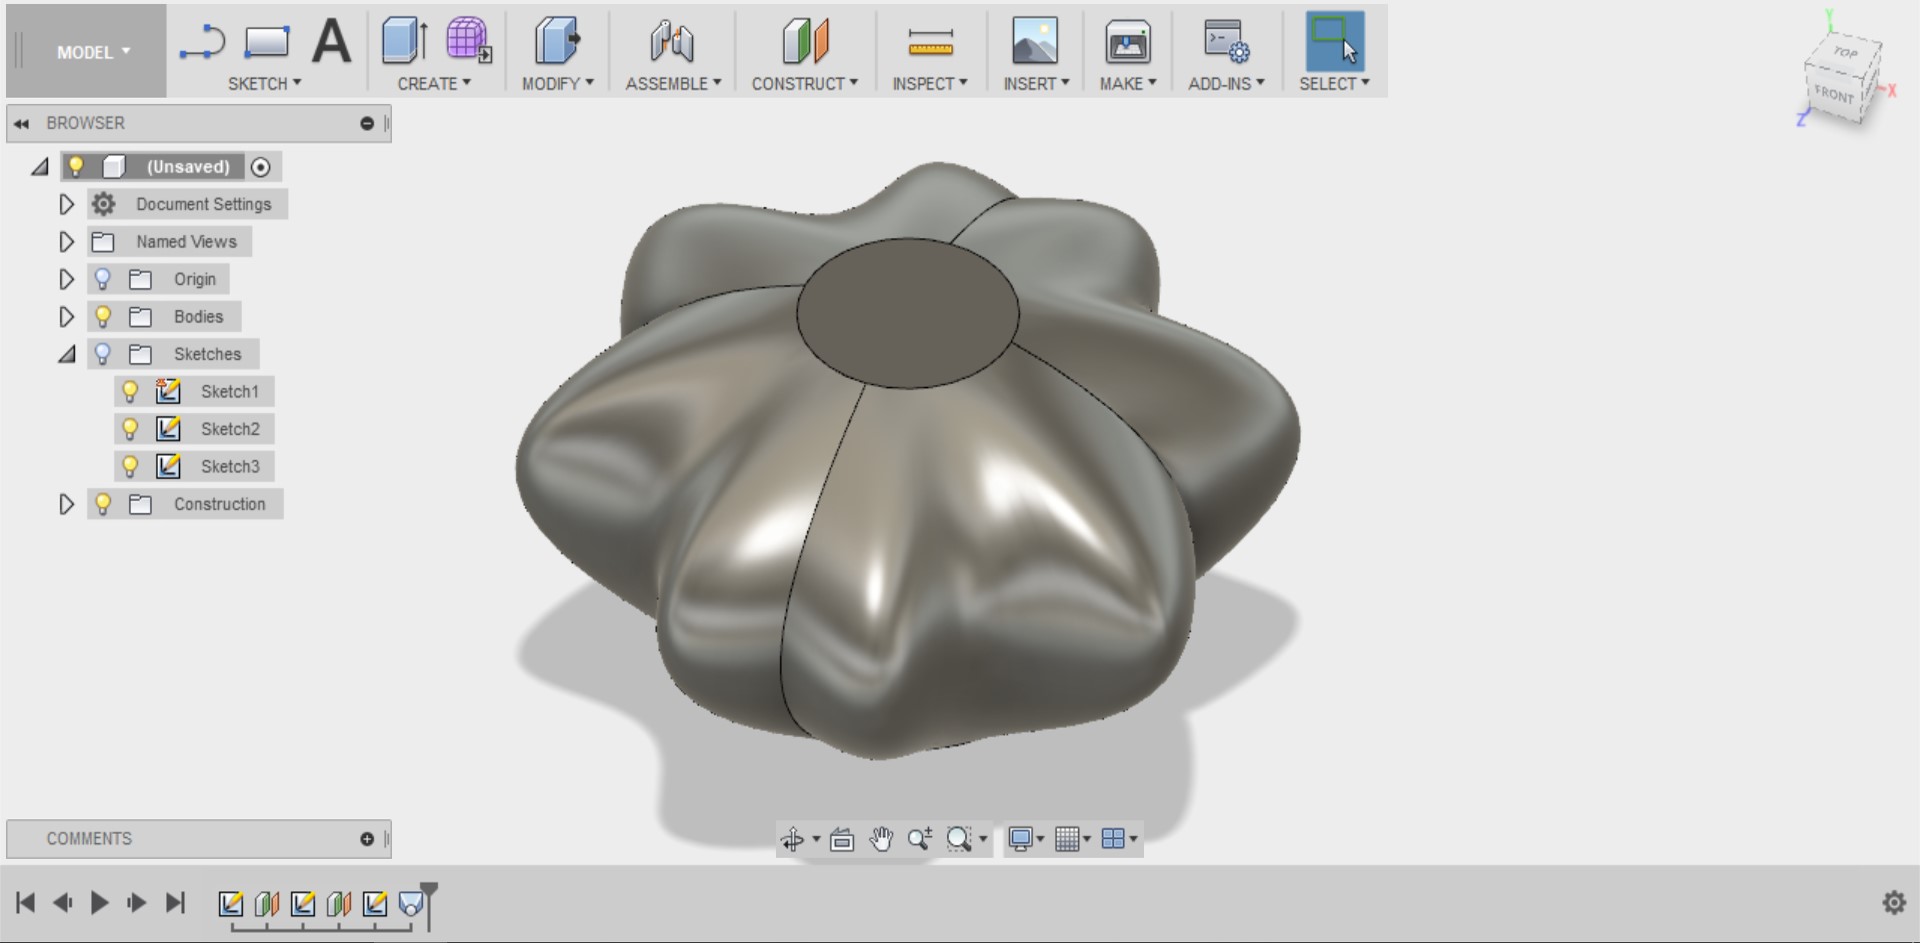
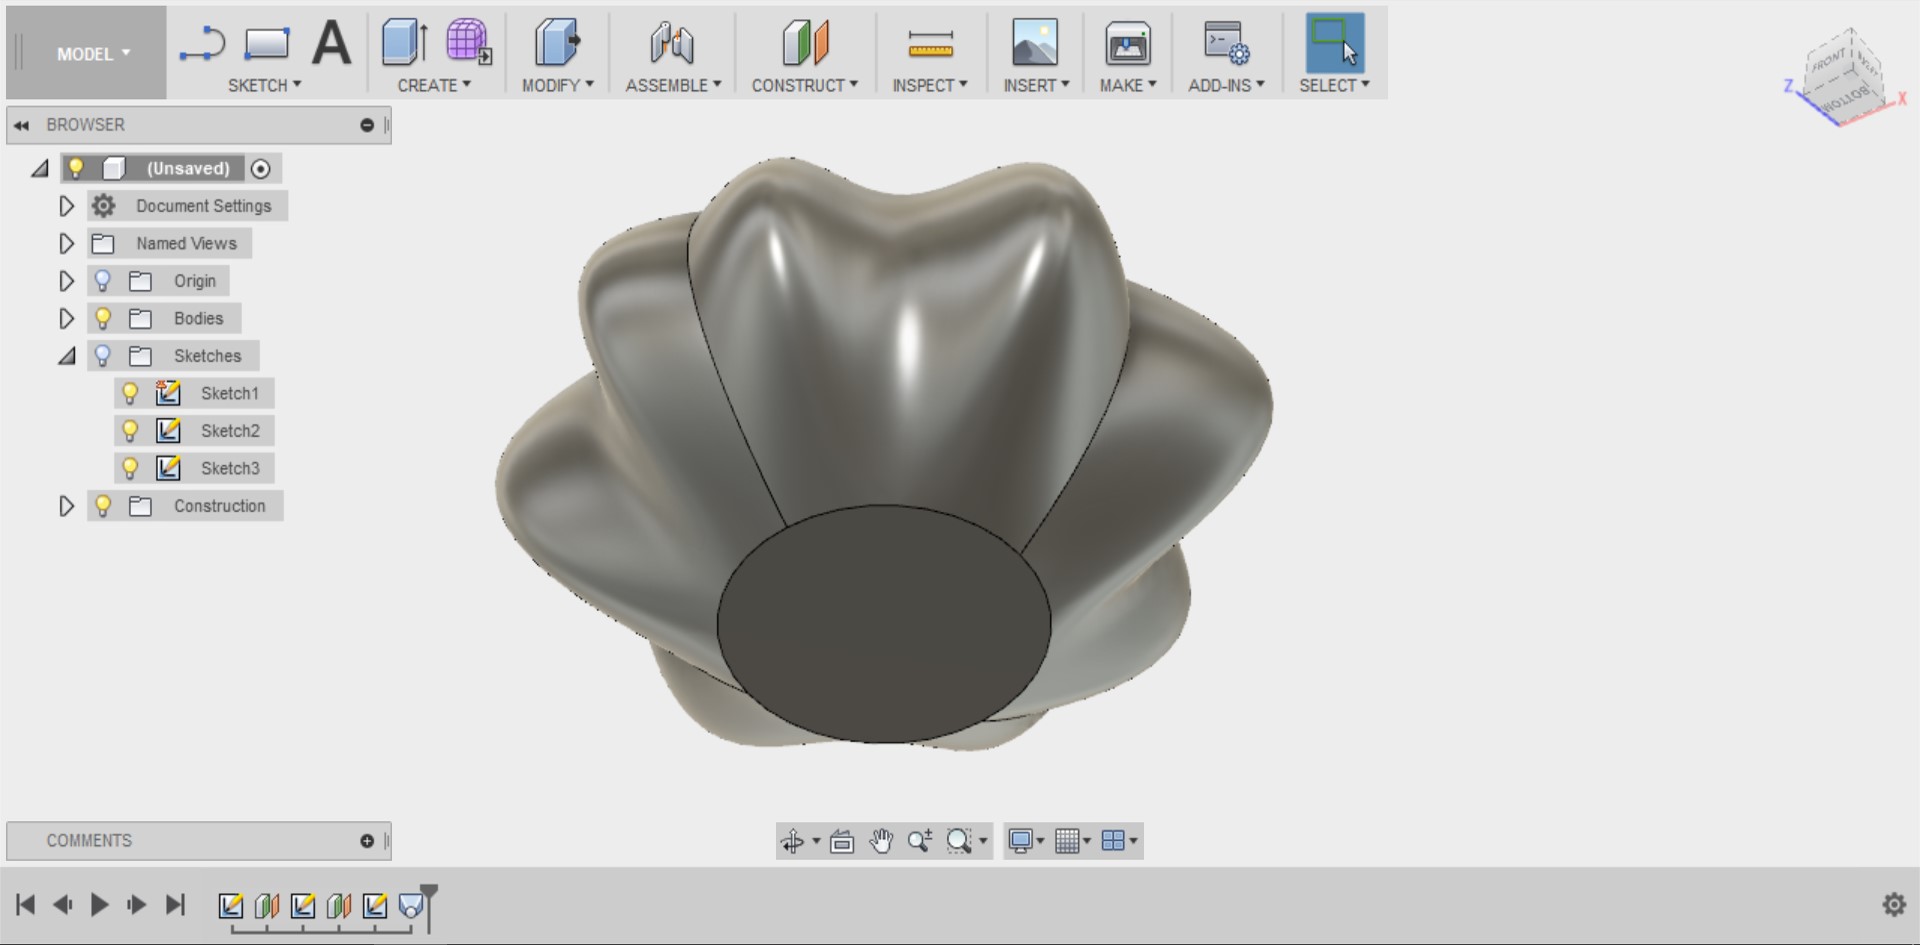
Step 20
Congratulations, you have performed a Loft command!
A loft command isn’t restricted to just two profiles. You can do as many as you like and have your shape follow a centre line or ‘guide rails’.
Use the cube in the top right corner to explore the shape you have created.