Course navigation
Modify Your Parameter
Step 1
Now that you’ve produced one single body, what do you do if you want to change your design? Do you have to delete everything you’ve created to go back and change that initial curve?
Luckily, you can use the Timeline tool at the bottom of the screen to change parts of your design, rather than undoing everything.
Step 2
In the timeline there are lots of different icons. If you hover your cursor over the icons, they will give a description of what happened in each step.
For example, if you hover over the first icon, it tells you that in this step you drew a sketch.
If you double-click one of the sketch icons in the timeline you can change it. Change the sketch you used for the intersection. (Hint: this was the second sketch).
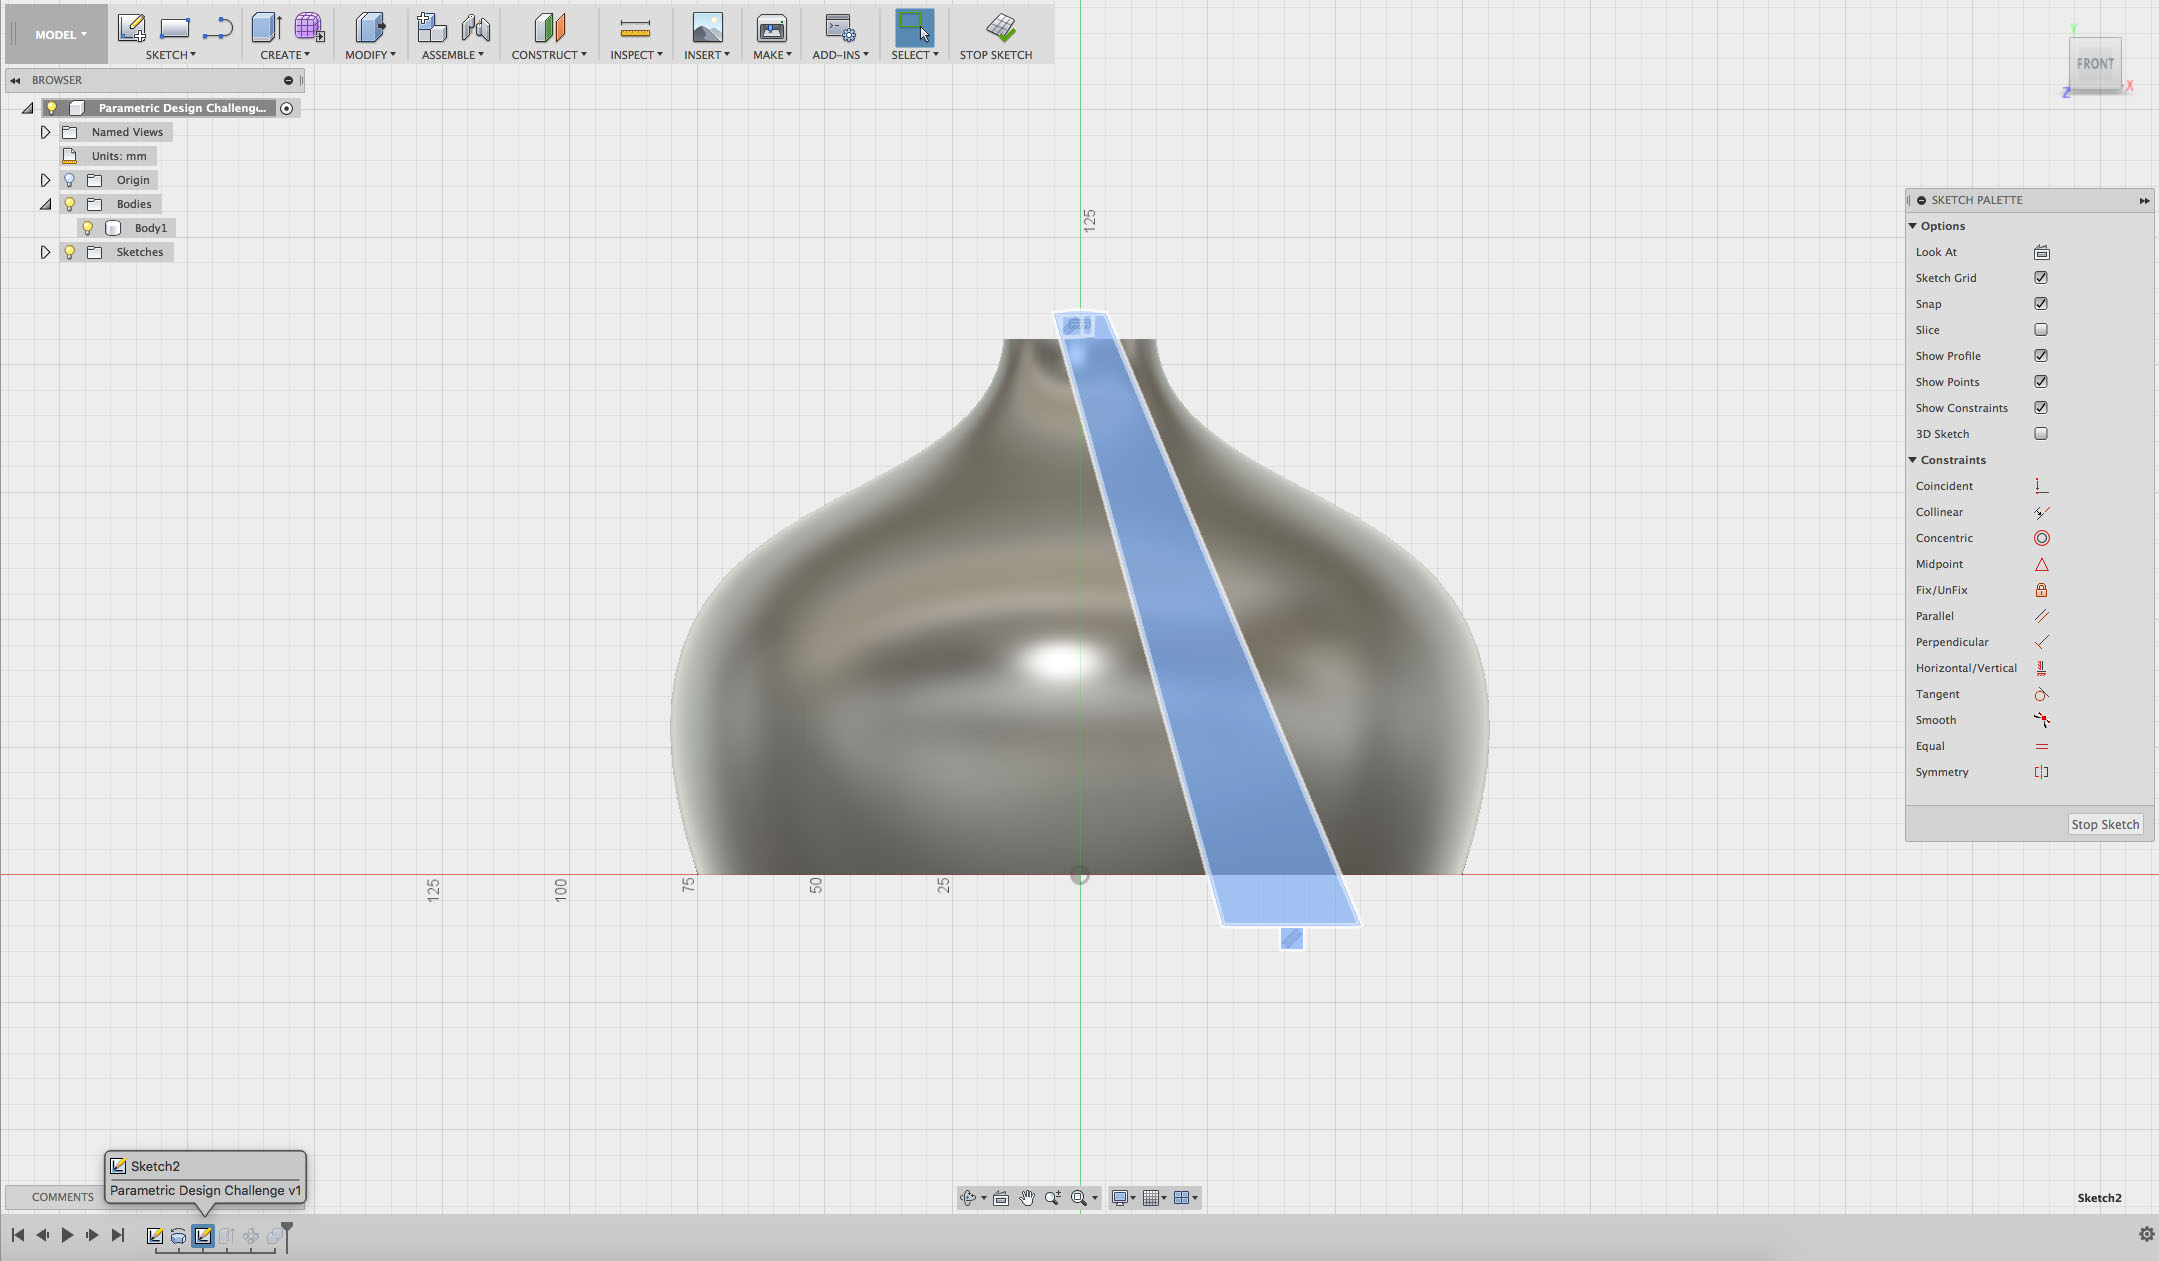
Step 3
Delete your straight-line shape by selecting the object, right-clicking and selecting delete. You may need to delete each line of your shape individually.
Create a new shape using splines. (Hint: you will need to use splines, straight lines and the offset tool to create a shape.)
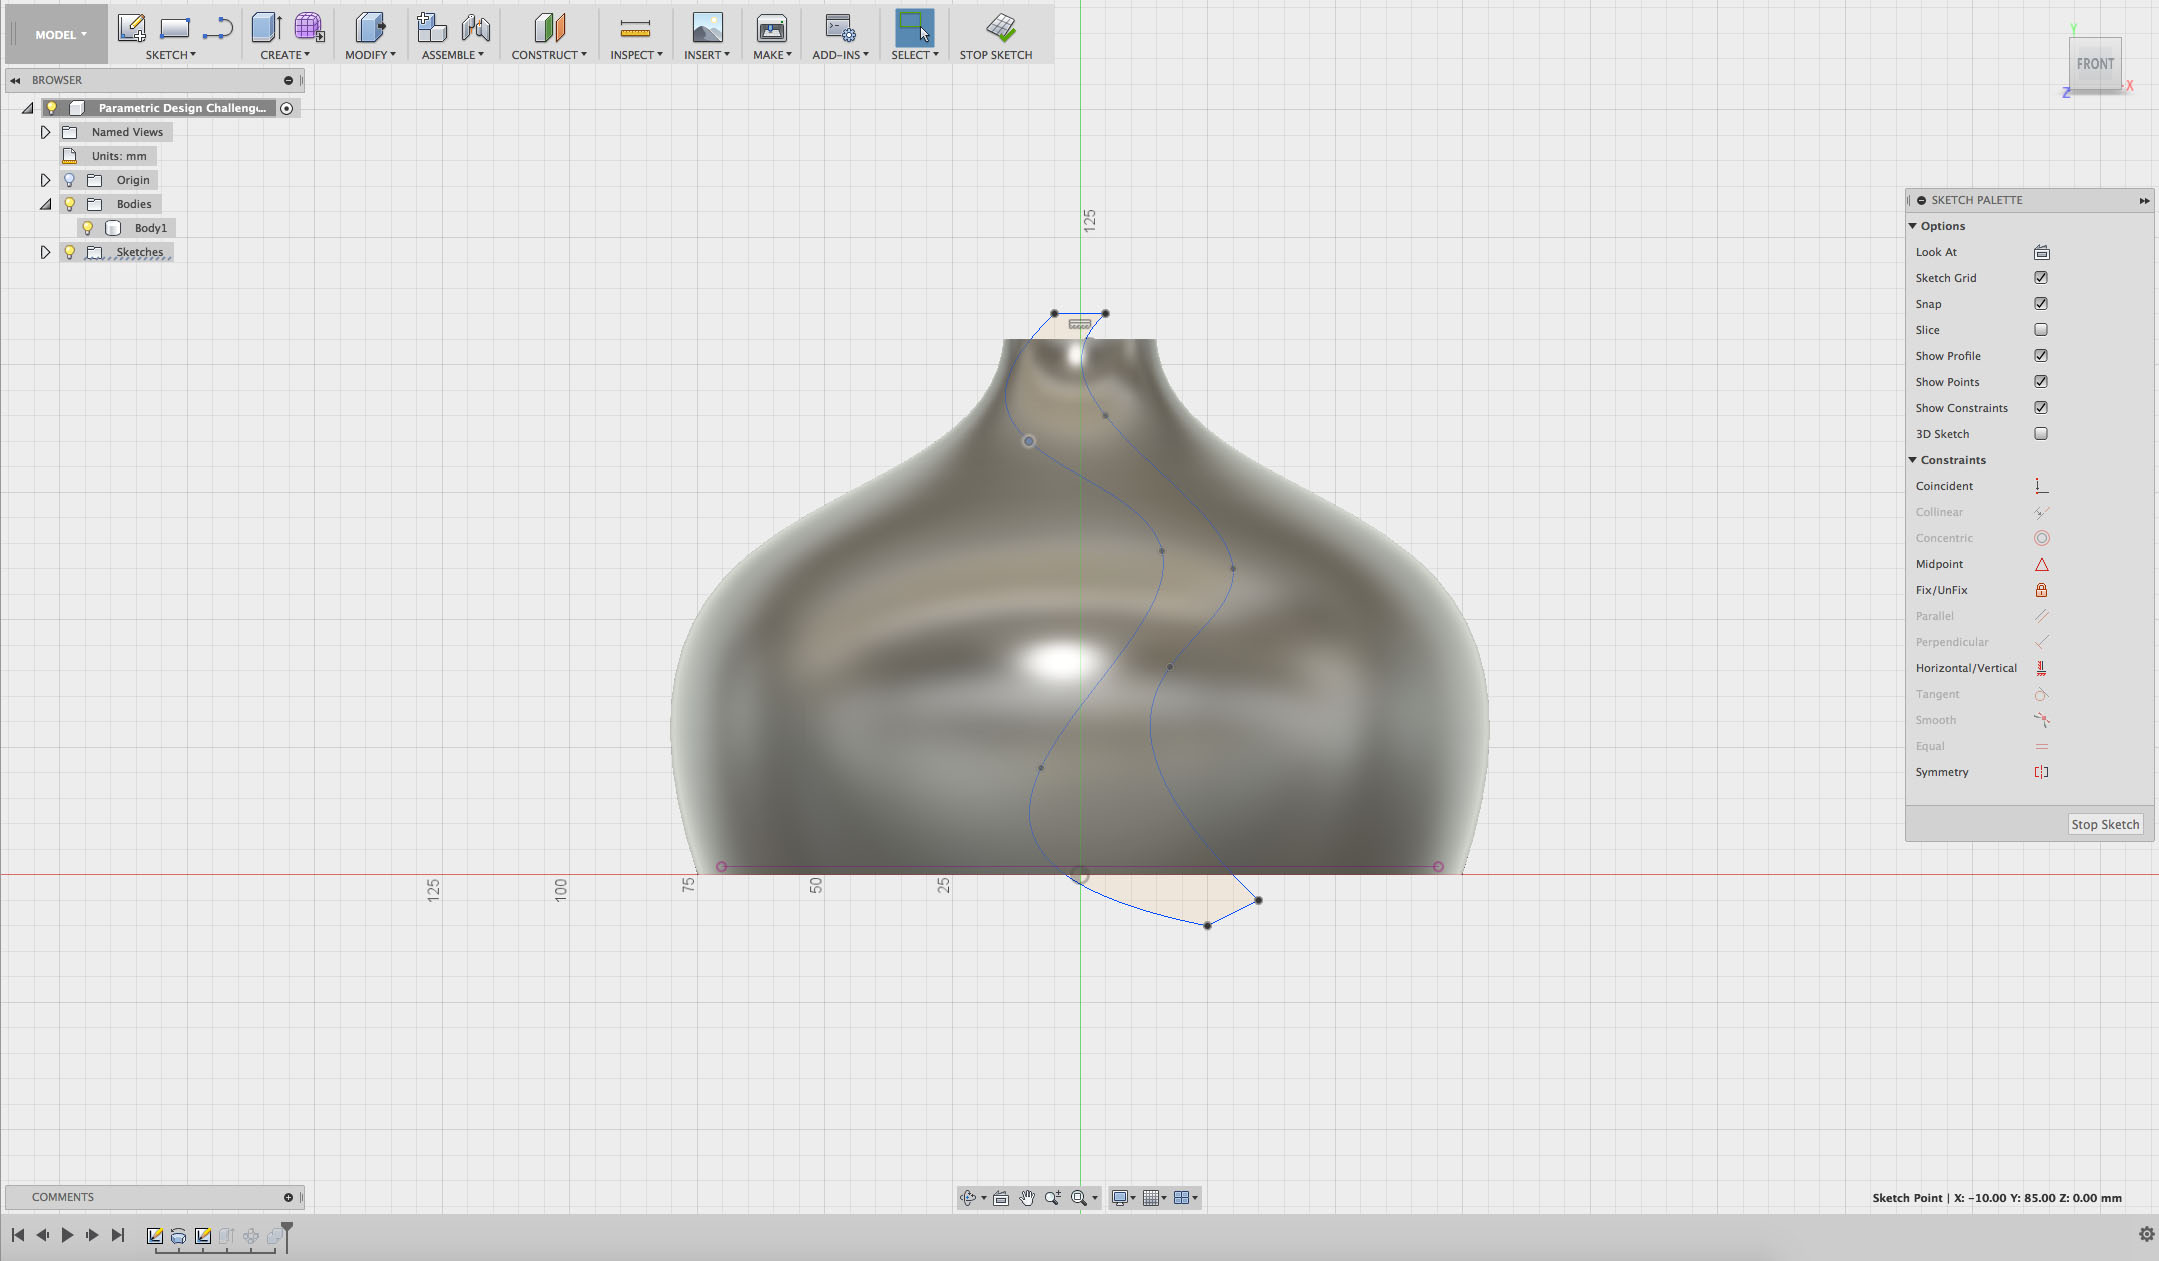
When you’re happy with your new shape, click STOP SKETCH or FINISH SKETCH.
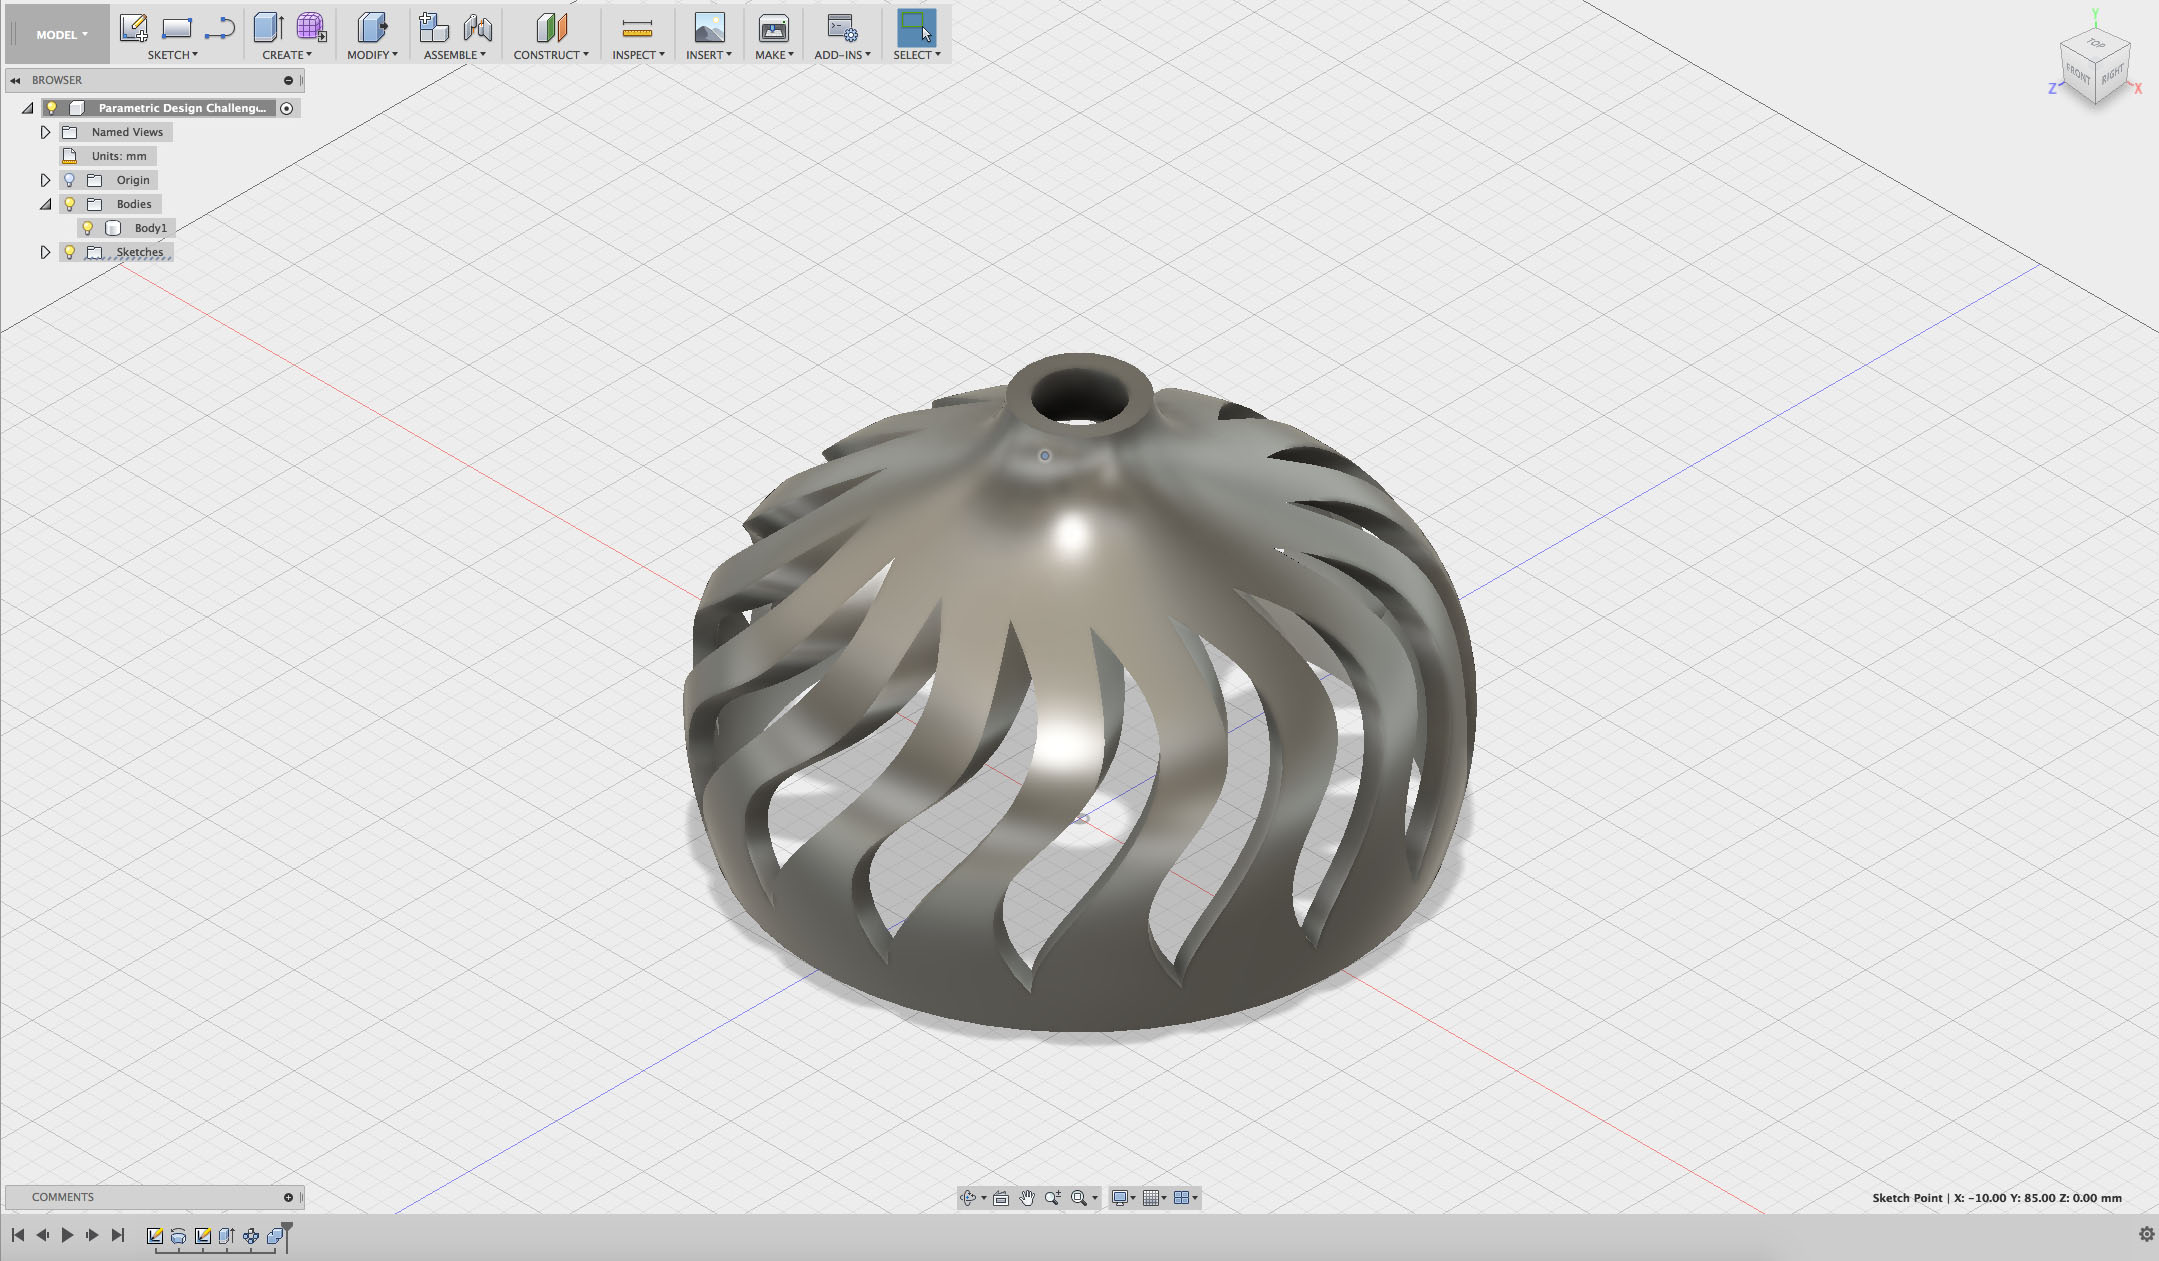
Step 4
Because you have just changed one step of your design, your shape should automatically change and update.
Step 5
You can do the same thing with your initial Sketch for the revolve shape.
Double-click on the first sketch in the timeline. Edit your shape however you like and when you are happy click STOP SKETCH or FINISH SKETCH.

Step 6
Again, your shape should automatically update based on the changes you have made to your initial sketch.
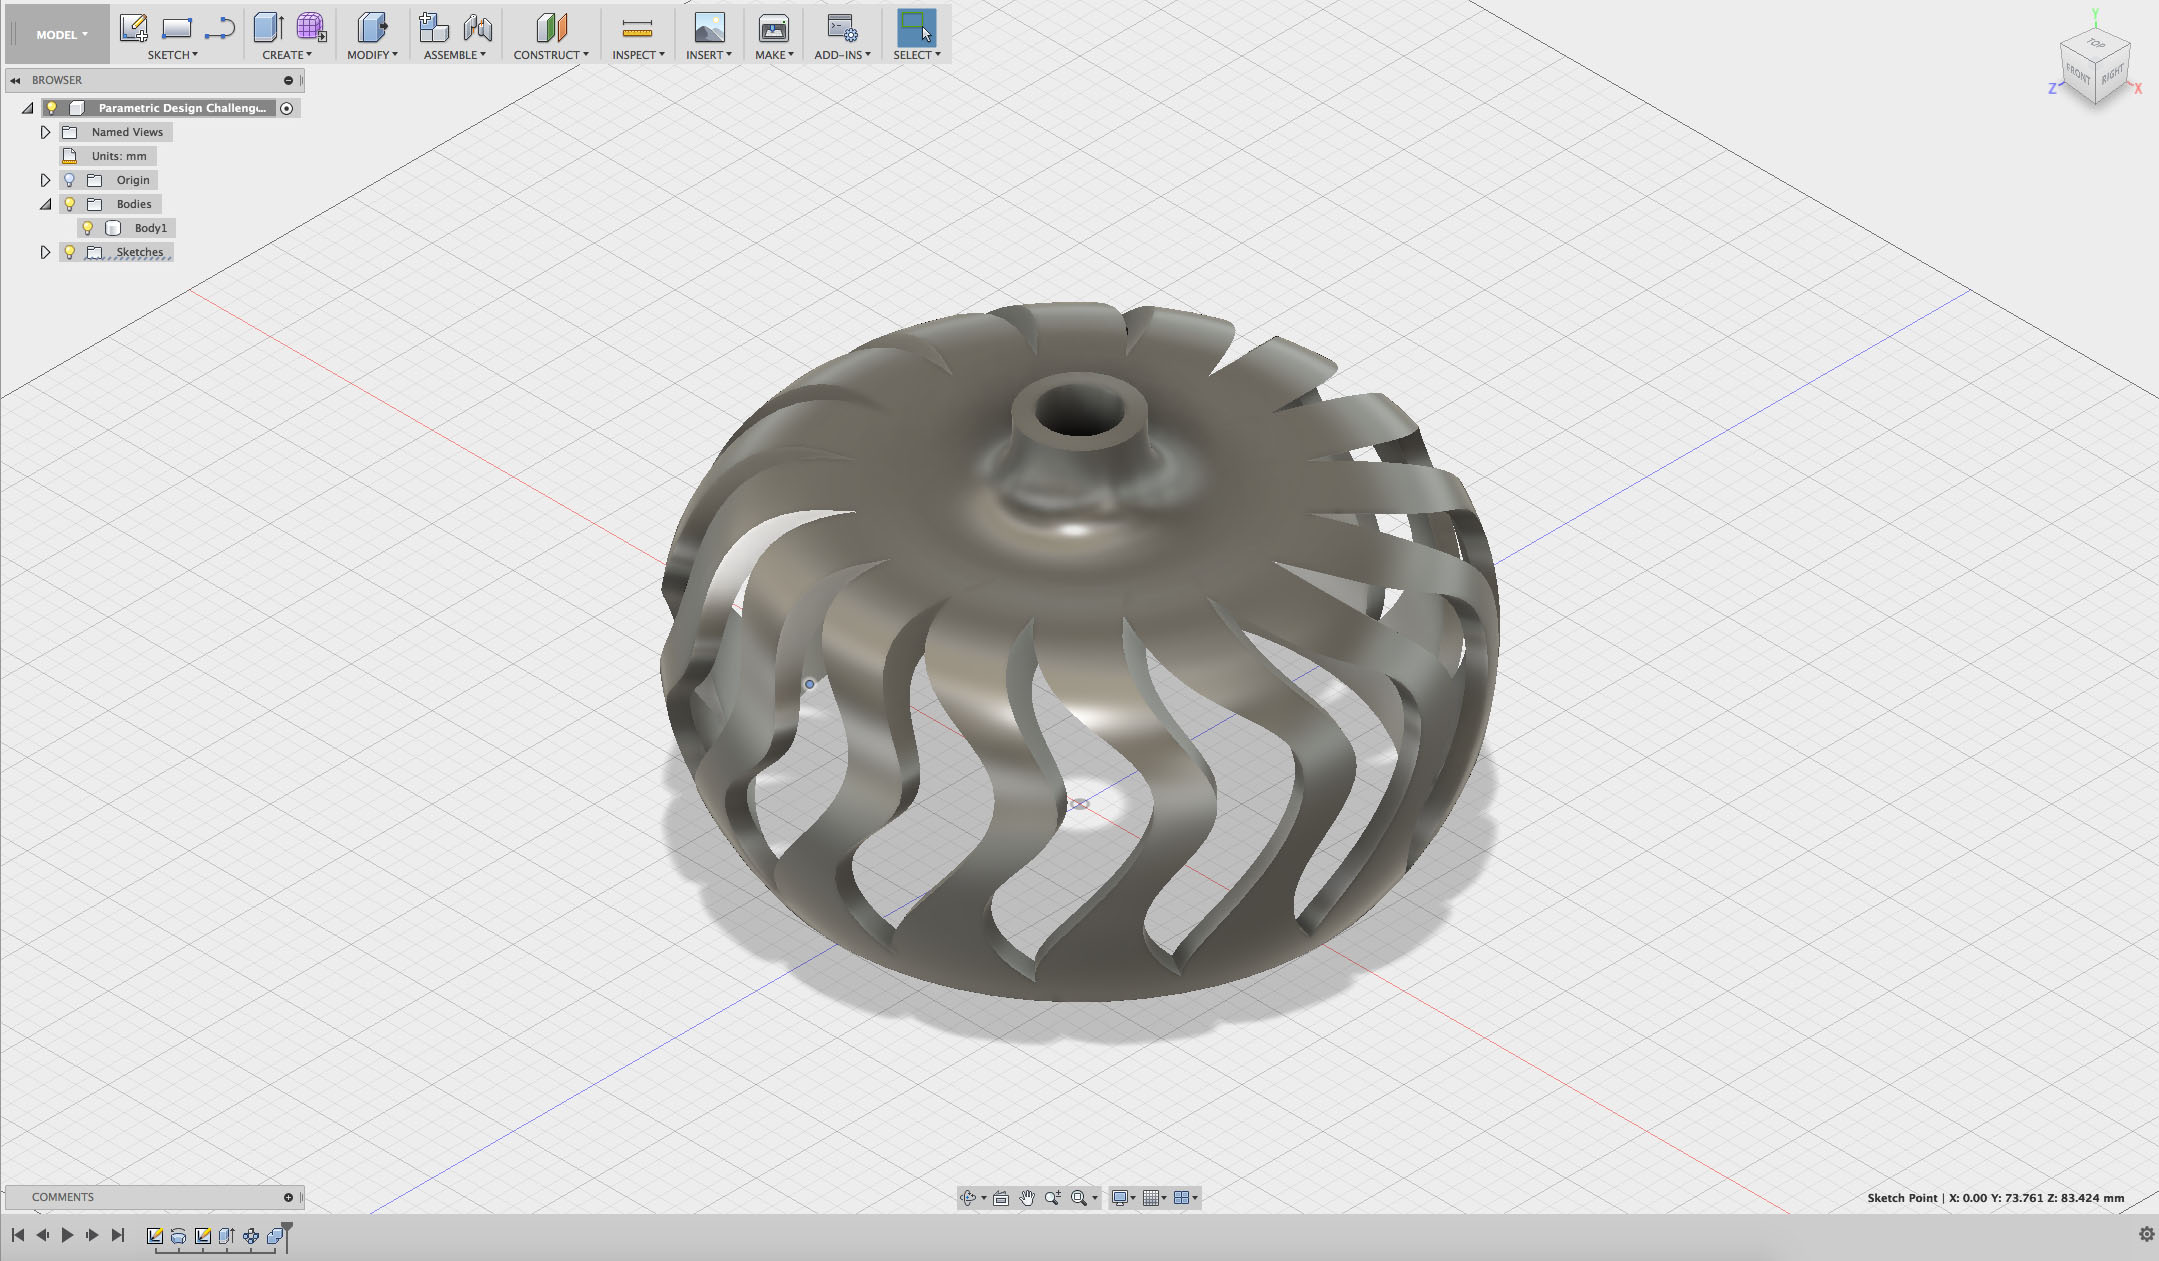
Using the timeline to tweak and change small elements of your project can allow you to quickly and simply alter entire projects very easily.
Congratulations! You have now mastered the basic principles of parametric design.