Course navigation
-
Unit 1 - Introduction to Digital Sewing Machines
Unit 2 - Create a Fabric Pattern
Unit 3 - Assemble a Textile Project
Unit 4 - Introduction to Digital Embroidery Machines
1—Set Up the Digital Embroidery Machine
2—Thread the Digital Embroidery Machine
3—Set up an embroidery hoop
4—Checkpoint!
Unit 5 - Set up a Digital Embroidery File
Unit 6 - Stitch a Digital Embroidery Patch
Thread the Digital Embroidery Machine
Step 1
Just like when you were sewing in earlier lessons, embroidery requires a bobbin to be wound and the machine to be threaded.
Set your spool and bobbin in position.
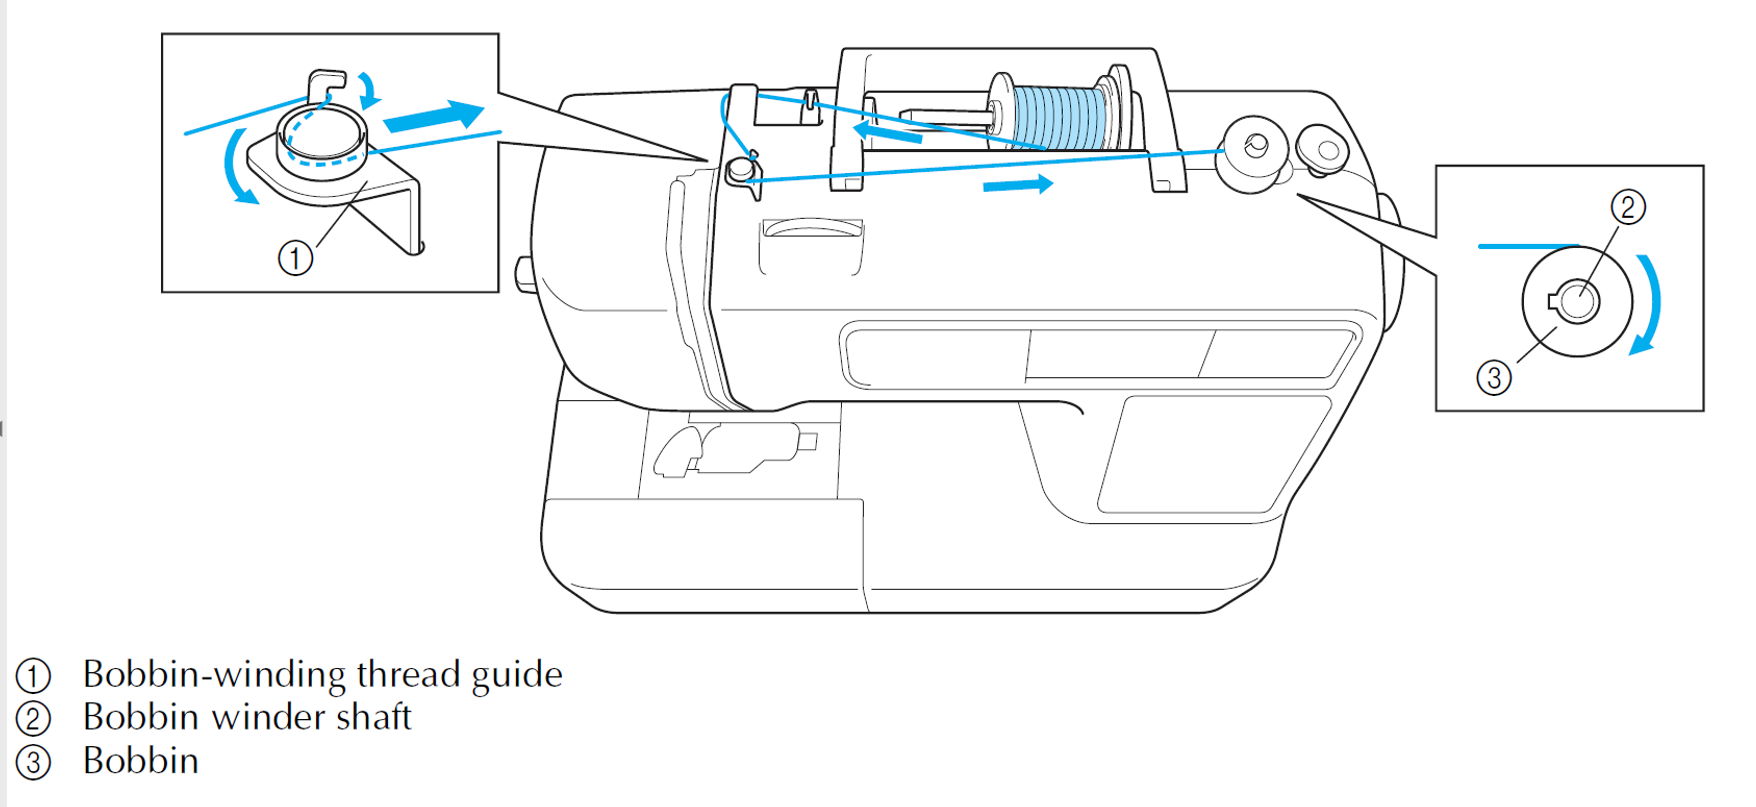
Making sure that the spool cap is on and the thread is wrapped round the bobbin to hold in place.
Slide the bobbin winder to the right until it snaps into place.
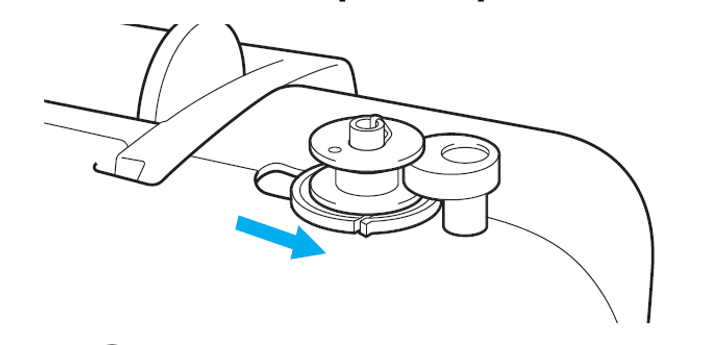
Make sure that the thread is well secured around the bobbin and kept taut between the spool and the bobbin.
Adjust the speed controller to the right (fastest setting) and press the start/stop button once. This will start the bobbin winding.
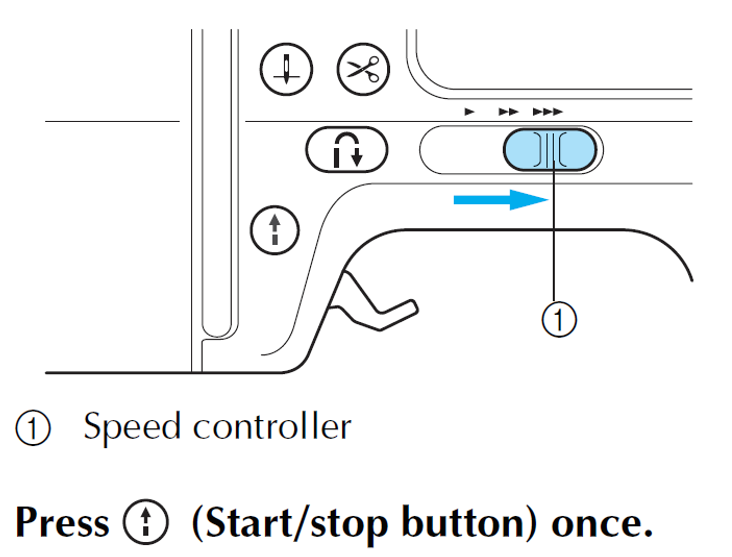
Press the start/stop button again to stop the bobbin winding.
Step 2
Thread the machine through the guides as shown below:
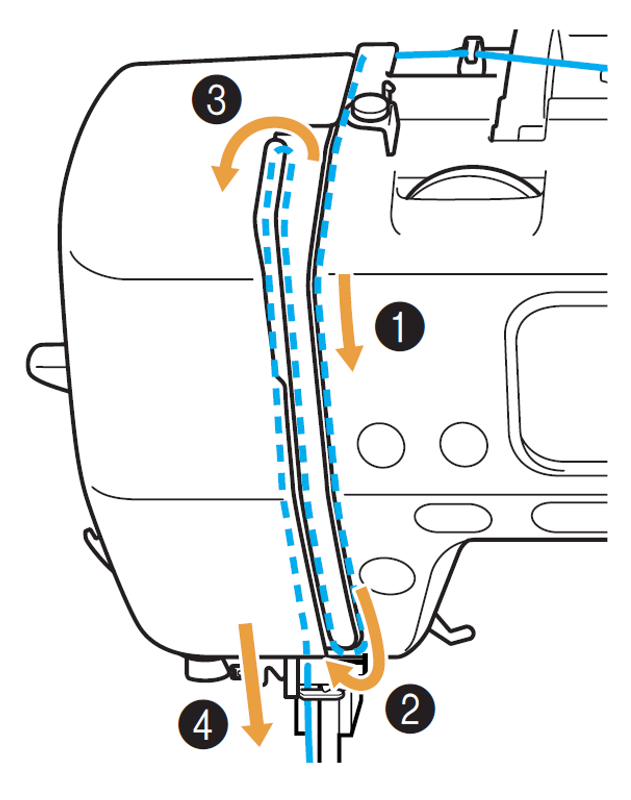
At guide no.3, make sure to pass the thread through the eye of the thread take-up lever as shown.
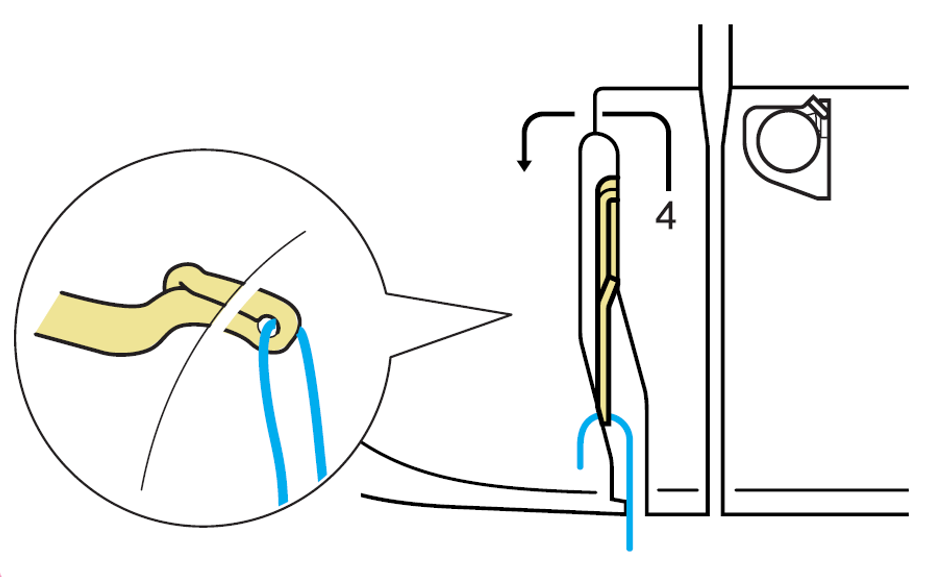
Once you’ve passed the thread through all the guides in the right order, make sure that the embroidery foot lever is down and thread the needle manually from front to back.
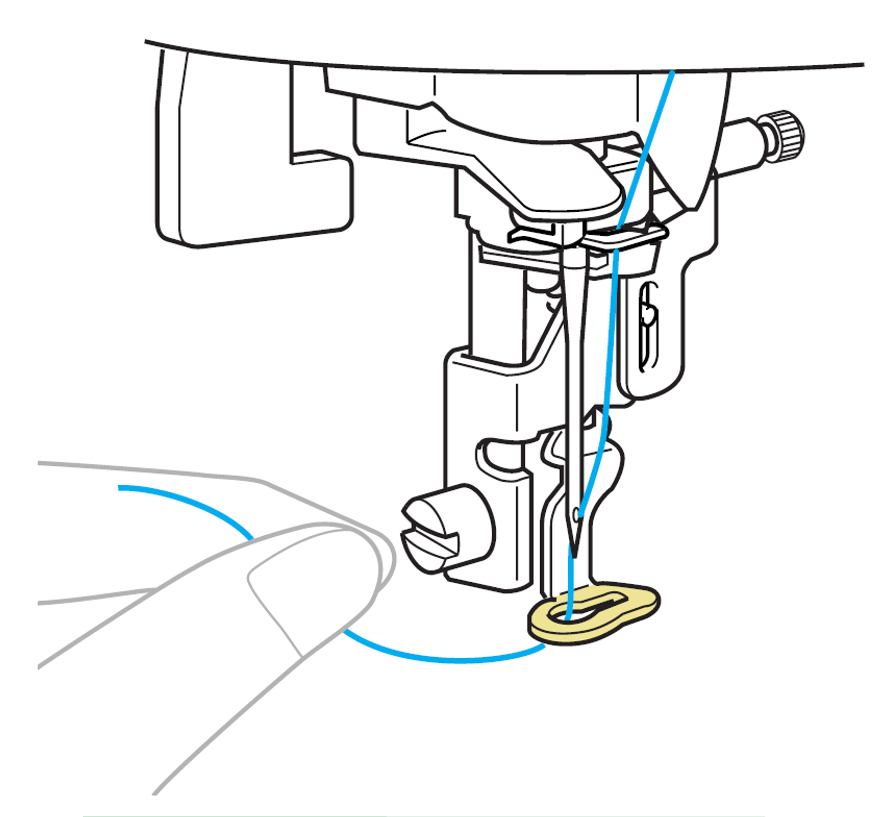
Step 3
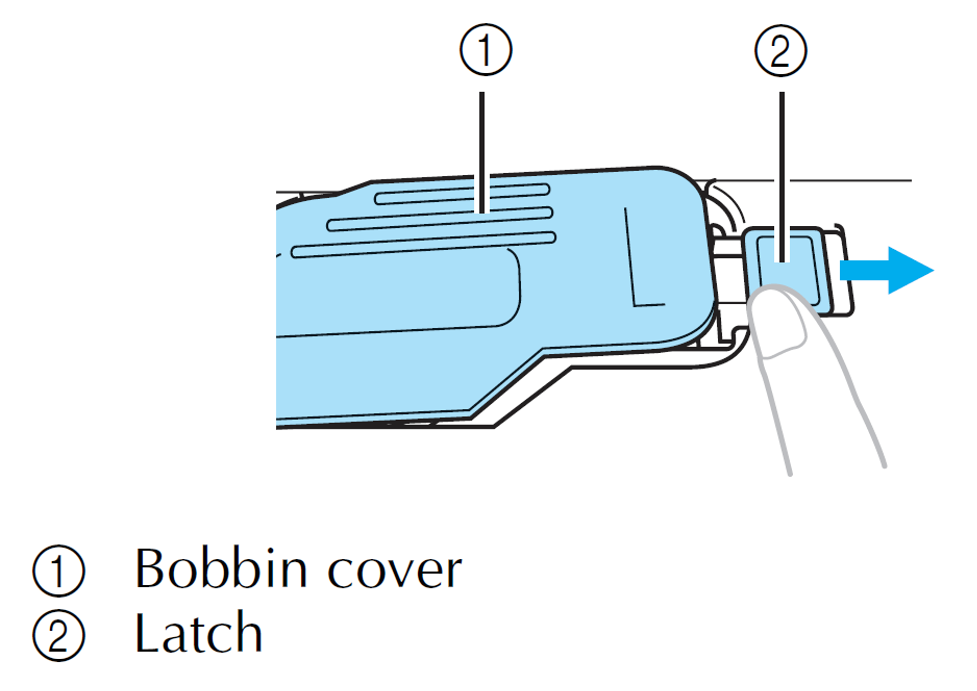
Open the bobbin cover using the latch.
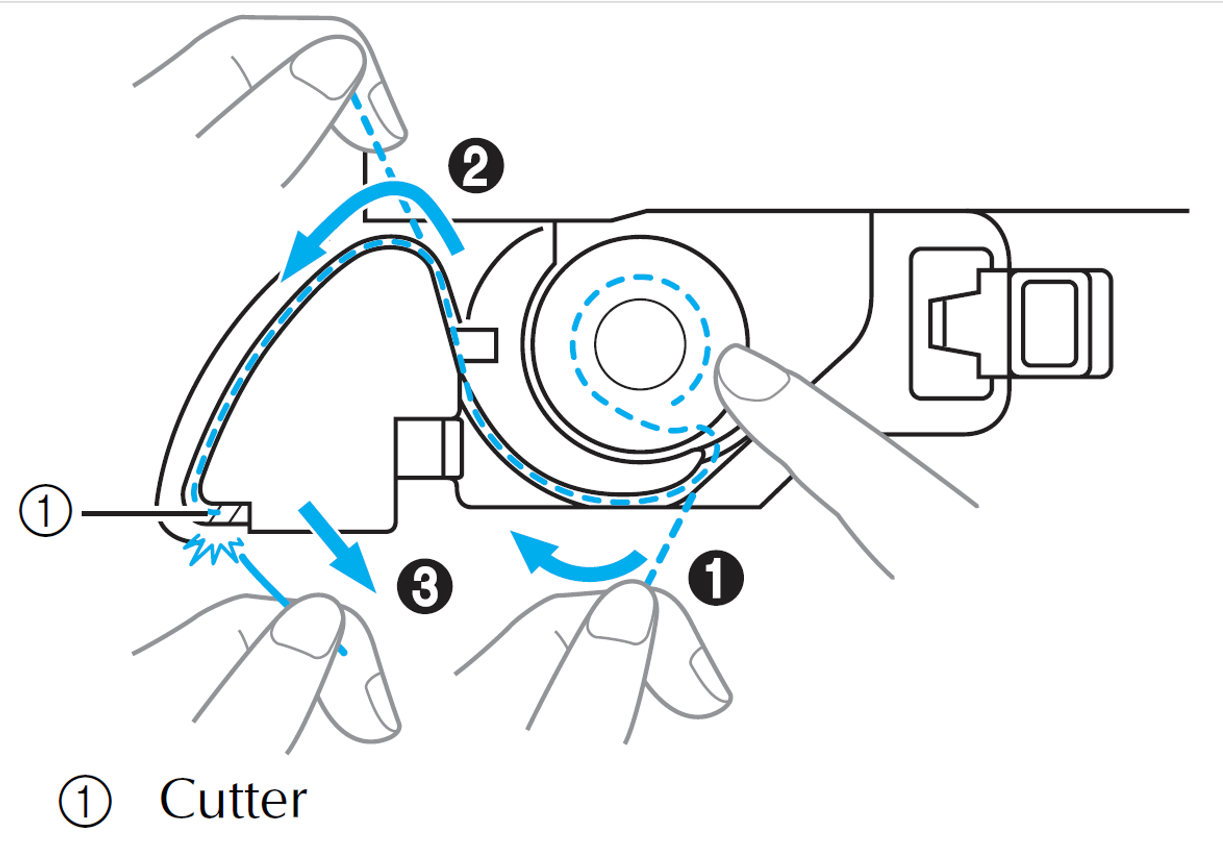
Position the bobbin and cut the thread.
Put the bobbin cover back in place.
Once the bobbin is in place, you need to use the upper thread to pull up the bobbin thread and draw it parallel to the upper thread.

Make sure to draw out at least 10 – 15 cm of thread and bobbin thread behind the machine before you start embroidering.