Course navigation
-
Unit 1 - Introduction to Digital Sewing Machines
Unit 2 - Create a Fabric Pattern
Unit 3 - Assemble a Textile Project
Unit 4 - Introduction to Digital Embroidery Machines
1—Set Up the Digital Embroidery Machine
2—Thread the Digital Embroidery Machine
3—Set up an embroidery hoop
4—Checkpoint!
Unit 5 - Set up a Digital Embroidery File
Unit 6 - Stitch a Digital Embroidery Patch
Set up an embroidery hoop
Step 1
Now that your machine is all set up, it’s time to have a go at embroidery.
Take your embroidery hoop and position it over a piece of embroidery fabric.
Mark out a rectangle on the fabric that is 3cm larger than the hoop on every side.
Cut out the rectangle using a pair of fabric scissors.
Cut a rectangle of tear-away backing fabric (stabilizer fabric) that is the same size as your embroidery fabric.
Step 2
You now need to place your fabric inside the embroidery hoop.
Loosen the hoop using the tensioning screw and separate the top and bottom parts.
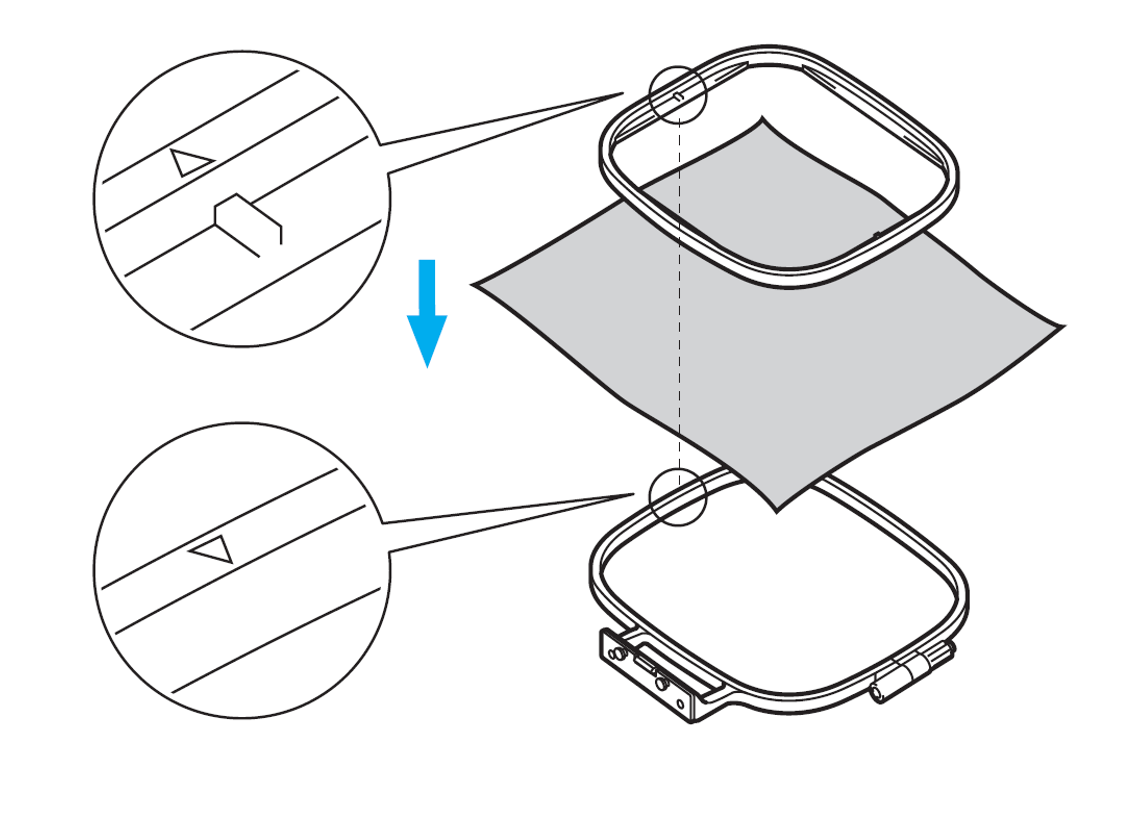
Sandwich the tear-away backing and the fabric between the top and the bottom parts of the hoop with the tear-away backing against the bottom hoop and the fabric on top.
Make sure to line up the key (marked by little triangles) on the top and bottom hoops.
You now need to make the fabric nice and tight in the embroidery hoop.
To do this, gradually pull on the edges of the fabric while tightening the tension screw on the hoop.
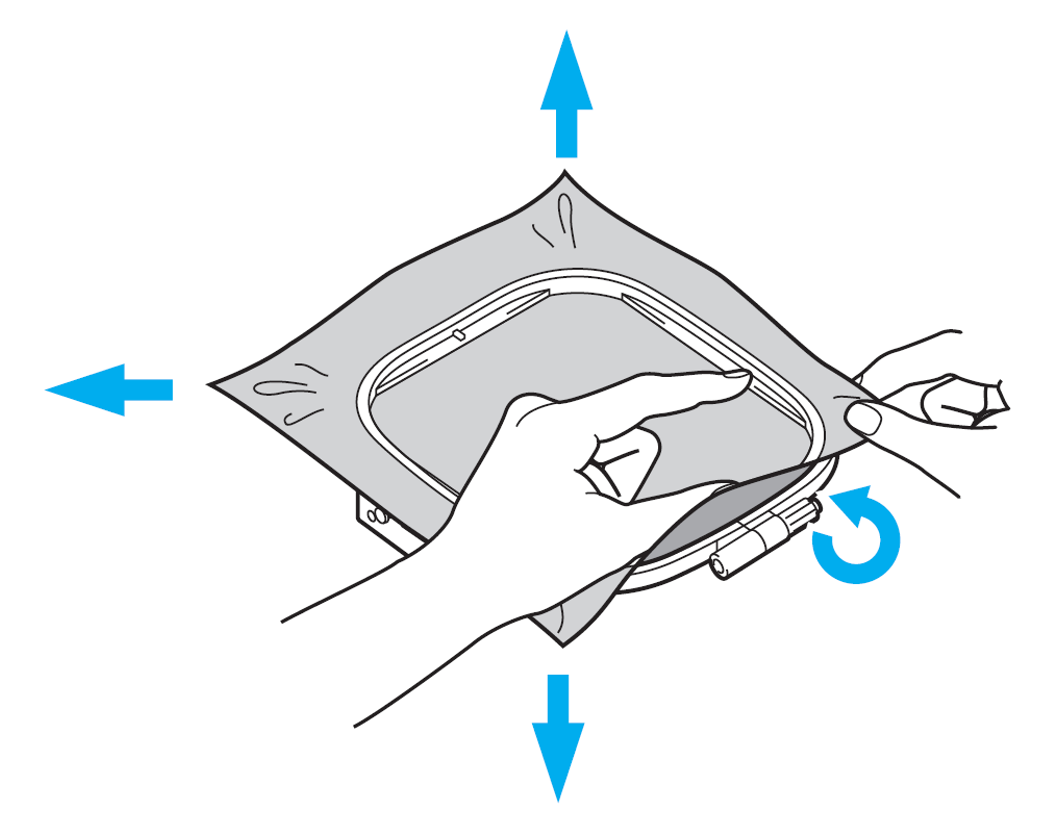
The goal is to make the fabric taut in the hoop and achieve a drum-like sound when the stretch fabric is hit lightly. Make sure you pull the fabric evenly on all edges.
Tighten the tension screw all the way to secure in place.
Step 3
You are now ready to place your embroidery hoop and fabric into the machine.
Make sure that the embroidery foot lever is raised and turn the hand-wheel counter-clockwise to raise the needle as far as it can go.
Slide the embroidery hoop under the embroidery foot while raising the foot even further with the embroidery foot lever.
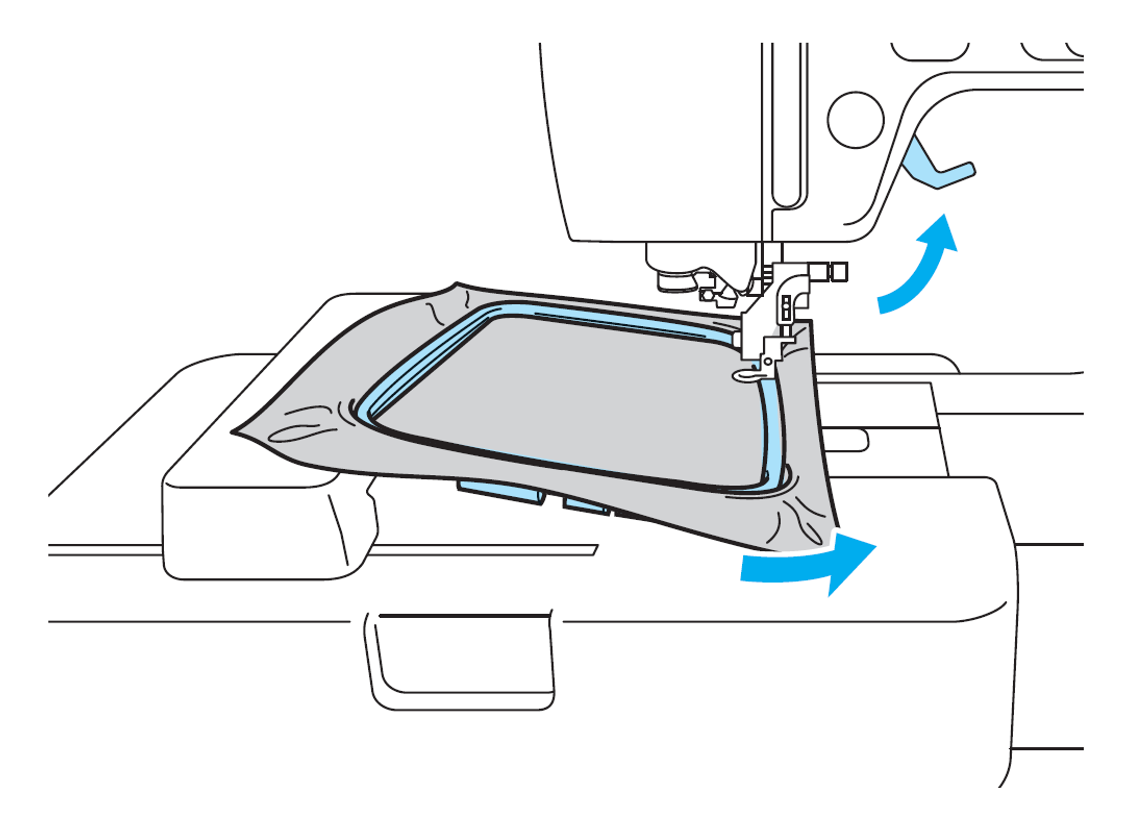
Firmly insert the embroidery hoop into the embroidery carriage by lining up the locking tabs.
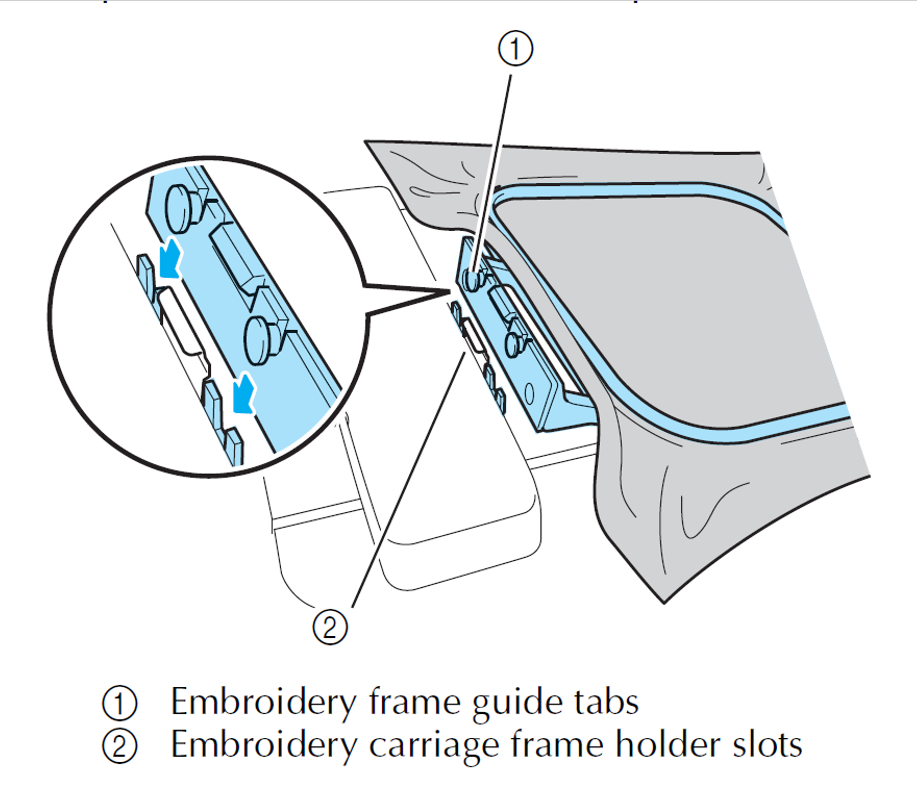
Check that the hoop is secured in place before proceeding with any embroidery pattern.
On the LCD screen, select the pre-set embroidery patterns menu. See no.1 in the diagram below:
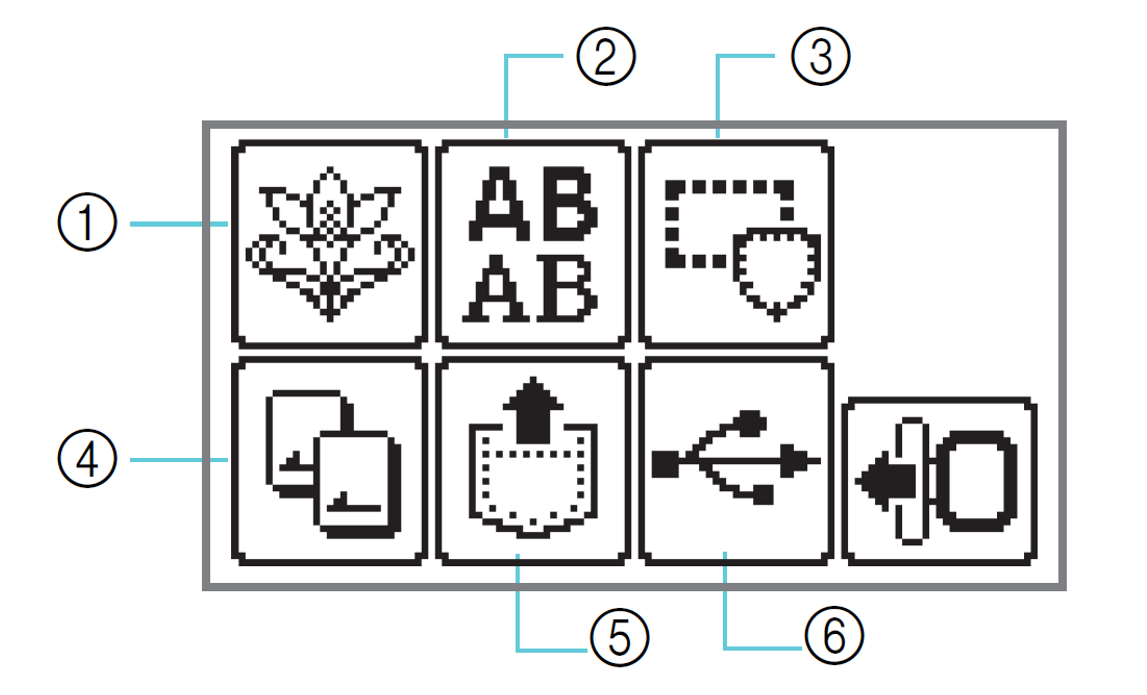
Select pattern 18/70.
Press the start/stop button to start the embroidery.
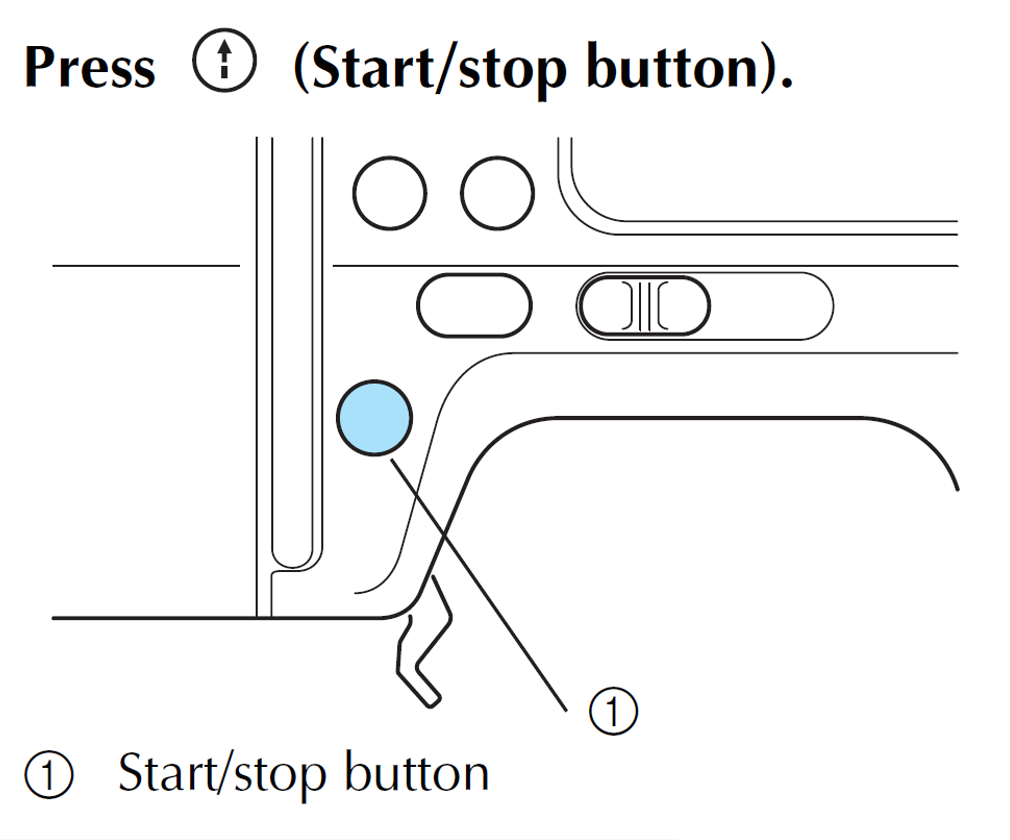
This pattern should take about two minutes to embroider.
When the embroidery is finished, press the thread-cutter button once.
