Course navigation
-
Unit 1 - Introduction to Digital Sewing Machines
Unit 2 - Create a Fabric Pattern
Unit 3 - Assemble a Textile Project
Unit 4 - Introduction to Digital Embroidery Machines
Unit 5 - Set up a Digital Embroidery File
Unit 6 - Stitch a Digital Embroidery Patch
1—Complete the Machine Set-up
2—Start Embroidery - Troubleshoot
3—Finishing an Embroidery Patch
4—Checkpoint!
Start Embroidery - Troubleshoot
Step 1
It is now time to upload your digital embroidery file onto the machine.
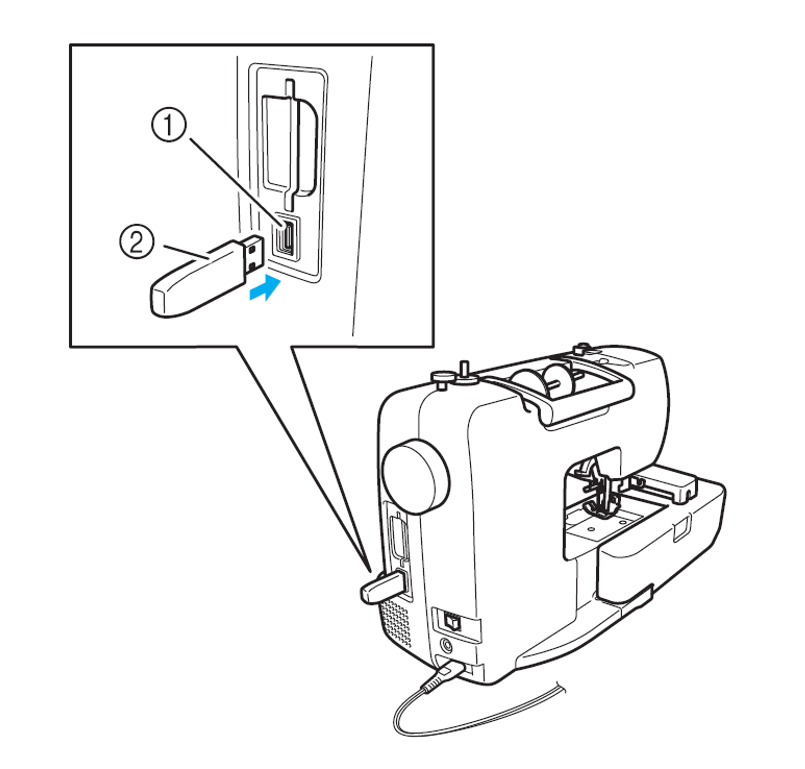
Plug your USB key into the digital embroidery machine.

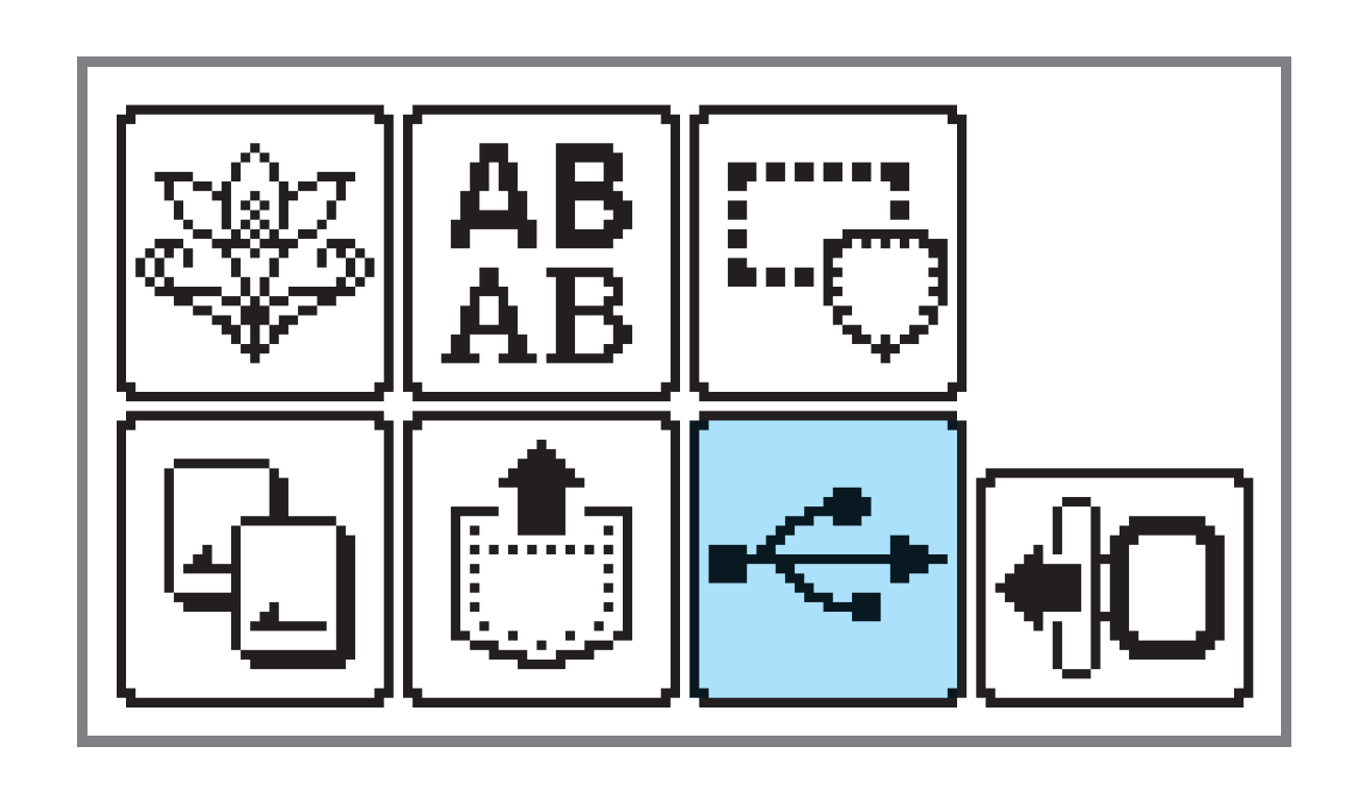
Select the USB menu on the LCD display.

Select your embroidery design from the USB files.
Press the Start/Stop button to begin.
The digital embroidery machine should now start creating your design.
Step 2


Step 3
If the thread snaps, runs out or if the machine comes to the end of a colour section, it will stop and instruct you to change thread.
To change the thread, lift the embroidery foot lever to raise it and raise the needle using the right-hand side handwheel.
Unhook the embroidery hoop, slide it under the embroidery foot and set it aside while changing the thread and/or bobbin as required.
Make sure not to alter the position of the fabric in the hoop, as the design will not be able to line up again properly otherwise.
Once the threading is complete, return the hoop to its position on the embroidery carriage and press the Start/Stop button to resume.
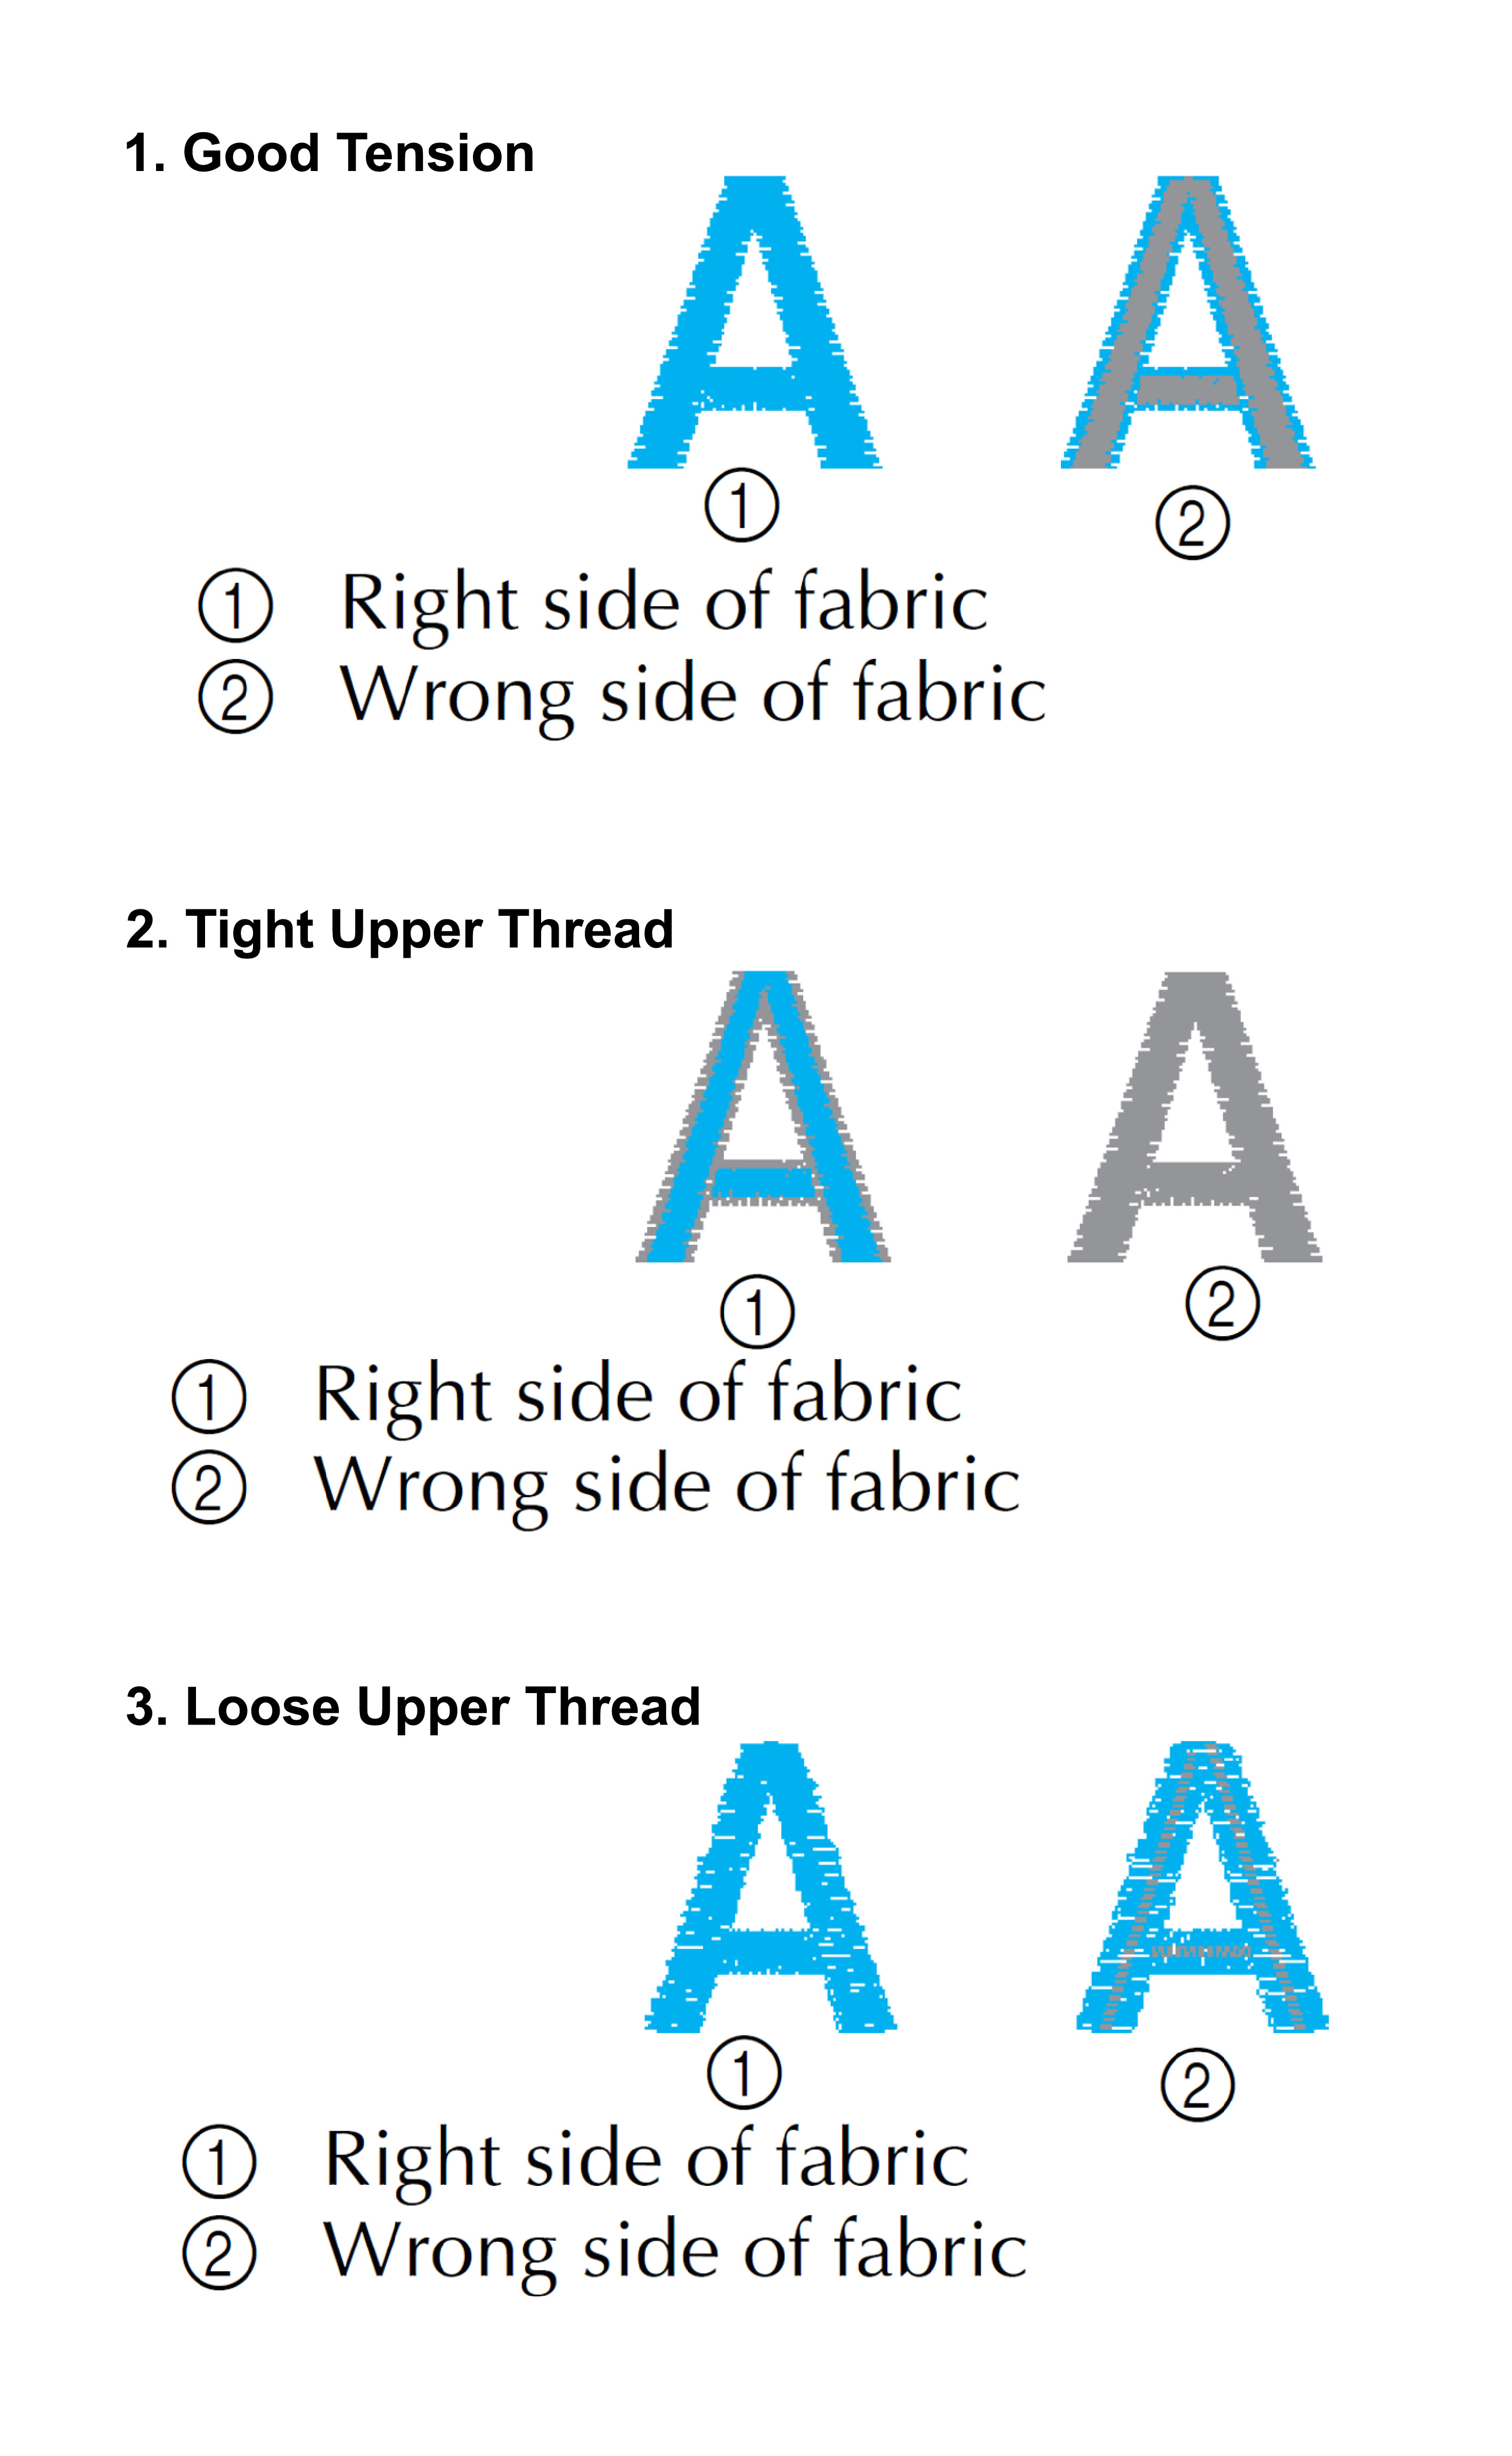
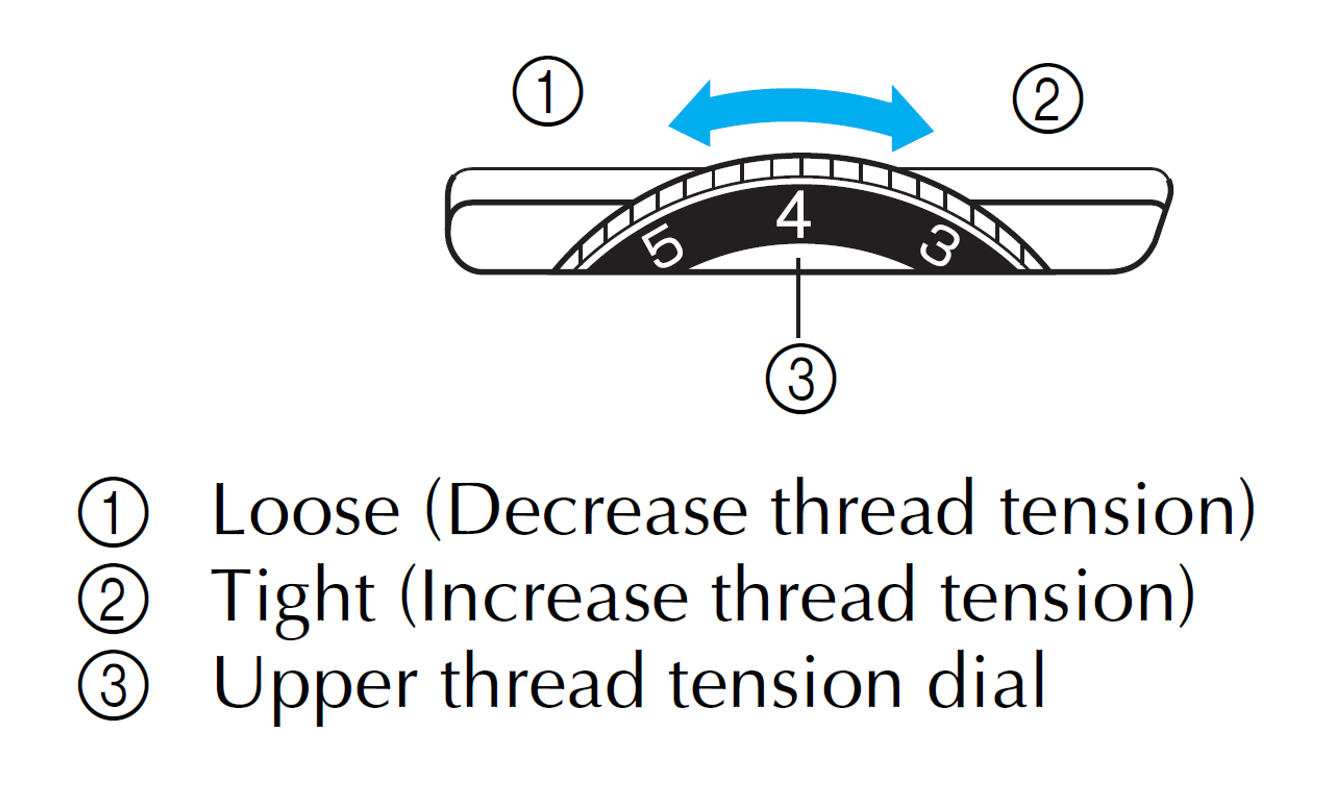
Adjust the tension as required if the thread has snapped.
Repeat until the pattern is complete.