Course navigation
Laser Cutting Settings
Learn to select the appropriate settings for your material and design.
Step 1
Select the artwork you wish to cut then go to File>Print.
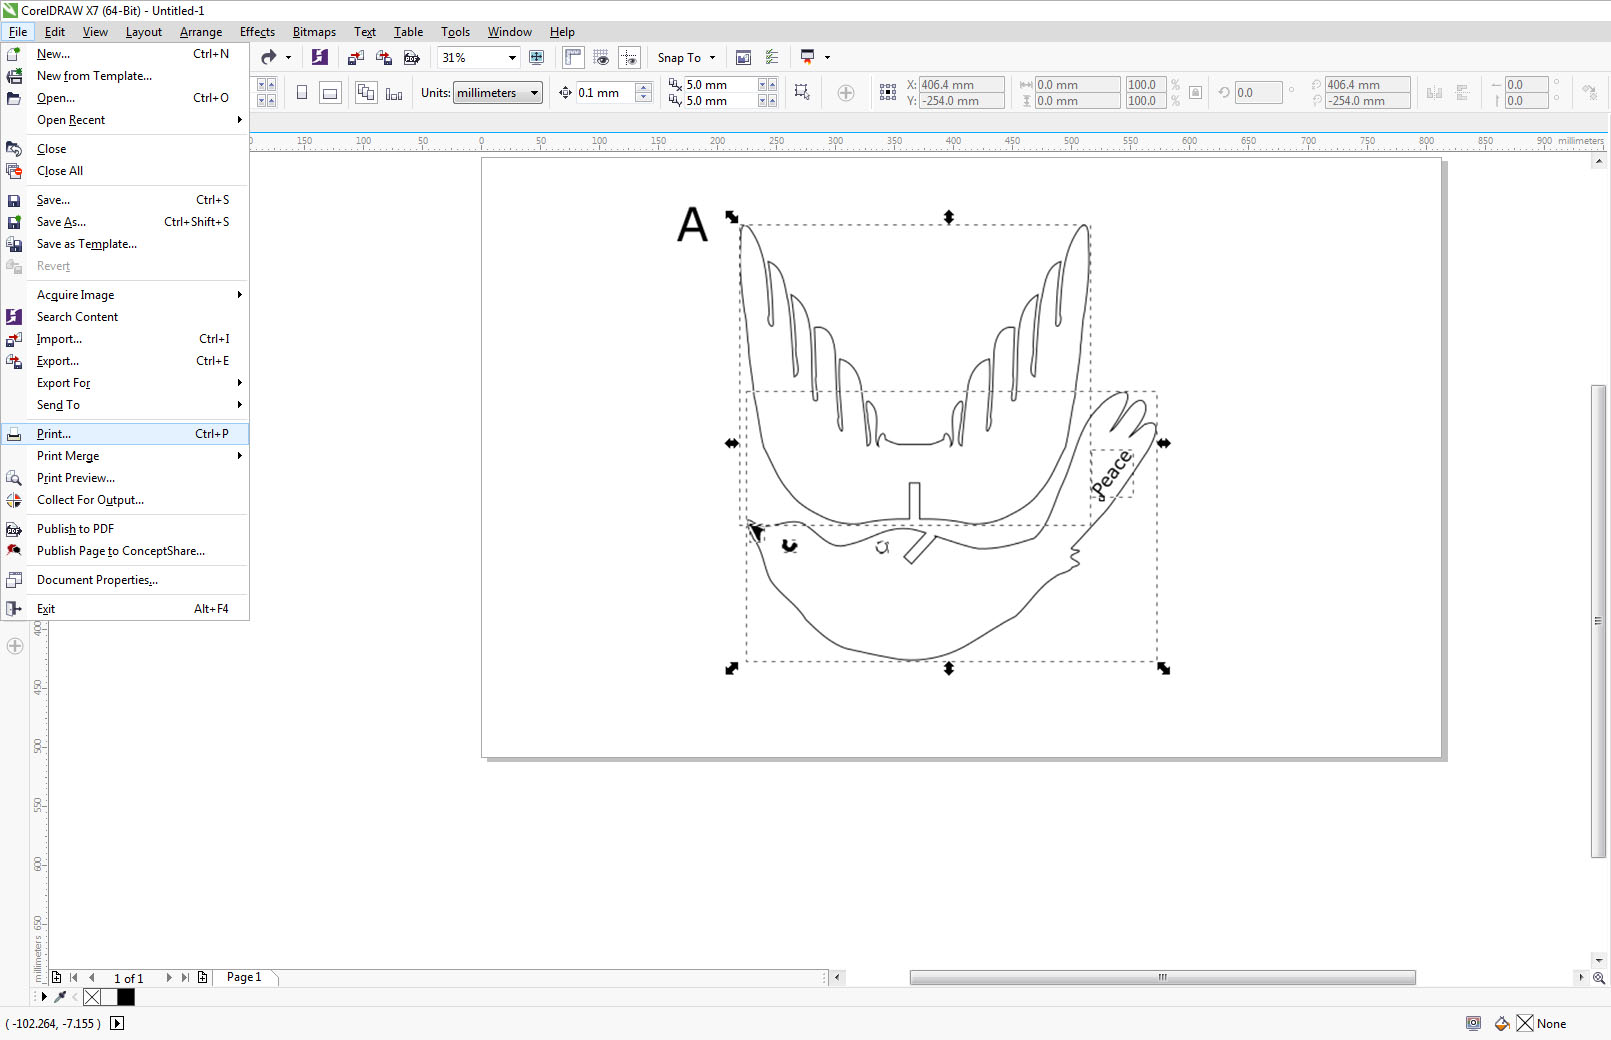
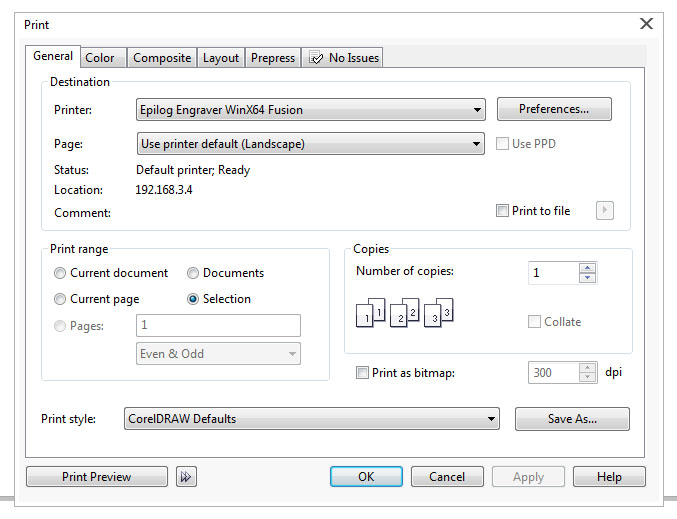
When the printer dialogue box opens, make sure to set it to selection, so you only send what you’ve selected to cut.
Step 2
Select Preferences then go to the Advanced menu.
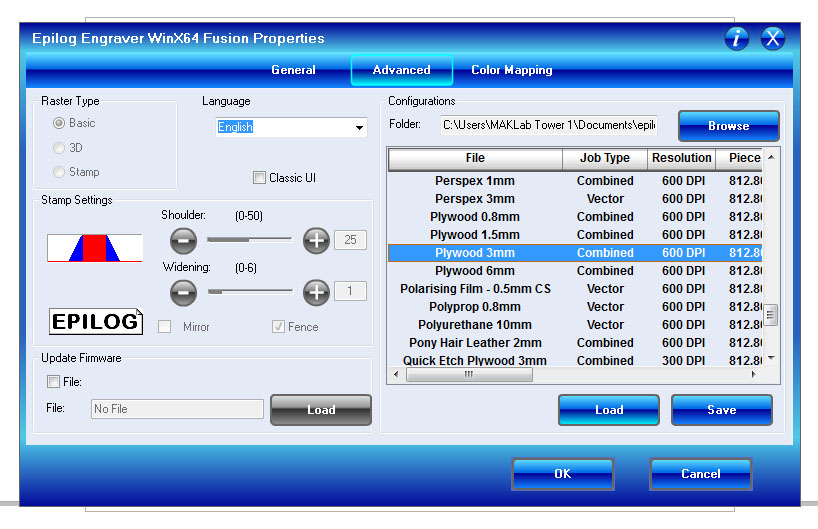
Select and load the material you wish to cut (for example Plywood 3mm).
Once your material is loaded, go to the General menu and set it to either Vector (if only cutting vector lines), Raster (if only etching raster fills) or Combined (if doing both).
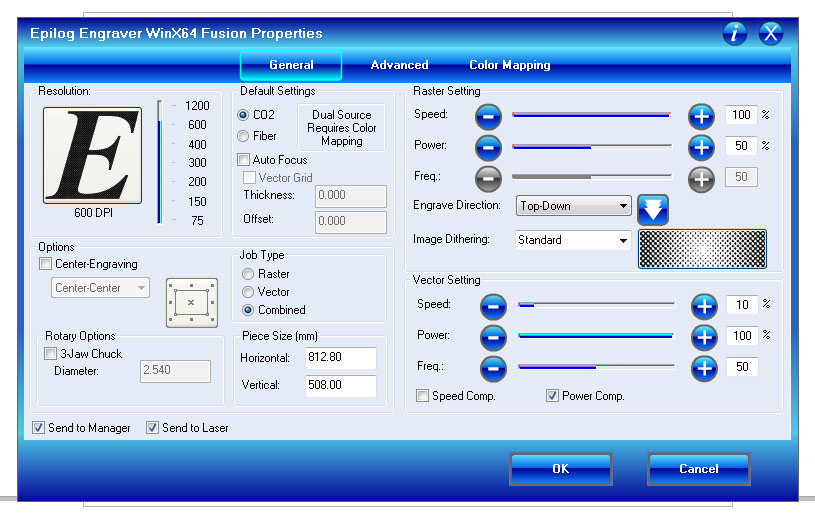
Select OK to bring yourself back to the main Print dialogue box.
Step 3
Go to Layout and select Reposition Images to: Top Left Corner.
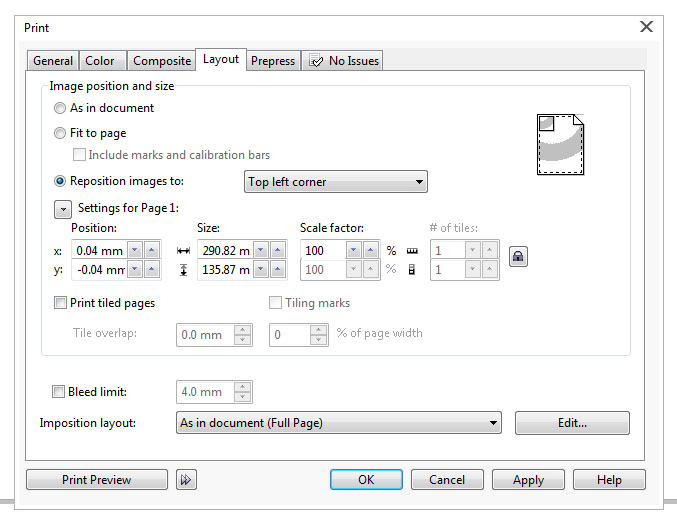
This allows you to set your homing position in relation to the bed of the laser.
Select Apply then OK to send the job through to the laser cutter.