Course navigation
Familiarise Yourself with the Inkscape Tools
Have a go at creating a basic design using the range of tools provided with the Inkscape design software.
Step 1
On your desktop, select the icon for the Inkscape software and open a new document.
You can now start familiarising yourself with the range of tools available for vector design.
Practise drawing a square, an ellipse, a polygon and/or a star using the relevant tools.
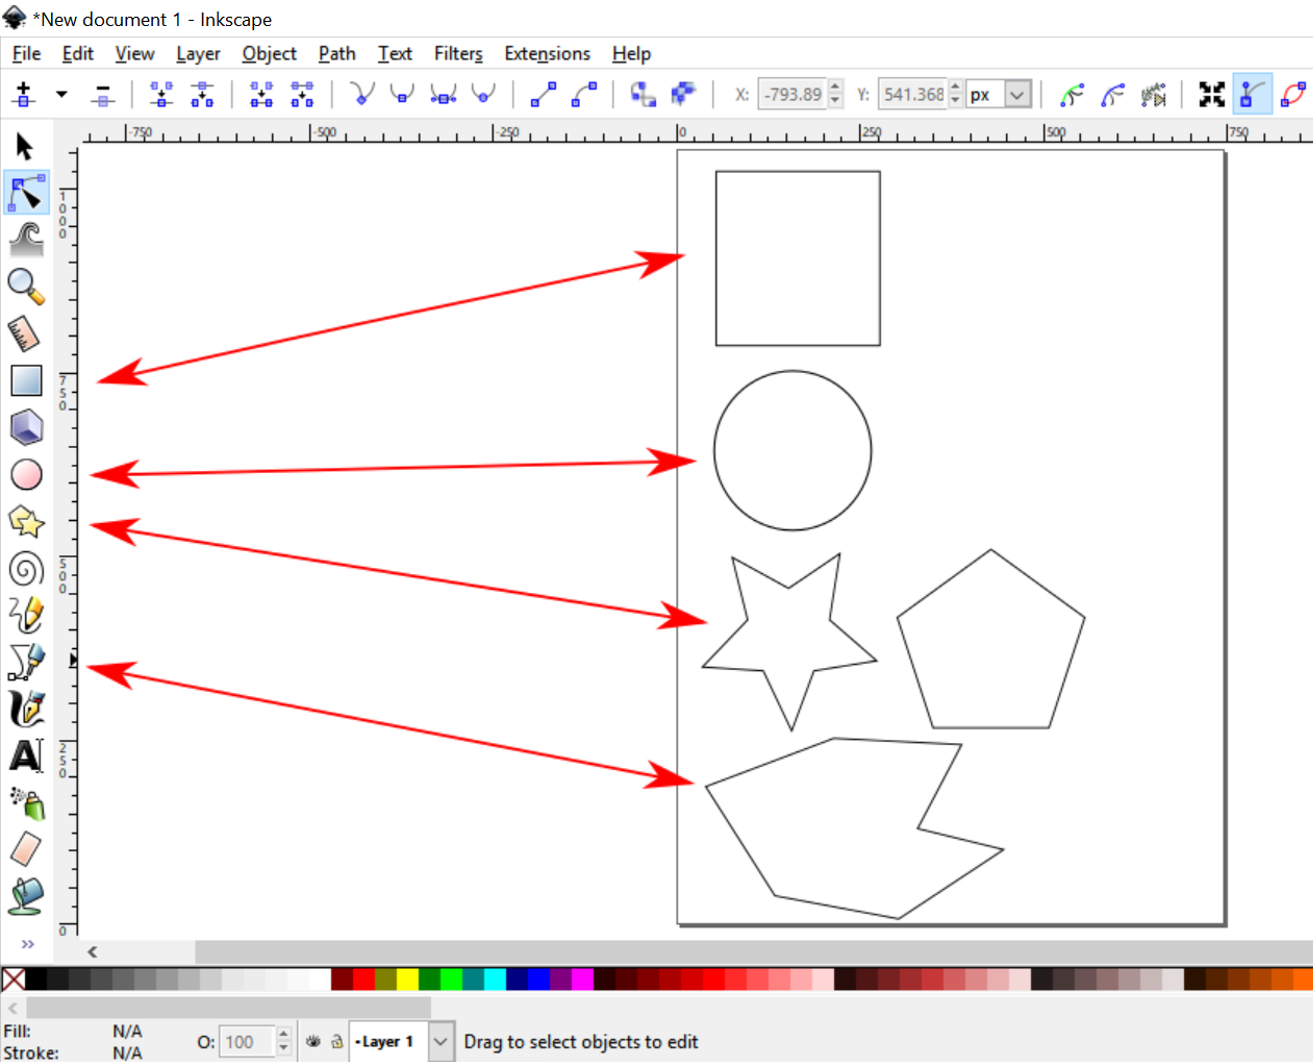
Use the Pen Tool to draw a free form shape, making sure to finish at the same anchor point as where you started to create a closed shape.
Step 2
Practise making a perfect circle or a perfect square by setting its width and height.
Check that your measurement units are set to millimetres (mm).
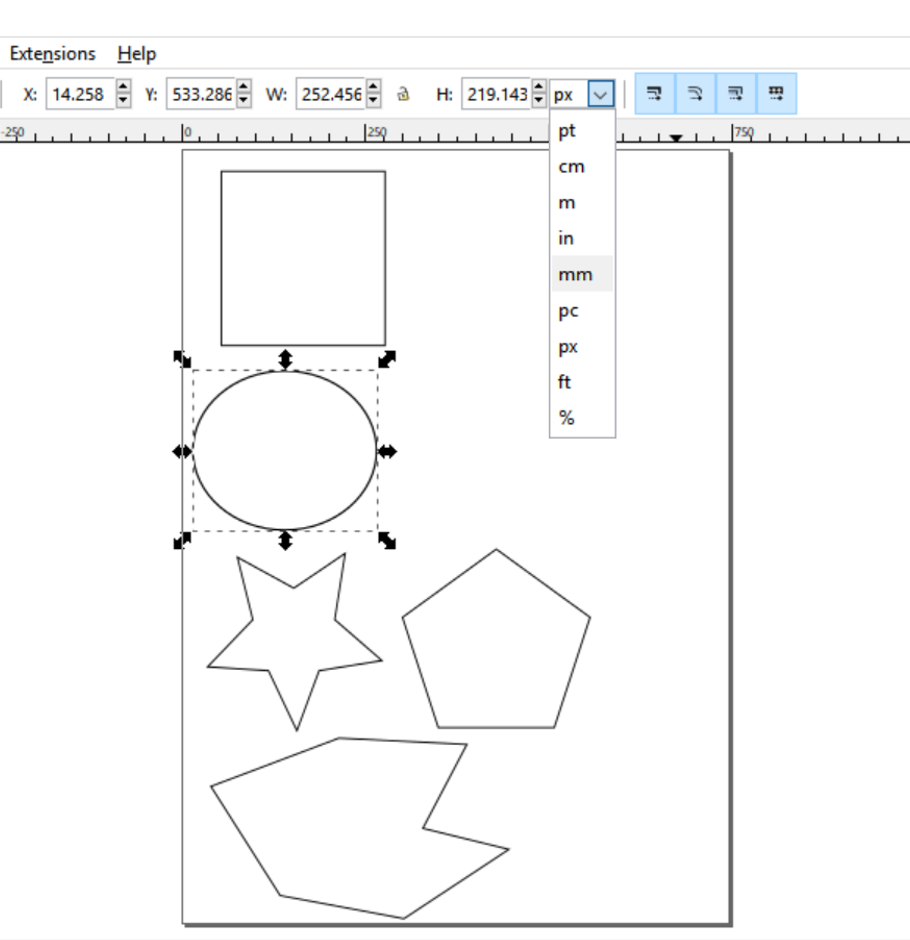
Make sure you unlock the ratio lock to allow you to change both width and height independently from each other.
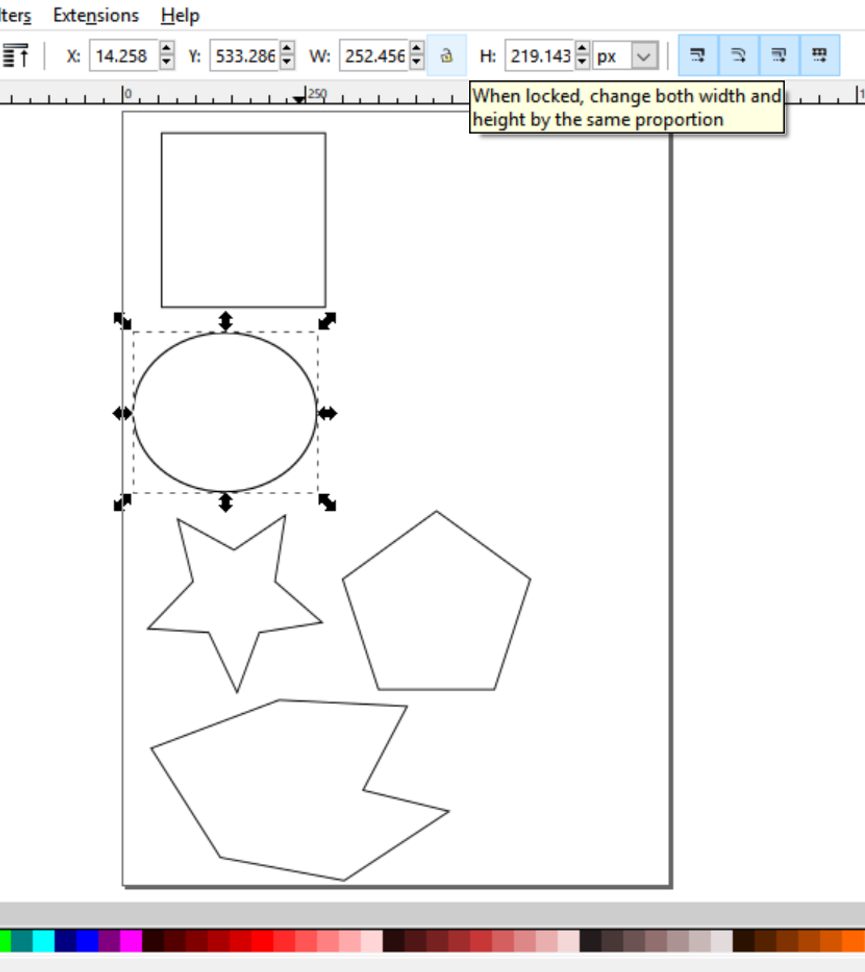
Set the height to 50mm and the width to 50mm, and lock the ratio lock again to keep those proportions in future.
Step 3
We will now introduce you to Inkscape’s Path tools, which will allow you to create complex shapes by adding or subtracting the basic shapes you practised using in step 1.
Create a Pacman profile by drawing a circle followed by a triangle. Select both together using the Shift key and the command Path>Difference.
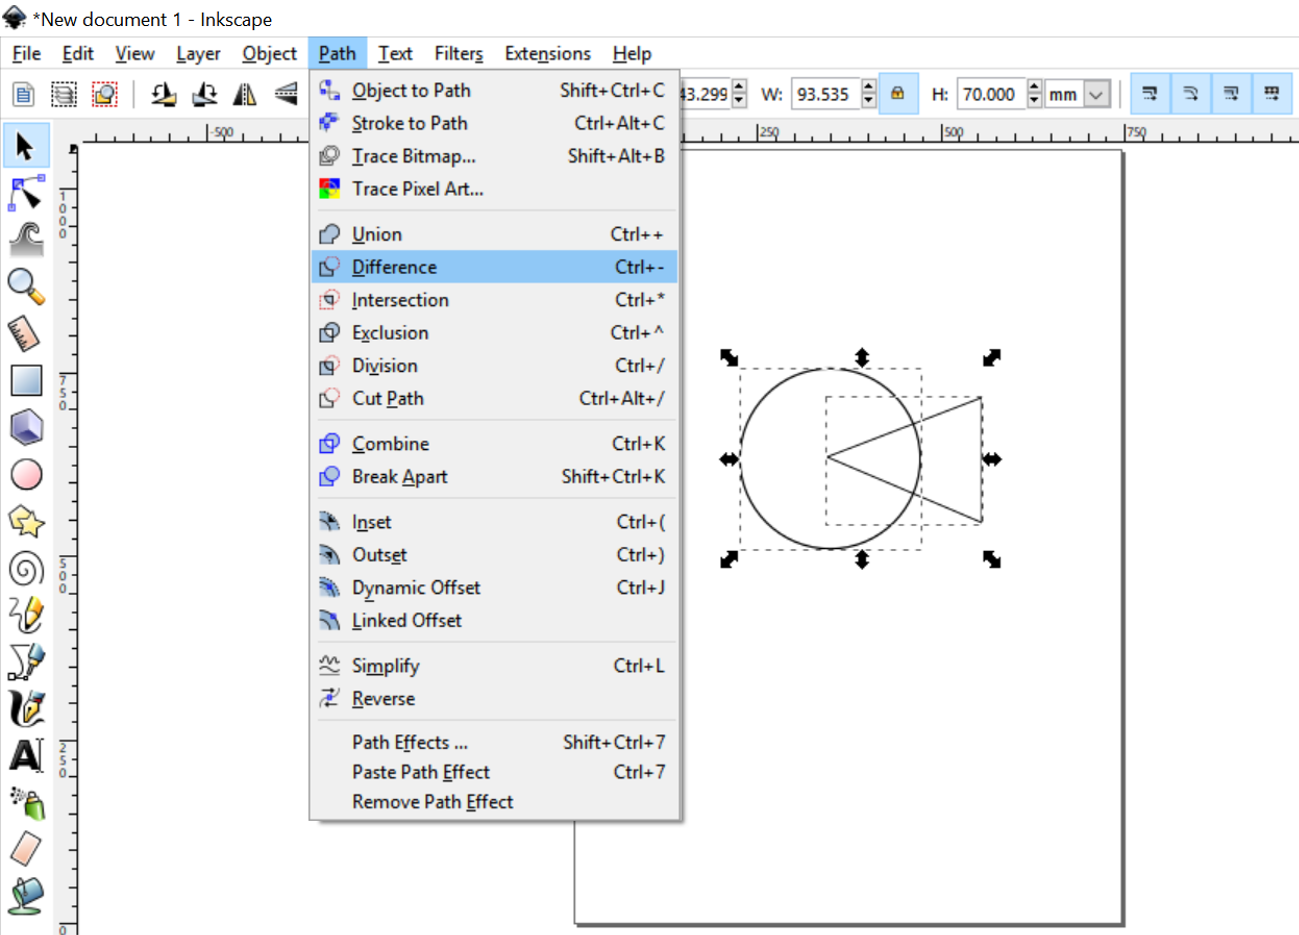
Create a heart by adding together two circles and one triangle. Select all three components using the Shift key and the command Path>Union.
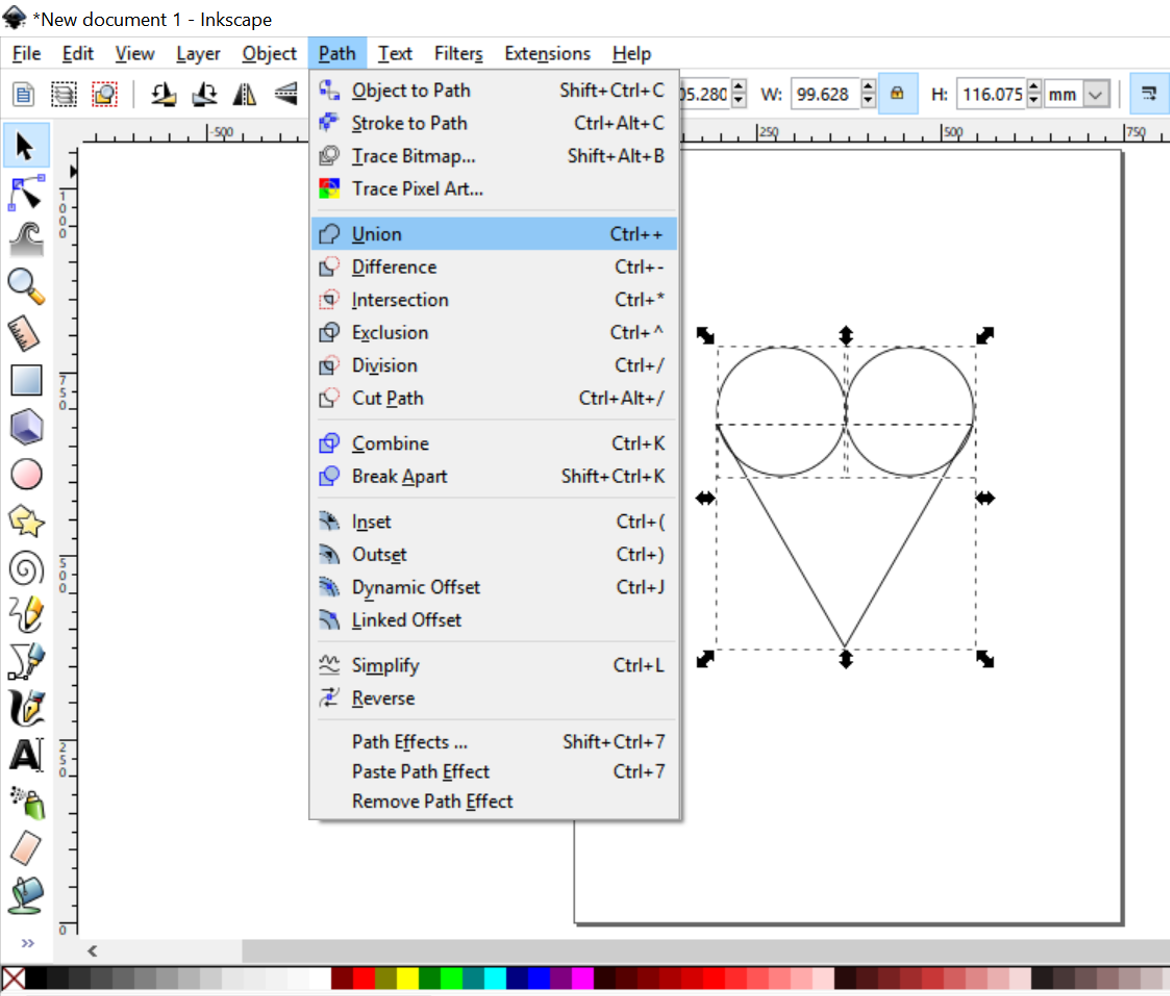
Step 4
To make the heart more smooth and uniform, select the Edit Paths by Nodes tool from the left-hand menu.
This will reveal a new range of tools along the top menu bar and you can use the Delete Selected Nodes tool to reduce the number of nodes for a smoother finish.
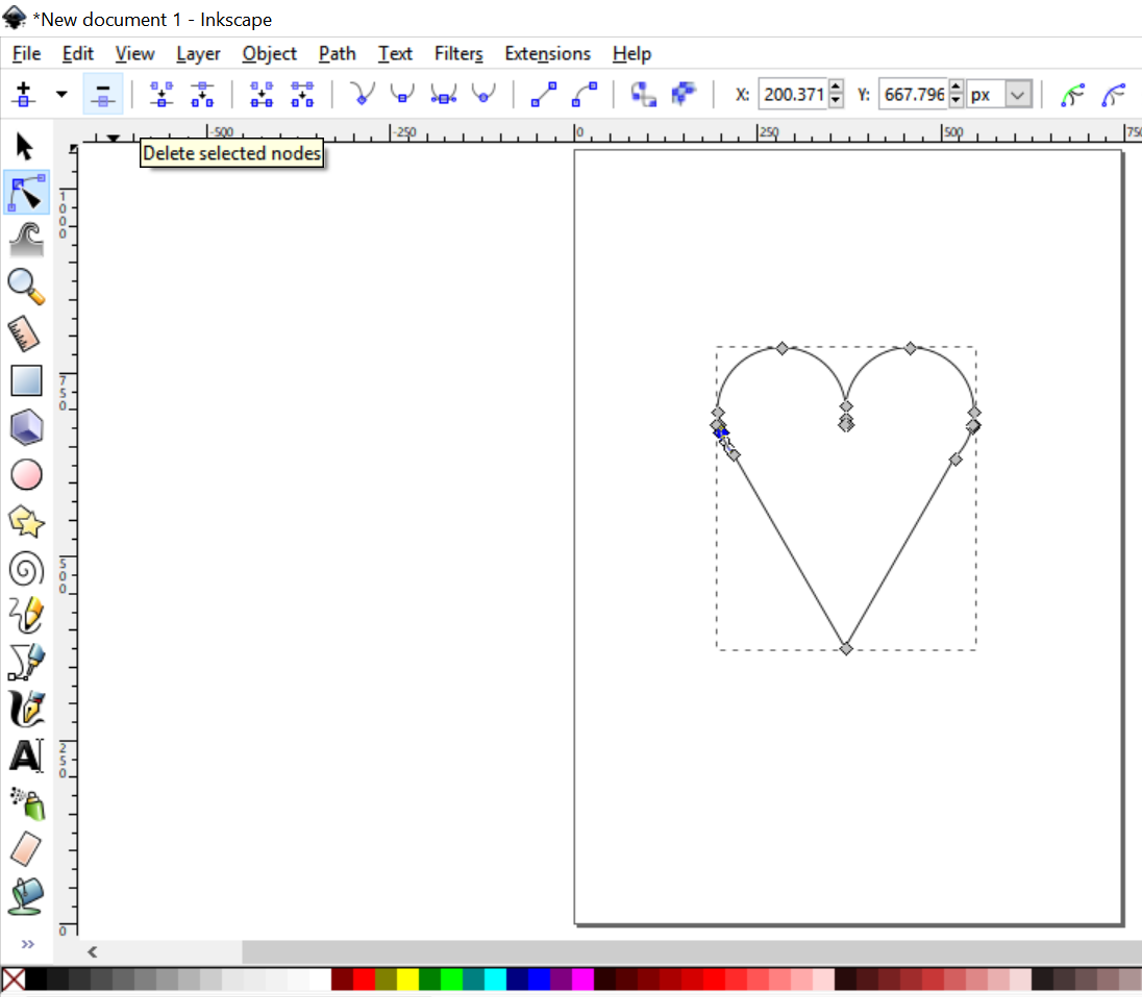
Once you have deleted all unnecessary nodes, you can create curves by selecting nodes and altering the position of their handles.
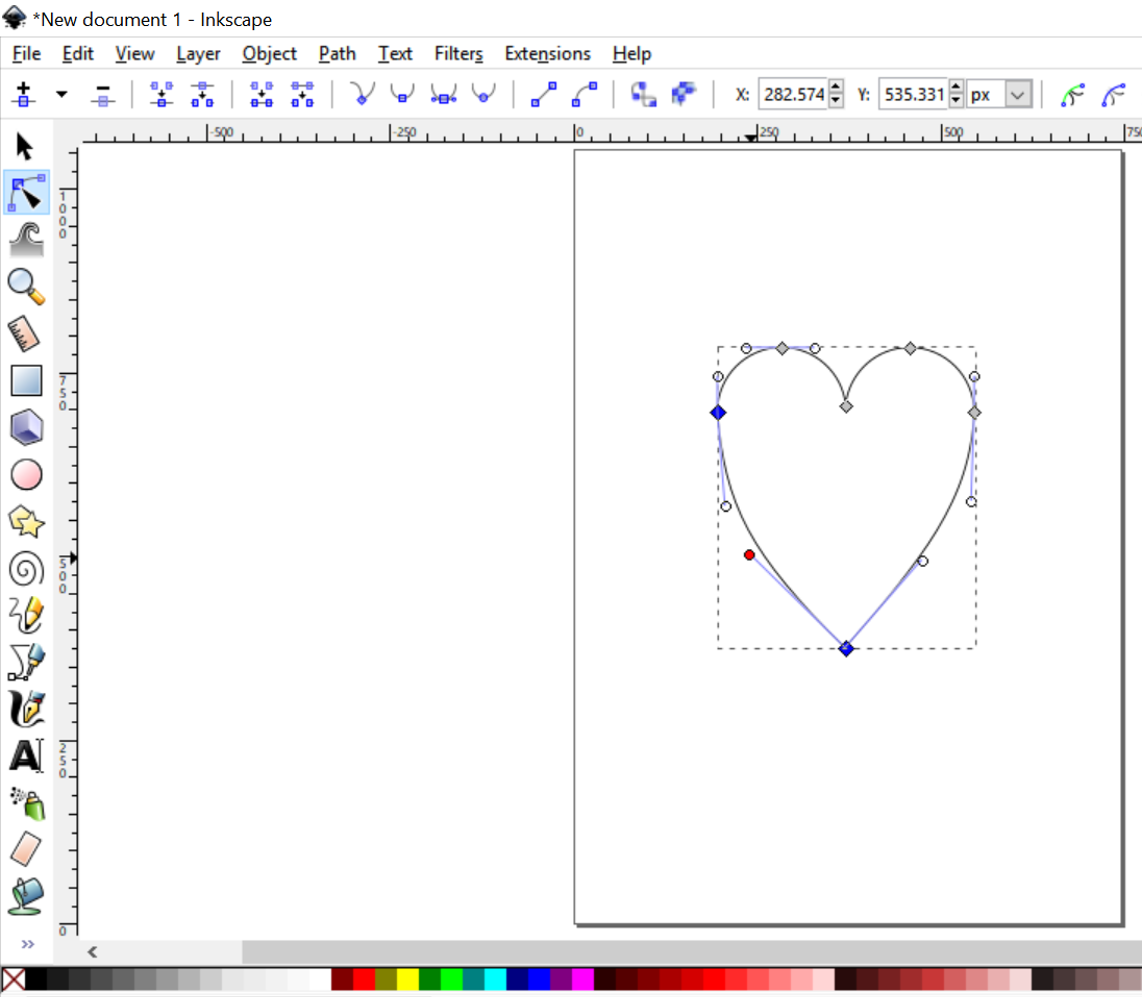
Step 5
Using all the tools you’ve been practising with above, have a go at creating your own ornament design.